This article delves into the common reasons behind vape leaks and offers practical solutions to help users address these issues effectively. By understanding the root causes, you can ensure a better vaping experience and avoid the frustration that comes with leaks.
What Causes Vape Leaks?
Understanding the reasons behind vape leaks is essential for effective troubleshooting. Common factors contributing to this issue include:
- Device Design: Some vape devices are more prone to leaks due to their design and build quality.
- User Handling: Improper handling, such as dropping the device or not securing the tank, can lead to leaks.
- E-Liquid Properties: The viscosity and composition of e-liquids can affect how they interact with the device.
How to Identify a Vape Leak?
Recognizing the signs of a leak is critical for timely intervention. Look out for:
- E-Liquid Pooling: Noticeable pooling of e-liquid around the device.
- Decreased Vapor Production: A sudden drop in vapor output may indicate a leak.
- Unusual Tastes: A burnt or off taste while vaping can signal a problem.
Are Your O-Rings Damaged?
O-rings are crucial for sealing your vape device. Inspecting and replacing damaged O-rings can significantly reduce the risk of leaks. What Are O-Rings? They are rubber seals that prevent e-liquid from escaping. Regular checks can help maintain a leak-free device.
How to Replace O-Rings?
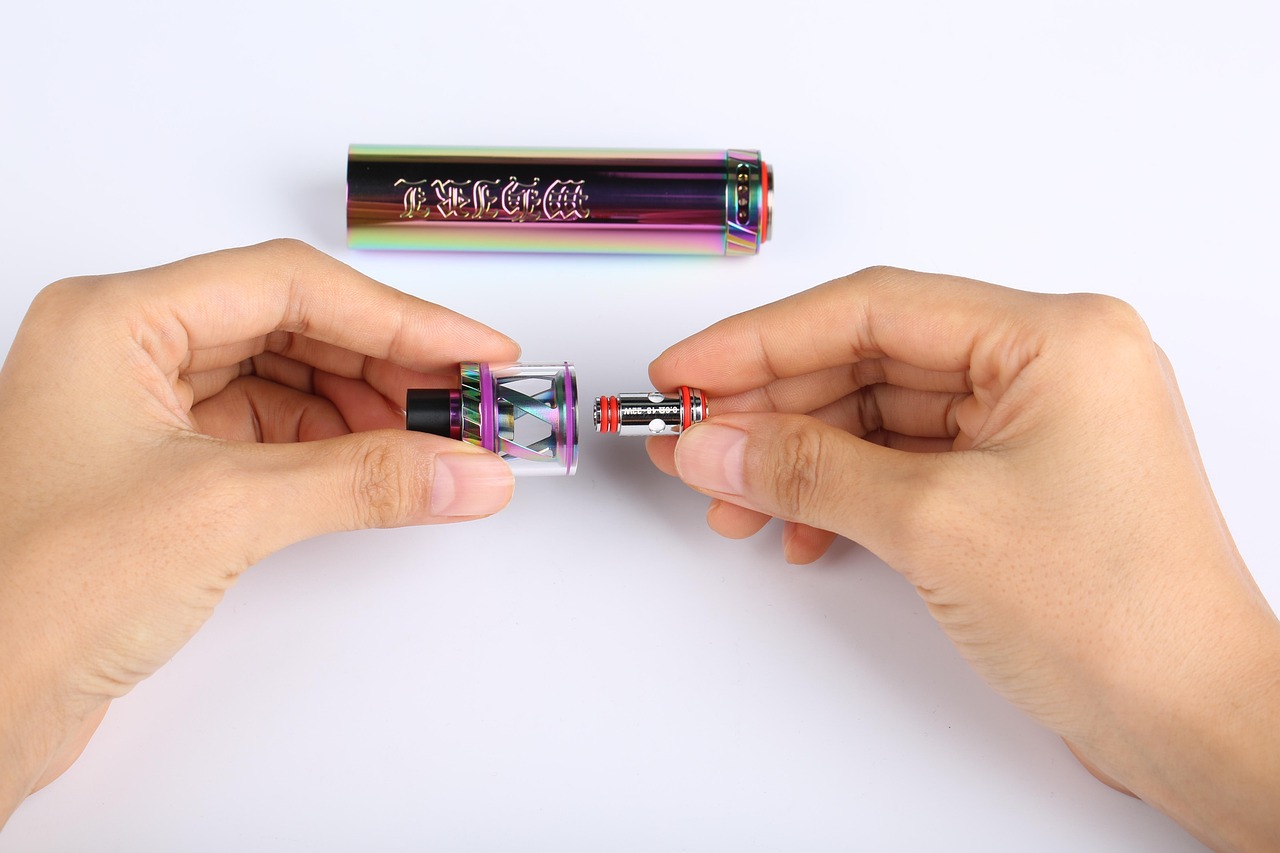
Replacing O-rings is simple. Disassemble your device, remove the old O-rings, and install new ones to ensure a proper seal.
Is Your Tank Overfilled?
Overfilling your tank can lead to leaks. Knowing the ideal fill level is essential. Most tanks have a maximum fill line to prevent overfilling. Proper filling techniques involve:
- Tilting the tank while filling.
- Avoiding air bubbles to maintain consistent e-liquid flow.
Are You Using the Right E-Liquid?
The viscosity of e-liquids can impact how they flow within your device. Understanding viscosity can help you choose the right e-liquid for your setup. Consider the PG/VG ratio and flavor profile when selecting e-liquids, as they can affect both performance and leak prevention.
Is Your Device Faulty?
Sometimes, a faulty device may be the source of leaks. Inspect your device for visible damage, such as cracks or loose components. Knowing when to replace your device is crucial for maintaining a satisfying vaping experience. Signs of irreparable damage or persistent leaks may indicate it’s time for a new device.
How to Maintain Your Vape Device?
Regular maintenance is key to preventing leaks. Implementing a routine cleaning and inspection schedule can extend the life of your device. Follow these maintenance steps:
- Clean the tank regularly.
- Check O-rings for wear and tear.
- Ensure all connections are secure.
Cleaning your vape device regularly, ideally after every few refills, can help prevent buildup and leaks, ensuring a smooth and enjoyable vaping experience.

What Causes Vape Leaks?
Understanding the complexities of vape leaks is essential for any vaping enthusiast. Vape leaks can be a source of frustration, but by identifying the underlying causes, users can effectively troubleshoot and enhance their vaping experience. In this section, we will explore the various factors that contribute to vape leaks, ensuring you have the knowledge to prevent and address these issues.
One of the primary reasons for vape leaks is device design flaws. Poorly designed tanks or atomizers may not create a proper seal, allowing e-liquid to escape. For instance, if the connection between the tank and the base is not snug, it can lead to leaks. Additionally, devices with intricate airflow systems may also be prone to leaking if not designed with precision.
User handling plays a crucial role in the performance of a vape device. Mishandling, such as dropping the device or improperly assembling components, can lead to leaks. Regular maintenance is equally important; neglecting to clean the tank or replace worn-out O-rings can compromise the device’s integrity and lead to leaks. Always ensure that your device is assembled correctly and check for any signs of wear.
The viscosity of the e-liquid used can significantly impact the likelihood of leaks. Thinner liquids tend to flow more easily and can seep out of small openings or cracks. Conversely, thicker e-liquids may not flow as freely, reducing the risk of leaks. Understanding the PG/VG ratio in your e-liquid can help you choose the right viscosity for your device, minimizing the chances of leakage.
Temperature fluctuations can also affect your vape device. When exposed to heat, e-liquids can expand, increasing pressure within the tank. This pressure can force e-liquid out through seals and joints, leading to leaks. Conversely, cold temperatures can cause the liquid to contract, which may create a vacuum effect, drawing e-liquid into areas where it shouldn’t be. Always store your vape device in a stable environment to mitigate these effects.
Overfilling your tank is a common mistake that can easily lead to leaks. It’s essential to adhere to the maximum fill line indicated on your tank. When filling, tilt the tank slightly to create space for air, which helps prevent bubbles that can cause overflow. Learning the correct filling techniques can greatly enhance your vaping experience while reducing the risk of leaks.
Sometimes, the issue may stem from faulty components within the device. Manufacturing defects can lead to compromised seals or damaged parts. Regular inspections of your device for cracks, loose connections, or damaged O-rings are vital. If you notice any persistent leaks despite proper handling and maintenance, it may be time to consider replacing the affected components or the entire device.
By understanding the various causes of vape leaks, users can take proactive steps to prevent these frustrating occurrences. Whether it’s ensuring proper device assembly, selecting the right e-liquid, or maintaining regular upkeep, being informed is the first step toward a leak-free vaping experience. Remember, a well-maintained device not only enhances your enjoyment but also ensures safety during use.
How to Identify a Vape Leak?
Identifying a vape leak is crucial for maintaining your device and ensuring a satisfying vaping experience. A leak not only wastes e-liquid but can also lead to performance issues and unpleasant tastes. This section will delve into the signs that indicate a vape leak, helping you recognize potential problems before they escalate.
When it comes to spotting a vape leak, there are several common indicators you should be aware of:
- E-Liquid Pooling: One of the most noticeable signs of a leak is the presence of e-liquid pooling around the base of your device or tank. If you see liquid accumulating, it’s a clear sign that something is amiss.
- Decreased Vapor Production: If you notice a significant drop in vapor production, it could indicate that e-liquid is escaping from your tank rather than being vaporized. This can lead to a less satisfying vaping experience.
- Unusual Tastes: A change in flavor can be another indicator of a leak. If you begin to taste burnt or unusual flavors, it may be due to e-liquid leaking onto the coil or wicking material.
- Frequent Refills: If you find yourself needing to refill your tank more often than usual, it could be a sign that e-liquid is leaking out instead of being consumed during vaping.
Recognizing the signs of a vape leak early can prevent further complications. Addressing leaks promptly can save you money on e-liquid and protect your device from potential damage. Moreover, it ensures that you continue to enjoy a satisfying vaping experience without the hassle of constant maintenance.
If you suspect that your vape is leaking, the first step is to conduct a thorough inspection:
- Check the Tank: Look for cracks or damage in the tank that might allow e-liquid to escape.
- Inspect O-Rings: Damaged or worn O-rings can lead to leaks. Ensure they are intact and properly seated.
- Examine the Coil: A poorly installed or damaged coil can also cause leaks. Make sure it’s securely fitted and in good condition.
To prevent future leaks, consider the following tips:
- Avoid Overfilling: Always adhere to the maximum fill line of your tank to prevent overflow.
- Use the Right E-Liquid: Ensure that the viscosity of your e-liquid is compatible with your device to avoid leaks.
- Regular Maintenance: Implement a routine cleaning schedule to keep your device in optimal condition.
By staying vigilant and addressing any signs of a leak promptly, you can ensure a better vaping experience and prolong the life of your device. Remember, a little attention can go a long way in maintaining your vape.

Are Your O-Rings Damaged?
When it comes to maintaining your vape device, one of the most critical components to consider is the O-ring. These small but essential rubber seals play a vital role in ensuring that your vape does not leak. Understanding the importance of O-rings, as well as how to inspect and replace them, can significantly enhance your vaping experience.
O-rings serve as the primary barrier between the e-liquid in your tank and the external environment. They are designed to create a tight seal, preventing any e-liquid from escaping. If your O-rings are damaged or worn out, the likelihood of leaks increases dramatically. This can lead to a messy situation and a decrease in the overall performance of your device.
- Visual Inspection: Regularly check your O-rings for any signs of wear, such as cracks, tears, or deformation.
- Feel for Damage: Run your fingers along the O-ring to feel for any irregularities that could indicate damage.
- Check for Leaks: If you notice any e-liquid pooling around your device, it may be a sign that your O-rings are not sealing properly.
Replacing O-rings is a straightforward process that can be done at home with minimal tools. Here’s a step-by-step guide:
- Disassemble the Device: Carefully take apart your vape device, ensuring you keep track of all components.
- Remove Old O-Rings: Gently pry off the damaged O-rings using a small tool or your fingers.
- Clean the Area: Before installing new O-rings, clean the groove where the O-ring sits to remove any residue.
- Install New O-Rings: Place the new O-rings into the designated grooves, ensuring they fit snugly.
- Reassemble the Device: Put your vape device back together and make sure all parts are secure.
When replacing O-rings, it’s essential to choose the right type. Most vape devices use silicone or rubber O-rings. Silicone O-rings are preferred for their durability and resistance to heat, making them ideal for high-temperature environments.
It’s advisable to replace your O-rings every few months or sooner if you notice any signs of wear. Regular maintenance will help ensure that your device remains leak-free and performs optimally.
- Visible Damage: Any cracks or tears in the O-rings indicate that they need to be replaced.
- Frequent Leaks: If you find yourself constantly dealing with leaks, it’s a strong sign your O-rings may be compromised.
- Decreased Performance: A drop in vapor production can also signal that your O-rings are not sealing properly.
In summary, keeping an eye on your O-rings and replacing them when necessary is crucial for maintaining a leak-free vaping experience. By understanding their importance and following the steps for inspection and replacement, you can significantly enhance the performance of your device and enjoy a more satisfying vape.
What Are O-Rings?
O-rings are essential components in the world of vaping, serving as rubber seals that play a critical role in preventing e-liquid from escaping the vape tank. These small yet mighty rings are often overlooked, but their function is vital for a seamless vaping experience. In this section, we will explore the importance of O-rings, how they work, and why maintaining them is crucial for keeping your device leak-free.
O-rings are designed to create a tight seal between various parts of your vape device, such as the tank and the base. This preventative measure ensures that e-liquid remains contained within the tank, reducing the risk of leaks that can lead to messy situations and wasted liquid. The integrity of these seals is paramount; even a small crack or deformation can result in significant leakage.
There are various types of O-rings used in vaping devices, typically made from materials like silicone or nitrile rubber. These materials are chosen for their durability and resistance to the corrosive properties of e-liquids. Understanding the type of O-ring in your device can help you select the right replacements when necessary.
- Visual Inspection: Look for any signs of wear, such as cracks, tears, or discoloration.
- Feel for Deformation: Gently press the O-ring to check if it maintains its shape. A misshapen O-ring may not seal properly.
- Check for Leaks: If you notice e-liquid pooling around the base of your tank, it may be time to inspect the O-rings.
Replacing O-rings is a straightforward process that can greatly enhance the performance of your vaping device. Here’s how to do it:
- Disassemble Your Device: Carefully take apart your vape device, ensuring you keep track of all components.
- Remove the Old O-Rings: Use a small tool or your fingers to gently pry the old O-rings from their grooves.
- Install New O-Rings: Place the new O-rings in their respective grooves, ensuring they fit snugly.
- Reassemble Your Device: Put your device back together, making sure all parts are securely connected.
To ensure your O-rings last as long as possible, consider the following maintenance tips:
- Regular Cleaning: Clean the O-rings during routine maintenance to remove any buildup of e-liquid or residue.
- Proper Storage: Store your vape device in a cool, dry place to prevent O-ring deterioration.
- Use Compatible E-Liquids: Some e-liquids can degrade O-ring materials. Always choose high-quality liquids that are compatible with your device.
Regularly inspecting and maintaining your O-rings is crucial for ensuring a leak-free experience. Neglecting these small components can lead to larger issues, including device malfunction and wasted e-liquid. By understanding the importance of O-rings and taking proactive steps to care for them, you can significantly enhance your overall vaping experience.
How to Replace O-Rings?
Replacing O-rings is an essential maintenance task for any vape user, as it directly impacts the performance and longevity of your device. A proper seal is crucial to prevent leaks, which can lead to a messy and unsatisfactory vaping experience. This process is relatively simple and can be done with minimal tools. Below is a step-by-step guide to help you through the O-ring replacement process.
- Gather Your Tools: Before starting, make sure you have the necessary tools. You will typically need a small screwdriver, tweezers, and, of course, the replacement O-rings. Ensure that the new O-rings are compatible with your specific vape model.
- Disassemble Your Device: Begin by carefully disassembling your vape device. This usually involves unscrewing the tank from the battery and removing any other components that may be in the way. Always refer to your user manual for specific disassembly instructions.
- Remove the Old O-Rings: Once your device is disassembled, locate the old O-rings. Use tweezers to gently pry them out of their grooves. Be cautious not to damage the surrounding components during this process.
- Inspect the Area: Before installing new O-rings, take a moment to inspect the area for any debris or damage. Clean the grooves where the O-rings sit to ensure a snug fit. This step is vital, as any dirt can compromise the seal.
- Install the New O-Rings: Carefully place the new O-rings into their respective grooves. Make sure they are seated evenly all around. A misaligned O-ring can lead to leaks, so take your time during this step.
- Reassemble Your Device: Once the new O-rings are in place, reassemble your vape device carefully. Ensure that all components fit snugly together and that there are no loose parts.
- Test for Leaks: After reassembly, it’s crucial to test your device for leaks. Fill the tank with e-liquid and let it sit for a few minutes. Check for any signs of leakage around the O-rings and other connection points.
By following these straightforward steps, you can effectively replace the O-rings in your vape device, ensuring a proper seal and enhancing your overall vaping experience. Regular maintenance, including O-ring replacement, can greatly reduce the risk of leaks and improve the performance of your device.
Remember, keeping your vape in good condition not only enhances your experience but also prolongs the life of your device. Always keep a set of replacement O-rings on hand for quick fixes when needed.
Is Your Tank Overfilled?
When it comes to vaping, one of the most frequent issues that users encounter is tank overfilling. This seemingly minor mistake can lead to significant problems, including leaks and a less enjoyable vaping experience. Understanding the nuances of filling your vape tank properly is essential for maintaining optimal performance and avoiding unnecessary messes.
Overfilling your vape tank can create a variety of complications. When the tank is filled beyond its capacity, the excess e-liquid has nowhere to go, which can lead to leaks. These leaks can not only waste your e-liquid but can also cause damage to your device and create sticky situations that are difficult to clean.
When you overfill, the pressure inside the tank increases, which can cause the e-liquid to escape through any available openings. This can result in:
- Pooling of e-liquid: You may notice e-liquid pooling around the base of your device, which is a clear indication of overfilling.
- Decreased vapor production: An overfilled tank may disrupt the wicking process, leading to less vapor when you inhale.
- Unpleasant tastes: If e-liquid leaks into the airflow channels, it can produce a burnt taste when vaping.
To avoid overfilling, it’s crucial to understand the ideal fill level for your specific tank. Most vape tanks come with a maximum fill line marked on the glass or plastic. This line indicates how much e-liquid you can safely add without risking leaks.
Implementing proper filling techniques can significantly reduce the risk of overfilling. Here are some steps to follow:
- Turn off your device: Always make sure your vape is turned off before filling.
- Angle the tank: Tilt the tank slightly while filling to prevent air bubbles from forming.
- Fill slowly: Pour the e-liquid gently, allowing it to flow down the side of the tank. Stop filling when you reach the maximum line.
- Check for air bubbles: After filling, check for air bubbles that may indicate a full tank. If bubbles form, you may need to adjust the liquid level.
The viscosity of your e-liquid also plays a significant role in how well it interacts with your tank. Thicker e-liquids may be more prone to causing leaks if the tank is overfilled. Always choose an e-liquid that is compatible with your device’s specifications.
If you find that your vape tank is leaking, take the following steps:
- Inspect your tank: Look for signs of damage or wear, particularly around the O-rings.
- Check your fill level: Ensure that you are not exceeding the maximum fill line.
- Clean your device: Regularly cleaning your vape can prevent buildup and leaks.
By following these guidelines and understanding the importance of proper filling techniques, you can significantly enhance your vaping experience and minimize the risk of leaks. Remember, a well-maintained vape device not only performs better but also provides a more enjoyable and satisfying experience.
What is the Ideal Fill Level?
When it comes to vaping, understanding the ideal fill level for your tank is crucial. Many users overlook this aspect, but it plays a significant role in preventing leaks and ensuring that your device operates at its best. Most vape tanks come with a maximum fill line, which serves as a guideline to prevent overfilling. Ignoring this line can lead to various issues, including leaks and suboptimal performance.
The fill level of your vape tank directly affects how the device functions. When the tank is filled beyond the maximum line, excess e-liquid can escape through the airflow holes or other openings, leading to leaks. This not only wastes e-liquid but can also create a mess and diminish your overall vaping experience.
- Leakage: Overfilling can cause e-liquid to leak out of the tank, resulting in a sticky situation.
- Dry Hits: When the wick is unable to absorb enough e-liquid due to overfilling, it can lead to dry hits, which are unpleasant and harsh on the throat.
- Reduced Flavor: Too much e-liquid can dilute the flavor, making your vaping experience less enjoyable.
To find the ideal fill level for your tank, always refer to the manufacturer’s guidelines. Typically, the maximum fill line is marked on the tank itself. It’s essential to stop filling just below this line to allow for any expansion of the liquid and to prevent spillage.
Proper filling techniques can greatly enhance your vaping experience. Here are some tips:
- Tilt the Tank: When filling, tilt the tank at an angle. This helps to reduce the formation of air bubbles, allowing for a smoother fill.
- Use a Funnel: If you’re having trouble pouring e-liquid accurately, consider using a funnel designed for vape tanks.
- Check for Air Bubbles: After filling, inspect the tank for any trapped air bubbles. If you see any, gently tap the tank to release them.
If you notice that your tank is leaking, the first step is to check the fill level. If it’s above the maximum line, drain some liquid to the appropriate level. Additionally, inspect the O-rings and seals to ensure they are intact and functioning correctly.
Understanding the ideal fill level for your vape tank is essential for maintaining a leak-free experience. By adhering to the maximum fill line and employing proper filling techniques, you can enjoy a more satisfying vaping experience. Always remember to check the manufacturer’s instructions for specific guidance on your device.
How to Properly Fill a Vape Tank?
Filling a vape tank correctly is crucial for ensuring optimal performance and preventing leaks. Many users experience frustration due to improper filling techniques, which can lead to wasted e-liquid and a less enjoyable vaping experience. This guide will provide you with essential tips on how to properly fill a vape tank to maintain a smooth vaping experience.
Proper filling techniques are not just about avoiding mess; they play a significant role in the overall functionality of your vape device. When filling your tank, it’s essential to tilt the tank slightly to allow for a more controlled flow of e-liquid. This simple adjustment helps to minimize the formation of air bubbles, which can disrupt the flow of e-liquid and lead to potential leaks.
- Gather Your Supplies: Ensure you have your e-liquid and a clean workspace.
- Prepare Your Tank: Remove the tank from your device and ensure it’s clean and dry.
- Check the Fill Port: Identify the fill port, which is usually located at the top or side of the tank.
- Tilt the Tank: Hold the tank at a slight angle to create an easier path for the e-liquid.
- Pour Slowly: Carefully pour the e-liquid into the tank, avoiding the center tube to prevent flooding.
- Leave Space: Ensure you leave some space at the top of the tank to allow for air expansion and to prevent overfilling.
- Reassemble: Once filled, securely reattach the tank to your device.
Air bubbles can cause a range of problems, including gurgling sounds and a decrease in vapor production. When air pockets form in the tank, they can disrupt the flow of e-liquid to the coil, leading to dry hits and a burnt taste. By tilting the tank while filling, you can effectively reduce the chances of air bubbles forming, ensuring a smoother vaping experience.
Overfilling your vape tank can lead to leaks, as excess e-liquid can escape through the air holes or overflow from the fill port. To avoid this, always adhere to the recommended fill level indicated on your tank. This not only prevents leaks but also ensures that your device operates efficiently.
- Regularly Clean Your Tank: Clean your tank frequently to prevent residue buildup that can affect performance.
- Inspect O-Rings: Check the O-rings for wear and tear, as damaged seals can lead to leaks.
- Use Appropriate E-Liquids: Choose the right viscosity of e-liquid to ensure proper flow and prevent leaks.
In summary, mastering the art of filling your vape tank can significantly enhance your vaping experience. By following these straightforward techniques and tips, you can minimize the risk of leaks and enjoy a more satisfying vape. Remember, a well-maintained device is key to a consistent and enjoyable vaping journey.
Are You Using the Right E-Liquid?
When it comes to vaping, choosing the right e-liquid is crucial for achieving an optimal experience. The viscosity of e-liquids significantly influences how they interact with your device, and understanding this characteristic can help you avoid common issues such as leaks and poor performance. In this section, we will delve into the importance of selecting the right e-liquid and how viscosity plays a role in your vaping journey.
Viscosity refers to the thickness or consistency of a liquid. In the context of e-liquids, it is primarily determined by the ratio of propylene glycol (PG) to vegetable glycerin (VG). E-liquids with a higher VG content tend to be thicker, while those with more PG are generally thinner. Understanding viscosity is essential because it affects how well the e-liquid can flow through your device’s components, including the coil and wicking material.
- Flow Rate: Thicker e-liquids may flow more slowly, which can lead to dry hits if the coil doesn’t receive enough liquid. Conversely, thinner liquids may flood the coil, causing leaks.
- Flavor Delivery: The viscosity can impact flavor intensity. Higher VG e-liquids often provide a smoother hit, while PG-based liquids tend to deliver a more pronounced flavor.
- Device Compatibility: Certain devices are designed to work best with specific viscosity levels. Using an e-liquid that doesn’t match your device’s requirements can lead to performance issues.
Selecting the appropriate e-liquid involves considering several factors:
- PG/VG Ratio: For a smoother throat hit and enhanced flavor, consider a higher PG ratio. If you prefer large vapor clouds and a smoother inhale, opt for a higher VG ratio.
- Nicotine Level: Choose a nicotine strength that aligns with your previous smoking habits or personal preferences.
- Flavor Profile: Experiment with different flavors to find what suits your palate. Some users may prefer fruity or dessert flavors, while others might lean towards menthol or tobacco.
Absolutely! Using an e-liquid that is too thin or too thick for your device can lead to leaks. Thin liquids may seep through seals or O-rings, while thick liquids can clog the wicking material, leading to dry hits or flooding. Therefore, it is essential to match the viscosity of your e-liquid with the specifications of your vaping device.
- Test Different Viscosities: If you experience leaks, try switching to an e-liquid with a different PG/VG ratio to see if it resolves the issue.
- Regular Maintenance: Keep your device clean and regularly check O-rings and seals for damage.
- Fill Properly: Avoid overfilling your tank to prevent excess pressure, which can lead to leaks.
In summary, understanding the viscosity of e-liquids and how it interacts with your device is vital for a satisfying vaping experience. By selecting the right e-liquid and maintaining your device, you can significantly reduce the risk of leaks and enhance overall performance.
What is Viscosity in E-Liquids?
When it comes to vaping, understanding the different characteristics of e-liquids can greatly enhance your experience. One crucial aspect to consider is viscosity, which refers to the thickness or flow resistance of the liquid. This property can significantly influence how well your e-liquid performs in your vape device.
Viscosity plays a vital role in the performance of your vape. Liquids with higher viscosity tend to flow more slowly than those with lower viscosity. This can affect how quickly the e-liquid is drawn into the coil for vaporization. If the liquid is too thick, it may not wick properly, leading to dry hits or burnt coils. On the other hand, if the e-liquid is too thin, it can result in flooding, causing leaks and poor vapor production.
Every vape device has its own specifications regarding the type of e-liquid it can handle. Sub-ohm tanks, for instance, are designed for e-liquids with lower viscosity, typically having a higher VG (Vegetable Glycerin) content. These liquids are thicker and produce larger vapor clouds. Conversely, higher PG (Propylene Glycol) liquids are thinner and are better suited for mouth-to-lung devices. Understanding these differences can help you select the right e-liquid for your setup.
- PG/VG Ratio: The ratio of Propylene Glycol to Vegetable Glycerin in your e-liquid is the primary determinant of viscosity. Generally, a higher VG content results in a thicker liquid.
- Temperature: Temperature can also affect viscosity. Warmer liquids tend to flow more easily than cooler ones.
- Additives: Some flavorings and additives can alter the viscosity of e-liquids, making them thicker or thinner.
Choosing the right e-liquid involves considering your device’s specifications and your personal vaping style. If you’re using a sub-ohm tank, opt for e-liquids with a higher VG content for optimal performance. For mouth-to-lung devices, a balanced PG/VG ratio is often preferable. Additionally, always check the manufacturer’s recommendations for e-liquid viscosity.
While you cannot change the viscosity of an e-liquid directly, you can blend different e-liquids to achieve a desired viscosity. For instance, mixing a thicker VG-based liquid with a thinner PG-based liquid can help you find the right consistency for your device. However, it’s essential to ensure that the flavors and nicotine levels remain balanced.
Understanding viscosity is crucial for a satisfying vaping experience. By selecting the right e-liquid based on its thickness, you can prevent issues like leaking and poor vapor production. Always consider your device’s compatibility and your personal preferences when choosing e-liquids to ensure an enjoyable vape.
How to Choose the Right E-Liquid?
Choosing the right e-liquid is a crucial aspect of enhancing your vaping experience. With a plethora of options available, it’s essential to consider various factors that can influence both flavor and performance. This guide will delve into the important elements to keep in mind when selecting e-liquids, ensuring that you find the perfect match for your preferences.
The PG (Propylene Glycol) and VG (Vegetable Glycerin) ratio is one of the primary considerations when choosing e-liquids. PG is known for its throat hit and flavor-carrying properties, while VG is thicker and produces larger vapor clouds. Understanding the differences can help you tailor your vaping experience:
- High PG (70% PG / 30% VG): Ideal for those who prefer a stronger throat hit and more flavor intensity.
- High VG (70% VG / 30% PG): Perfect for cloud chasers looking for a smoother inhale and larger vapor production.
The flavor profile of an e-liquid can significantly affect your satisfaction. E-liquids come in a vast array of flavors, from fruity and sweet to savory and minty. Here are some tips to help you choose:
- Experiment: Try different flavors to discover what you enjoy most.
- Consider Your Preferences: If you enjoy sweet flavors, opt for dessert or candy-inspired e-liquids.
- Seasonal Choices: Some users prefer fruity flavors in summer and richer, warmer flavors in winter.
Nicotine strength is another critical factor in your e-liquid choice. It is available in various concentrations, typically ranging from 0mg to 24mg. Consider the following:
- New Vapers: Start with a higher nicotine level (6mg to 12mg) to satisfy cravings.
- Experienced Vapers: Gradually reduce nicotine levels as you become accustomed to vaping.
Not all e-liquids are created equal. The quality of the ingredients used can significantly impact your health and vaping experience. Look for:
- Reputable Brands: Choose brands known for their quality and safety standards.
- Ingredient Transparency: Opt for e-liquids that disclose their ingredients clearly.
Lastly, ensure that the e-liquid you choose is compatible with your vaping device. Some devices work better with specific PG/VG ratios or viscosity levels. Check your device specifications and adjust your e-liquid choice accordingly.
In summary, selecting the right e-liquid requires careful consideration of the PG/VG ratio, flavor profiles, nicotine levels, ingredient quality, and compatibility with your device. By taking these factors into account, you can enhance your vaping experience, minimize leaks, and enjoy your sessions to the fullest.

Is Your Device Faulty?
When it comes to vaping, a faulty device can often be the underlying cause of frustrating leaks. Understanding how to identify potential issues with your device is essential for a better vaping experience. Both manufacturing defects and regular wear and tear can contribute to leaks, and knowing how to spot these problems can help you take appropriate action.
Identifying a faulty vape device is crucial for preventing leaks. Look out for the following signs:
- Visible Damage: Check for cracks or dents on the tank or body of the device.
- Loose Components: Ensure that all parts are securely fitted together.
- Unusual Sounds: Listen for any hissing or gurgling noises that may indicate internal issues.
- Inconsistent Performance: If you notice a sudden drop in vapor production or flavor quality, it could be a sign of device malfunction.
Regular inspection of your vape device can help you catch potential issues before they result in leaks. Here’s a simple checklist to follow:
1. Disassemble the device carefully.2. Examine the tank for cracks or scratches.3. Check the O-rings for any signs of wear.4. Inspect the battery compartment for corrosion or loose connections.5. Reassemble and test the device for any leaks.
Knowing when to replace your vape device is vital for maintaining a satisfying vaping experience. Consider replacing your device if:
- You Notice Persistent Leaks: If leaks continue despite troubleshooting, it may indicate a serious defect.
- There Are Multiple Issues: A combination of problems, such as battery issues and leaking, can signal that it’s time for a new device.
- Age of the Device: If your device is several years old, it may be less reliable and more prone to issues.
Absolutely! Regular maintenance can extend the life of your vape device and help prevent leaks. Here are some maintenance tips:
- Clean the Tank: Regularly clean your tank to prevent residue buildup that can cause leaks.
- Check O-Rings: Inspect O-rings frequently and replace them if they appear worn or damaged.
- Store Properly: Keep your device in a cool, dry place to prevent unnecessary wear and tear.
By staying vigilant about the condition of your vape device and performing regular checks, you can significantly reduce the risk of leaks and enhance your overall vaping experience. Remember, a well-maintained device not only performs better but also ensures that you enjoy every puff without the hassle of leaks.
How to Spot Device Defects?
When it comes to ensuring a seamless vaping experience, spotting device defects is crucial. A well-maintained device not only enhances performance but also minimizes the risk of leaks and other operational issues. Here, we will delve into effective methods for identifying visible damage and faults in your vape device.
One of the first steps in identifying potential issues with your vape device is to conduct a thorough inspection for visible damage. Look for:
- Cracks on the body of the device or tank
- Loose components that may not fit securely
- Scratches that could indicate wear and tear
- Corrosion around the battery contacts
These physical signs can significantly impact the functionality of your device. For example, a crack in the tank can lead to leaks, while loose components may cause inconsistent vapor production.
In addition to external damage, it’s essential to check the internal components of your vape device. This includes:
- Inspecting the coil for signs of burning or damage
- Checking the O-rings for wear and tear
- Ensuring that the battery is securely in place and free from damage
Internal defects can lead to performance issues, such as poor vapor production and leaking e-liquid. Regularly examining these components can help you catch problems before they escalate.
Another aspect to consider is the airflow system of your vape device. If you notice that your device is producing less vapor than usual, it might be due to:
- Blocked airflow holes
- Improperly adjusted airflow settings
Make sure to clean any debris from the airflow holes and adjust the settings as needed to ensure optimal performance.
As your device ages, it may show signs of wear and tear that could lead to leaks. Look for:
- Fading or discoloration of materials
- Inconsistent performance during use
- Frequent leaks despite proper maintenance
If you encounter these issues, it may be time to consider repairs or replacements.
If you’re unsure about the condition of your device, seeking professional help can be beneficial. Vape shops often have experienced staff who can:
- Conduct a thorough inspection
- Provide advice on necessary repairs
- Recommend suitable replacement options
Don’t hesitate to reach out to professionals if you suspect that your device may have defects that are beyond your expertise.
By regularly inspecting your vape device for visible damage, assessing internal components, testing airflow, and recognizing signs of wear and tear, you can significantly reduce the risk of leaks and enhance your overall vaping experience. Remember, a well-maintained device leads to a more enjoyable and satisfying vape.
When to Replace Your Vape Device?
Knowing when to replace your vape device is crucial for maintaining a satisfying vaping experience. As technology evolves, so do the devices we use, and understanding the signs that indicate it’s time for an upgrade can significantly enhance your enjoyment. Below are key indicators and considerations to help you make an informed decision.
- Persistent Leaks: If you find yourself constantly dealing with e-liquid leaks, it may be a sign of irreparable damage. Check for cracks or faulty seals, but if leaks persist despite troubleshooting, consider a replacement.
- Decreased Vapor Production: A noticeable drop in vapor output can indicate that your device is struggling. This could be due to a failing coil or other internal issues that might not be fixable.
- Unusual Tastes: If you experience a burning or unpleasant taste, it may suggest that the coil is burnt out or that the device is not functioning correctly. While coils can be replaced, a malfunctioning device may need to be replaced altogether.
- Physical Damage: Inspect your device for any visible damage, such as cracks, dents, or broken components. These can not only lead to leaks but also affect the overall performance and safety of the device.
Regular maintenance can prolong the life of your vape device, but even with diligent care, wear and tear are inevitable. Over time, components like O-rings and tanks can degrade, leading to leaks and performance issues. If you’ve been maintaining your device but still encounter problems, it may be time to consider a new one.
The vaping industry is constantly evolving, with new technologies and features being introduced regularly. If your device lacks modern functionalities that enhance the vaping experience—such as adjustable wattage, temperature control, or improved battery life—it might be worth investing in a newer model. Upgrading can provide a more satisfying experience and access to the latest innovations.
While it may be tempting to keep repairing an old device, consider the long-term costs. Frequent repairs can add up, and investing in a new device might save you money in the long run. Additionally, a new device can offer improved efficiency, better flavor, and a more enjoyable vaping experience.
If you’re unsure whether to replace your device, consulting with a knowledgeable vape shop staff member or an expert can provide valuable insights. They can help you assess the condition of your device and recommend the best course of action based on your vaping habits and preferences.
In summary, recognizing the signs that indicate it’s time to replace your vape device is essential for maintaining a satisfying vaping experience. Whether it’s persistent leaks, decreased performance, or the desire for modern features, being proactive can lead to a more enjoyable vaping journey.

How to Maintain Your Vape Device?
Maintaining your vape device is essential for ensuring a seamless and enjoyable vaping experience. Regular maintenance not only helps in preventing leaks but also ensures that your device functions at its best. By implementing a systematic cleaning and inspection routine, you can significantly extend the lifespan of your vape and enhance its performance.
Just like any other electronic device, your vape requires attention to function optimally. Neglecting maintenance can lead to a variety of issues, including leaks, reduced vapor production, and unpleasant tastes. By prioritizing maintenance, you can:
- Prevent Leaks: Regular inspections can help identify potential leak sources before they become a problem.
- Enhance Performance: A clean device ensures better airflow and vapor production.
- Extend Lifespan: Routine care can prolong the life of your vape device, saving you money in the long run.
To keep your vape in top condition, follow these essential maintenance steps:
- Clean the Tank: After every few refills, disassemble the tank and clean it with warm water. Avoid using soap, as it can leave residues that affect flavor.
- Inspect O-Rings: Check the O-rings for any signs of wear or damage. Replacing them when necessary is crucial for maintaining a proper seal.
- Check Connections: Ensure that all components are securely connected. Loose parts can lead to leaks and decreased performance.
- Wipe Down the Device: Regularly wipe the exterior of your vape to remove any e-liquid residue, which can accumulate over time.
Cleaning frequency can vary based on usage, but a good rule of thumb is to clean your vape device every few days, especially if you are a frequent vaper. If you notice any changes in flavor or vapor production, it may be time for a thorough cleaning. Additionally, consider the following:
- Daily Use: If you use your vape daily, a quick clean after every few refills is advisable.
- Occasional Use: For occasional users, a deep clean every couple of weeks should suffice.
Having the right tools can make maintenance easier and more effective. Here are some essential items:
- Soft Cloth: Use a microfiber cloth to wipe down your device.
- Warm Water: For cleaning the tank, warm water is sufficient.
- Replacement O-Rings: Always have spare O-rings on hand for quick replacements.
Absolutely! A clean tank and device ensure that you experience the full flavor of your e-liquids. Residue buildup can lead to a muted taste or unpleasant flavors. Regular maintenance helps to:
- Preserve Flavor Integrity: By removing old e-liquid residues, you can enjoy the true taste of your chosen flavors.
- Enhance Vapor Quality: A clean device promotes better vapor production and quality.
In conclusion, maintaining your vape device is not just about preventing leaks; it’s about ensuring a high-quality vaping experience. By following a regular maintenance routine, you can enjoy your vape to the fullest while extending its life. Remember, a little care goes a long way in enhancing your overall vaping satisfaction.
What Maintenance Steps Should You Follow?
Maintaining your vape device is essential for ensuring a consistent and enjoyable vaping experience. Regular maintenance not only helps in preventing leaks but also extends the lifespan of your device. Below are some crucial steps you should follow to keep your vape in top condition.
Cleaning the tank is one of the most critical maintenance tasks. Over time, residue from e-liquids can build up, affecting the flavor and performance of your vape. To clean your tank:
- Disassemble the tank carefully to avoid damaging any components.
- Use warm water to rinse the tank and remove any leftover e-liquid.
- For a deeper clean, consider using a mild soap solution, but ensure you rinse thoroughly to eliminate any soap residue.
- Allow all parts to dry completely before reassembling.
O-rings are crucial for creating a secure seal within your vape device. Damaged or worn O-rings can lead to leaks. Here’s how to inspect and maintain them:
- Carefully remove the O-rings from their grooves.
- Check for cracks, tears, or deformities.
- If damaged, replace them with new O-rings that are compatible with your device.
Ensuring all connections are secure is vital for preventing leaks. Loose connections can allow e-liquid to escape. Follow these steps:
- Examine all connection points, including where the tank meets the battery.
- Tighten any loose parts gently, but avoid over-tightening, which can cause damage.
- Look for any signs of e-liquid around the connections, indicating a potential leak.
Keeping an eye on your e-liquid levels is essential. Overfilling the tank can lead to leaks. To maintain the ideal fill level:
- Familiarize yourself with the maximum fill line of your tank.
- When filling, tilt the tank slightly to avoid air bubbles.
- Leave some space at the top of the tank to allow for expansion.
Coils can accumulate residue, affecting flavor and vapor production. Regularly cleaning or replacing coils can help:
- Remove the coil from the tank.
- Rinse it under warm water and allow it to dry completely.
- Replace the coil if it appears burnt or discolored.
To maintain optimal performance, establish a cleaning schedule for your vape device. Aim to clean your device every few refills or at least once a week, depending on usage. Regular maintenance will help you avoid leaks and ensure a better vaping experience.
By following these maintenance steps diligently, you can significantly reduce the likelihood of leaks and enhance the overall performance of your vape device. Remember, a well-maintained vape not only delivers a better flavor but also ensures your safety while enjoying your favorite e-liquids.
How Often Should You Clean Your Vape?
Maintaining a clean vape device is essential for optimal performance and longevity. Many users often overlook the importance of regular cleaning, which can lead to a variety of issues, including leaks and poor flavor. In this section, we will explore how often you should clean your vape and the benefits of doing so.
Regular cleaning of your vape device helps to prevent buildup of residue from e-liquids, which can affect both flavor and vapor quality. Additionally, cleaning your device reduces the chances of leaks caused by clogged airflow or damaged components. A clean vape not only enhances your experience but also prolongs the life of the device.
As a general rule, it is advisable to clean your vape device after every few refills. This ensures that any residue does not accumulate and affect your vaping experience. However, the frequency can vary based on several factors:
- Type of E-Liquid: Thicker e-liquids with higher VG content may require more frequent cleaning due to increased residue buildup.
- Usage Frequency: If you vape frequently throughout the day, consider cleaning your device at least once a week.
- Flavor Changes: If you notice a change in flavor, it may be time to clean your device, regardless of how many refills you’ve done.
Cleaning your vape device can be simple and effective. Here are some steps you can follow:
1. Disassemble your device: Take apart the tank, mouthpiece, and any removable parts.2. Rinse components: Use warm water to rinse the tank and mouthpiece thoroughly.3. Use a soft cloth: Wipe down the exterior and any accessible internal parts with a soft cloth.4. Dry completely: Ensure all components are completely dry before reassembling.
Regularly cleaning your vape device offers several benefits:
- Improved Flavor: A clean tank ensures that the flavors of your e-liquids are not altered by residue.
- Enhanced Vapor Production: Reducing buildup allows for better airflow, leading to more vapor.
- Leak Prevention: Cleaning helps to identify and address potential issues before they lead to leaks.
Neglecting to clean your vape can result in several problems:
- Clogged Airflow: Buildup can block airflow, making it difficult to draw vapor.
- Off-Flavors: Old e-liquid remnants can create unpleasant tastes.
- Device Damage: Accumulated residue can lead to more severe issues, potentially damaging your device.
In conclusion, cleaning your vape device regularly is crucial for maintaining its performance and ensuring a satisfying vaping experience. By following a routine cleaning schedule, you can enjoy better flavor, prevent leaks, and prolong the life of your device. Remember, a clean vape is a happy vape!
Frequently Asked Questions
- What should I do if my vape is leaking?
If your vape is leaking, first check for overfilling or damaged O-rings. Ensure the tank is filled to the appropriate level and inspect the seals for any wear. Cleaning your device regularly can also help prevent leaks.
- How can I tell if my O-rings need replacing?
Look for visible signs of wear, such as cracks or deformation. If you notice e-liquid leaking from your device, it’s a good indication that the O-rings may need to be replaced.
- Is it normal for a new vape to leak?
Sometimes, new vapes can leak due to manufacturing defects or improper assembly. If the issue persists after checking the seals and filling technique, consider reaching out to the manufacturer for support.
- What is the best way to fill my vape tank?
To fill your vape tank properly, tilt it at an angle and pour the e-liquid slowly, avoiding the central airflow tube. This helps prevent air bubbles and ensures a smooth fill without spills.
- How often should I clean my vape device?
It’s recommended to clean your vape device every few refills or at least once a week. Regular cleaning helps maintain optimal performance and reduces the chances of leaks.


