The gurgling sound from your vape can be both annoying and concerning. Understanding why this occurs can help you troubleshoot issues effectively and improve your overall vaping experience. In this article, we will delve into the various reasons behind the gurgling noise in vapes, providing you with practical solutions and tips to enhance your enjoyment.
Gurgling sounds in vapes typically arise from a few common issues. Recognizing these causes allows users to quickly identify and rectify problems, ensuring a smoother vaping experience.
Overfilling your vape tank is one of the primary reasons for gurgling sounds. When the tank is too full, e-liquid can seep into the airflow system, leading to unwanted noises. Here are some signs and solutions for this issue:
- Signs of Overfilling: Look for leaking e-liquid or excessive condensation around the airflow holes.
- How to Fix an Overfilled Tank: Remove excess e-liquid using a syringe or cloth to restore proper airflow.
- Prevention Tips: Measure e-liquid carefully and leave some space in the tank to avoid overfilling.
A flooded coil can also lead to gurgling sounds, as e-liquid may pool in the chamber. Identifying a flooded coil is essential for maintaining optimal vape performance.
The viscosity of your e-liquid plays a crucial role in how it behaves within your vape. Choosing the appropriate VG/PG ratio can significantly impact your experience:
- Understanding VG and PG: Vegetable glycerin (VG) creates thicker vapor, while propylene glycol (PG) provides a stronger throat hit. Knowing their properties helps in selecting the right ratio.
- How to Adjust Your VG/PG Ratio: Experimenting with different ratios can alleviate gurgling sounds. Consider your device’s specifications and personal preferences.
A damaged vape device can lead to various issues, including gurgling sounds. Regular inspections can help identify potential problems:
- Identifying Device Damage: Look for physical damage, such as cracks or dents, that may affect performance.
- Repairing or Replacing Your Device: If damage is detected, consider repairs or replacement to ensure optimal functionality.
Using incorrect wattage settings can result in poor vaporization and gurgling sounds. Understanding how wattage impacts your experience is crucial:
- How to Determine the Right Wattage: Consult your coil’s specifications for the recommended wattage range. Adjusting to the correct settings can improve performance.
- Effects of Low vs. High Wattage: Both low and high wattage can affect vapor production and sound. Finding the right balance is key.
Proper airflow is essential for optimal vapor production and preventing gurgling sounds. Regularly checking airflow can prevent issues:
- Signs of Poor Airflow: Indicators include reduced vapor production and unusual sounds.
- Adjusting Airflow Settings: Most devices have adjustable airflow settings. Experimenting can help find the perfect balance.
The quality of e-liquid used can significantly impact your vape’s performance. Choosing high-quality e-liquids reduces the likelihood of gurgling:
- Choosing High-Quality E-Liquids: Opt for reputable brands to ensure better consistency and performance.
- How to Store E-Liquids Properly: Store e-liquids in a cool, dark place to maintain their quality and improve vaporization.
By understanding these factors, you can effectively troubleshoot the gurgling sounds in your vape and enjoy a more satisfying vaping experience.

What Causes Gurgling Sounds in Vapes?
When it comes to vaping, one of the most common and frustrating issues users encounter is the gurgling sound that can arise during use. Understanding the primary causes of these sounds is essential for vapers looking to enhance their experience. This article delves into the various factors that contribute to gurgling noises and offers practical solutions to ensure a smoother vaping experience.
The gurgling sound in vapes often indicates underlying issues that can affect performance and enjoyment. Here are some of the primary causes:
- Overfilled Tanks: One of the most common reasons for gurgling is an overfilled tank. When there’s too much e-liquid, it can enter the airflow system, leading to unwanted sounds.
- Flooded Coils: A flooded coil occurs when excess e-liquid pools in the atomizer, causing gurgling sounds as the vapor struggles to escape.
- Improper VG/PG Ratio: The viscosity of your e-liquid plays a significant role in how it behaves in your vape. A ratio that’s too thick can lead to gurgling.
- Device Damage: Physical damage to your vape can disrupt its functionality, leading to issues like gurgling sounds.
- Incorrect Wattage Settings: Using the wrong wattage can prevent proper vaporization, contributing to gurgling noises.
- Poor Airflow: Restricted airflow can cause unusual sounds, as vapor cannot move freely through the device.
- E-Liquid Quality: Low-quality e-liquids may not vaporize efficiently, leading to gurgling sounds during use.
Overfilling your vape tank can lead to liquid entering the airflow system, causing gurgling sounds. Here are some signs of overfilling:
- Liquid leaking from the airflow holes
- Excessive condensation around the tank
To resolve this issue, simply remove excess e-liquid using a syringe or cloth, restoring proper airflow and eliminating gurgling.
A flooded coil can produce gurgling sounds due to e-liquid pooling in the chamber. Identifying this issue is crucial for maintaining optimal vape performance.
The viscosity of e-liquid can significantly impact its behavior in your vape. Understanding the properties of Vegetable Glycerin (VG) and Propylene Glycol (PG) can help you select the appropriate ratio.
Physical damage to your device can lead to various issues, including gurgling sounds. Regularly inspect your vape for cracks or dents that may affect performance.
Using incorrect wattage settings can result in poor vaporization and gurgling sounds. Consult your coil’s specifications to find the recommended wattage range.
Proper airflow is essential for optimal vapor production. Signs of poor airflow include reduced vapor output and unusual sounds. Most devices have adjustable airflow settings; experimenting with these can help eliminate gurgling sounds.
The quality of e-liquid used can significantly impact your vape’s performance. Opting for reputable brands ensures better consistency and reduces the likelihood of gurgling sounds.
By understanding these common causes of gurgling sounds in vapes, users can take proactive steps to enhance their vaping experience. Whether it’s adjusting the e-liquid levels, checking for device damage, or ensuring the right settings, addressing these issues can lead to a more enjoyable and smoother vaping journey.

Is Your Vape Overfilled?
When it comes to vaping, many enthusiasts encounter various issues that can affect their overall experience. One common problem is the gurgling sound that can arise from your device. This question is crucial for vapers who want to maintain optimal performance and enjoy a smooth vaping experience. In this section, we will explore the signs of overfilling, the solutions to rectify the issue, and tips to prevent it from happening in the future.
Recognizing the indicators of an overfilled tank is essential. Here are some common signs:
- Leaking e-liquid: If you notice liquid pooling around the base of your tank or dripping onto your device, it may be a sign of overfilling.
- Excessive condensation: Look for condensation forming around the airflow holes, which can indicate that e-liquid is entering areas it shouldn’t.
- Gurgling sounds: If your vape produces a gurgling noise when you inhale, this is often a direct result of excess liquid in the airflow system.
If you suspect your tank is overfilled, addressing the issue promptly is crucial. Here are some effective solutions:
- Remove excess e-liquid: Using a syringe or a cloth, carefully extract the excess liquid from your tank. This will help restore proper airflow and eliminate gurgling sounds.
- Check your coil: After addressing the overfill, inspect your coil for any signs of flooding. If it appears saturated, you may need to replace it to improve performance.
Preventing overfilling is key to maintaining a smooth vaping experience. Consider these practical tips:
- Measure e-liquid carefully: Use a syringe or dropper to measure your e-liquid accurately. This ensures you do not exceed the recommended fill line.
- Leave space in the tank: Always leave a small gap at the top of your tank to allow for expansion and prevent overfilling.
- Know your device: Familiarize yourself with your vape device’s specifications and recommended fill levels to avoid accidental overfilling.
By understanding the signs of an overfilled tank and implementing these solutions and prevention tips, you can significantly enhance your vaping experience. A well-maintained tank not only prevents gurgling sounds but also ensures optimal flavor and vapor production. Keep these insights in mind to enjoy a smoother, more enjoyable vape.
Signs of Overfilling
When it comes to vaping, ensuring your tank is filled appropriately is essential for a smooth experience. Overfilling can lead to a range of issues, including gurgling sounds and poor vapor production. Understanding the is crucial for maintaining your device’s performance and your overall satisfaction.
- Leaking E-Liquid: One of the most obvious signs that your tank is overfilled is the presence of e-liquid leaking from the airflow holes. If you notice liquid pooling around the base of your device, it’s likely that you have filled the tank beyond its capacity.
- Excessive Condensation: If you see an unusual amount of condensation forming around the airflow holes, this may indicate that e-liquid is entering the airflow system. This can lead to gurgling sounds and an unpleasant vaping experience.
- Difficulty in Drawing: An overfilled tank can create resistance when you try to draw from your vape. If you find it harder than usual to take a puff, it may be due to excess liquid obstructing airflow.
- Gurgling Sounds: Perhaps the most recognizable symptom of an overfilled tank is the gurgling noise that occurs when you inhale. This sound is caused by e-liquid being forced into the airflow system, creating a disruptive vaping experience.
Addressing an overfilled tank is straightforward. Here are some practical steps:
- Remove Excess E-Liquid: Use a syringe or a cloth to carefully remove the excess liquid from the tank. This will help restore proper airflow and eliminate those annoying gurgling sounds.
- Check for Blockages: After removing the excess liquid, ensure that the airflow holes are clear of any obstructions. This will help improve your vaping experience.
To avoid the hassle of overfilling, consider the following tips:
- Measure Carefully: Always measure your e-liquid before filling the tank. Leaving some space at the top can prevent overfilling.
- Familiarize Yourself with Your Tank: Different tanks have different capacities. Knowing your tank’s limits will help you avoid overfilling.
- Monitor Your Usage: Keep an eye on how much e-liquid you have left in the tank. This can help you refill at the right time, reducing the risk of overfilling.
By recognizing the signs of an overfilled tank and taking preventive measures, you can enhance your vaping experience significantly. Remember, maintaining the right liquid level is key to enjoying smooth, flavorful puffs without the interruptions caused by gurgling or leaking.
How to Fix an Overfilled Tank
When it comes to vaping, encountering a gurgling sound can be quite frustrating. One common cause of this issue is an overfilled vape tank. Understanding how to address this problem is essential for ensuring a smooth and enjoyable vaping experience. Here, we will explore effective methods to fix an overfilled tank and prevent future occurrences.
Before delving into solutions, it’s crucial to recognize the signs of an overfilled tank. Common indicators include:
- Gurgling sounds when inhaling.
- Liquid leaking from the airflow holes.
- Excessive condensation around the mouthpiece.
These symptoms suggest that your tank may be too full, leading to liquid entering the airflow system and causing unwanted sounds.
To resolve the issue of overfilling, follow these simple steps:
- Gather your tools: You will need a syringe or a clean cloth.
- Remove the tank: Carefully detach the tank from your vape device to avoid spills.
- Extract the excess e-liquid: If using a syringe, gently insert it into the tank and draw out the excess liquid. If you prefer a cloth, you can use it to wipe away the liquid around the edges and airflow holes.
- Check for leaks: After removing the excess liquid, inspect the tank for any signs of leakage. Ensure all components are secure before reassembling.
- Reattach the tank: Once you have corrected the overfill, reattach the tank to your device and test it.
Restoring proper airflow is vital for optimal vaping. When a tank is overfilled, e-liquid can obstruct the airflow, leading to that annoying gurgling sound. By removing the excess liquid, you not only enhance airflow but also improve the overall flavor and vapor production of your device.
To avoid the hassle of overfilling in the future, consider these preventive measures:
- Measure carefully: Always check the fill line on your tank and avoid exceeding it.
- Leave space: Ensure there is adequate space at the top of the tank to accommodate the liquid’s expansion.
- Use a funnel: When filling, using a funnel can help control the flow of e-liquid and minimize spills.
Addressing an overfilled tank is a straightforward process that can significantly enhance your vaping experience. By following the steps outlined above and implementing preventative measures, you can enjoy a smoother, gurgle-free vape. Remember, regular maintenance and careful filling practices are key to keeping your device in optimal condition.
Prevention Tips for Overfilling
When it comes to vaping, ensuring a smooth and enjoyable experience is paramount. One common issue that many vapers encounter is the annoying gurgling sound, which often arises from an overfilled tank. Understanding how to prevent this problem is essential for both novice and experienced users alike.
Overfilling your vape tank can lead to a host of issues, most notably the gurgling sound that disrupts your vaping experience. When the tank is filled beyond its capacity, e-liquid can enter the airflow system, causing blockages and leading to the unpleasant noise. This not only affects the flavor but can also lead to potential leaks.
To prevent overfilling, it is crucial to measure your e-liquid carefully. Here are some tips:
- Use a Syringe: Utilizing a syringe allows for precise measurements, ensuring you fill the tank to the correct level.
- Check the Capacity: Familiarize yourself with your tank’s capacity. Most tanks have markings indicating the maximum fill line.
- Leave Space: Always leave some space at the top of the tank. This air gap helps prevent pressure build-up and allows for proper vaporization.
Being able to identify the signs of an overfilled tank can save you from a frustrating vaping experience. Look out for:
- Leaking E-Liquid: If you notice e-liquid pooling around the base of your tank, it may be a sign that you’ve overfilled.
- Excessive Condensation: Moisture buildup around the airflow holes can indicate that your tank is too full.
- Unusual Sounds: Besides gurgling, other odd noises can signal airflow issues related to overfilling.
If you find yourself with an overfilled tank, don’t worry! Here are some effective solutions:
- Remove Excess Liquid: Use a syringe or a cloth to carefully remove the excess e-liquid. This will restore proper airflow and eliminate gurgling sounds.
- Check Coil Position: Ensure that your coil is seated properly. Misalignment can also contribute to gurgling sounds.
To maintain a hassle-free vaping experience, consider these long-term prevention strategies:
- Regular Maintenance: Clean your tank regularly to prevent residue build-up that can affect performance.
- Choose the Right E-Liquid: Opt for e-liquids with appropriate viscosity for your device. Thicker liquids can exacerbate gurgling issues.
- Understand Your Device: Familiarize yourself with your vape device’s specifications and limitations to avoid overfilling.
By taking these precautions and understanding the importance of leaving space in your tank, you can enhance your vaping experience and reduce the likelihood of encountering gurgling sounds. Remember, a little attention to detail goes a long way in ensuring optimal performance.
Is Your Coil Flooded?
When it comes to vaping, experiencing a gurgling sound can be both frustrating and confusing. One of the primary culprits behind this noise is a flooded coil. Understanding how a flooded coil affects your vaping experience is essential for maintaining optimal performance and enjoying your sessions.
A flooded coil occurs when excess e-liquid pools in the chamber of your vape device. This can lead to various issues, including gurgling sounds, leaking, and reduced vapor production. Identifying a flooded coil promptly can prevent further complications and enhance your overall vaping experience.
- Gurgling Sounds: One of the most noticeable indicators is the gurgling noise that occurs when you inhale.
- Leaking E-Liquid: If you notice e-liquid seeping from the airflow holes, this may indicate a flooded coil.
- Weak Vapor Production: A flooded coil can hinder vapor production, leading to disappointing hits.
Several factors can contribute to a flooded coil:
- Overfilling the Tank: Adding too much e-liquid can cause it to overflow into the coil.
- Incorrect Wattage Settings: Using a wattage that is too low for your coil can prevent proper vaporization, leading to flooding.
- Airflow Restrictions: Blocked airflow can cause pressure buildup, forcing e-liquid into the coil chamber.
If you suspect your coil is flooded, there are several steps you can take to rectify the situation:
- Remove Excess E-Liquid: Use a syringe or a cloth to soak up any excess liquid from the tank.
- Check Your Wattage: Ensure that you are using the recommended wattage for your specific coil type.
- Adjust Airflow Settings: Experiment with your device’s airflow settings to ensure optimal performance.
Taking proactive measures can help prevent your coil from flooding in the first place:
- Fill Your Tank Correctly: Always leave a little space at the top of the tank to allow for liquid expansion.
- Choose the Right E-Liquid: Thicker e-liquids can be more prone to flooding; consider using a balanced VG/PG ratio.
- Regular Maintenance: Clean your device regularly to prevent buildup that can lead to flooding.
Understanding the causes and signs of a flooded coil is vital for any vaper. By recognizing these issues early and taking the necessary steps to fix and prevent them, you can enhance your vaping experience and enjoy smoother, more flavorful hits.

Are You Using the Right VG/PG Ratio?
When it comes to vaping, one of the most critical factors that can influence your experience is the viscosity of your e-liquid. This is largely determined by the VG/PG ratio, which refers to the proportions of vegetable glycerin (VG) and propylene glycol (PG) in your e-liquid. Understanding and selecting the right VG/PG ratio can significantly affect how your vape behaves, the quality of the vapor produced, and even the overall satisfaction of your vaping experience.
Vegetable Glycerin (VG) is a thicker, sweeter liquid that produces large vapor clouds. It is known for its smooth throat hit and is often favored by those who prioritize vapor production. On the other hand, Propylene Glycol (PG) is a thinner liquid that provides a stronger throat hit and is often used in traditional tobacco products. It is also better at carrying flavor, making it a popular choice for those who enjoy a more pronounced taste in their vaping.
The VG/PG ratio you choose can dramatically influence various aspects of your vaping experience:
- Vapor Production: Higher VG ratios typically result in denser vapor clouds, while higher PG ratios yield less vapor but a more intense flavor.
- Throat Hit: A higher PG content provides a stronger throat hit, which can be more satisfying for users transitioning from traditional cigarettes.
- Flavor Profile: PG is better at carrying flavors, making it the preferred choice for flavor enthusiasts.
Determining the ideal VG/PG ratio involves considering your vaping device and personal preferences. For example, if you are using a sub-ohm tank designed for high vapor production, a higher VG ratio (such as 70/30 or 80/20) may be more suitable. Conversely, if you are using a pod system or MTL (mouth-to-lung) device, a higher PG ratio (like 50/50) can enhance flavor and provide a satisfying throat hit.
Don’t hesitate to experiment with different VG/PG ratios to find what works best for you. Start with a baseline, such as 70/30 VG/PG, and adjust based on your experience. If you find that your device is gurgling or leaking, it may be a sign that the viscosity of your e-liquid is too high for your setup.
- Ignoring Device Compatibility: Always check your device’s specifications to ensure compatibility with your chosen VG/PG ratio.
- Overlooking Personal Preferences: Your personal preference plays a crucial role. Don’t just follow trends; find what you enjoy the most.
- Neglecting E-Liquid Quality: The quality of e-liquid can also impact your experience. Choose reputable brands that offer the VG/PG ratios you desire.
In summary, selecting the right VG/PG ratio is essential for optimizing your vaping experience. By understanding the properties of VG and PG, experimenting with different ratios, and considering your device’s compatibility, you can enhance your enjoyment and reduce common issues like gurgling sounds. Take the time to find the perfect balance that suits your personal preferences and device requirements for the best possible vaping experience.
Understanding VG and PG
When it comes to vaping, the composition of your e-liquid plays a crucial role in your overall experience. Two primary ingredients that significantly impact vaping characteristics are vegetable glycerin (VG) and propylene glycol (PG). Understanding these components can help you make informed decisions about your e-liquid choices and enhance your vaping satisfaction.
Vegetable glycerin is a thick, sweet liquid derived from plant oils, commonly used in food and cosmetic products. In vaping, VG is known for its ability to produce large vapor clouds. The thickness of VG contributes to a smoother throat hit, making it a popular choice for those who prefer a gentler vaping experience.
Propylene glycol is a thinner liquid that is often used in food and pharmaceutical products. In e-liquids, PG is known for its ability to provide a stronger throat hit, similar to that of traditional tobacco smoking. This property makes it a preferred choice for former smokers who are transitioning to vaping.
- Throat Hit: The ratio of VG to PG can significantly affect the throat hit. A higher PG content typically results in a more pronounced throat hit, while a higher VG content offers a smoother experience.
- Vapor Production: VG is known for its ability to produce dense vapor clouds. If you enjoy cloud chasing, opting for a higher VG ratio may be beneficial.
- Flavor Delivery: PG is better at carrying flavors, which can enhance the taste of your e-liquid. A balanced VG/PG ratio can provide an optimal flavor experience.
Choosing the right VG/PG ratio depends on your personal preferences and the type of device you are using. For instance:
- If you are using a sub-ohm device designed for high wattage and cloud production, a higher VG ratio (70% VG to 30% PG) is often recommended.
- For mouth-to-lung devices, which mimic the experience of traditional smoking, a higher PG ratio (50% VG to 50% PG or even 70% PG to 30% VG) may be more suitable.
Don’t hesitate to experiment with different VG/PG ratios to find what works best for you. Many vapers find that their preferences evolve over time, so staying flexible and open to trying new blends can lead to a more satisfying vaping experience.
Understanding the roles of VG and PG in your e-liquid is essential for optimizing your vaping experience. By considering factors such as throat hit, vapor production, and flavor delivery, you can select a VG/PG ratio that aligns with your preferences and device capabilities. Whether you prioritize flavor, cloud production, or a smooth throat hit, making informed choices about your e-liquid composition can enhance your overall satisfaction.
How to Adjust Your VG/PG Ratio
When it comes to enhancing your vaping experience, one of the most critical factors to consider is the VG/PG ratio of your e-liquid. The right balance between vegetable glycerin (VG) and propylene glycol (PG) can significantly affect not only the flavor and throat hit but also the overall performance of your device. In this section, we will delve into how to adjust your VG/PG ratio effectively to alleviate gurgling sounds and improve your vaping satisfaction.
Vegetable glycerin (VG) is a thicker liquid that produces larger vapor clouds, while propylene glycol (PG) is thinner and provides a stronger throat hit. The ratio of these two components can influence how your vape performs. A higher VG content typically results in denser vapor but may lead to gurgling sounds if the device is not equipped to handle it. Conversely, a higher PG ratio can enhance flavor but may cause dryness in the throat.
To find the ideal VG/PG ratio for your device, it’s essential to experiment. Start by adjusting the ratio incrementally, paying close attention to any changes in performance. A common starting point is a 50/50 mix, which offers a balance between vapor production and throat hit. As you tweak the ratio, observe how your device responds. If gurgling sounds persist, consider increasing the PG content for better wicking and airflow.
Every vape device has its own specifications that dictate the optimal VG/PG ratio. Sub-ohm tanks are generally more suited for higher VG liquids due to their powerful coils and airflow systems, while pod systems may perform better with higher PG liquids. Always refer to your device’s manual for recommendations on the ideal e-liquid composition.
Your personal preferences also play a crucial role in determining the right VG/PG ratio. Some vapers prefer the smoothness and vapor production of high VG liquids, while others may favor the throat hit and flavor intensity provided by higher PG ratios. By understanding your own preferences, you can tailor your e-liquid mix to enhance your vaping pleasure.
- Start with a balanced mix (50/50) and adjust based on your device’s performance.
- Monitor for signs of gurgling or leaking to determine if your current ratio is suitable.
- Consider the type of coils you are using; different coils may require different VG/PG ratios.
- Take notes on your experiences with each ratio to find what works best for you.
Adjusting your VG/PG ratio is a simple yet effective way to enhance your vaping experience and reduce unwanted gurgling sounds. By taking into account your device’s specifications and your personal preferences, you can find the perfect balance that maximizes both flavor and vapor production. Remember, experimentation is key, and with a little patience, you can achieve the optimal setup for your vaping needs.
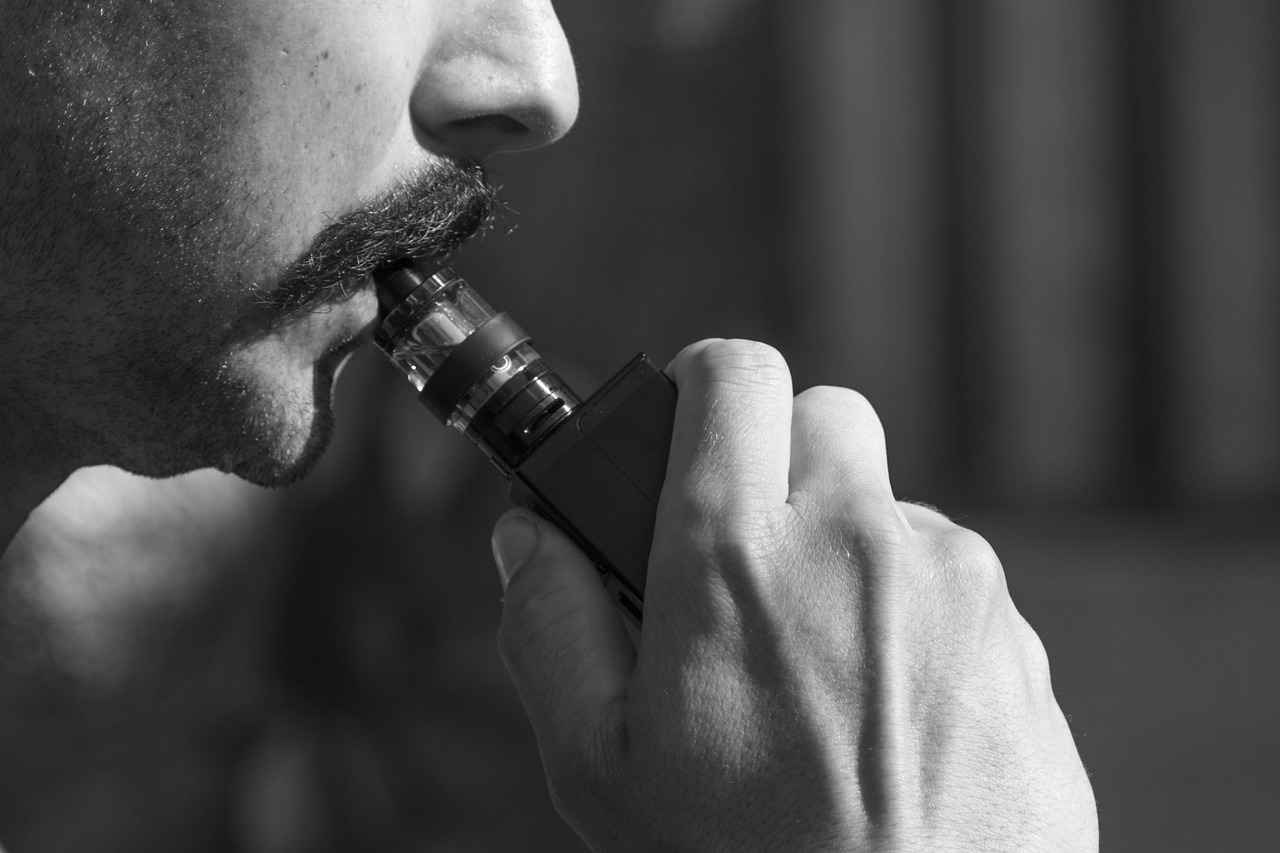
Is Your Vape Device Damaged?
A damaged vape device can lead to various issues, including gurgling sounds, which can significantly affect your vaping experience. Understanding the signs of damage and how to address them is crucial for maintaining optimal performance and enjoyment. In this section, we will explore the common indicators of device damage and provide actionable solutions.
Identifying Device Damage
Recognizing the signs of a damaged vape device is the first step toward resolving issues. Here are some common signs to look for:
- Physical Damage: Inspect your device for any visible cracks, dents, or breaks. Such damage can compromise the integrity of the device and lead to performance issues.
- Leaking E-Liquid: If you notice e-liquid pooling around the base of your device or in the tank, it may indicate a damaged seal or tank.
- Inconsistent Vapor Production: If your vape is producing less vapor than usual or the vapor quality has diminished, it could be a sign of internal damage.
- Unusual Sounds: Gurgling or bubbling sounds often indicate that e-liquid is not vaporizing correctly, which can be a result of device damage.
Repairing or Replacing Your Device
If you identify any signs of damage, it’s essential to take action promptly. Here are some options:
- Check Warranty: If your device is under warranty, contact the manufacturer for repair or replacement options. Many brands offer support for damaged devices.
- DIY Repairs: For minor issues, such as replacing a coil or fixing a leak, you can often find tutorials online to guide you through the repair process.
- Professional Help: If the damage is extensive, consider taking your device to a professional vape shop. They can assess the device and recommend the best course of action.
Preventing Future Damage
Taking preventative measures can help extend the life of your vape device. Here are some tips:
- Regular Maintenance: Clean your device regularly to prevent buildup and ensure all components function correctly.
- Proper Storage: Store your vape device in a cool, dry place, away from direct sunlight to avoid overheating and damage.
- Avoid Overfilling: As discussed previously, overfilling your tank can lead to leaks and damage. Always leave some space in the tank to allow for expansion.
By being proactive about device care and promptly addressing any signs of damage, you can significantly enhance your vaping experience. Remember, a well-maintained device not only improves performance but also ensures safety during use.
Identifying Device Damage
When it comes to vaping, ensuring that your device is in optimal condition is paramount for a satisfying experience. Regular maintenance and inspections can help you identify potential issues before they escalate. One critical aspect to focus on is .
Physical damage to your vape device can significantly impact its performance. Issues such as cracks or dents not only compromise the structural integrity but can also lead to leaks, electrical failures, and other malfunctions. Regular inspections are essential as they can help prevent further issues that may arise from neglect.
- Cracks: Look for any visible cracks on the body or tank of the device. Even minor cracks can lead to larger issues over time.
- Dents: Dents may not seem serious, but they can affect the internal components of the device.
- Leaks: If you notice e-liquid pooling around the device, it may indicate damage that needs addressing.
- Unusual Sounds: Gurgling or other strange sounds can be a sign of internal issues caused by damage.
To effectively assess the condition of your vape device, follow these steps:
- Visual Examination: Start with a thorough visual check for any cracks, dents, or signs of wear.
- Functional Testing: Test the device to ensure it powers on and operates smoothly without any unusual noises.
- Check for Leaks: Inspect around the tank and connections for any signs of leaking e-liquid.
- Battery Check: Ensure the battery compartment is free from corrosion and that the connections are clean.
If you discover any damage during your inspection, it’s crucial to take action:
- Repair: Minor damages like small cracks can sometimes be repaired with adhesive or sealants designed for vape devices.
- Replacement: If the damage is extensive, it may be more practical to replace the device altogether to ensure safety and performance.
- Professional Help: Consider seeking assistance from a professional vape technician for a thorough assessment and repair options.
To safeguard your device from potential damage, consider the following tips:
- Use a Protective Case: Invest in a quality case to protect your vape from accidental drops and impacts.
- Store Properly: Keep your device in a cool, dry place away from direct sunlight and extreme temperatures.
- Handle with Care: Always handle your vape with care, especially when filling or changing components.
By regularly inspecting your vape device and addressing any damage promptly, you can significantly enhance its longevity and performance. Remember, a well-maintained device not only provides a better vaping experience but also ensures safety during use.
Repairing or Replacing Your Device
When it comes to maintaining your vape device, attention to detail is crucial. A gurgling sound can often indicate underlying issues that need to be addressed. One of the most effective solutions is to consider . This not only ensures optimal functionality but also enhances your overall vaping experience.
If you notice any signs of damage, such as cracks or leaks, it is essential to take action. A damaged vape can lead to a myriad of problems, including poor vapor production and, of course, those annoying gurgling sounds. Ignoring these signs can lead to more significant issues down the line, potentially costing you more in repairs or replacements.
- Physical Damage: Look for visible cracks or dents that can affect performance.
- Inconsistent Vapor Production: If you’re experiencing fluctuating vapor amounts, it may be time to inspect your device.
- Unusual Sounds: Gurgling is often a clear indicator that something is amiss.
- Leaking E-Liquid: This can signify damage to the tank or seals.
If the damage is minor, consider repairing your vape device. Many issues can be resolved with simple fixes:
- Replacing Coils: Worn-out coils can lead to gurgling and poor vapor quality. Regularly replacing them can restore your device’s performance.
- Sealing Leaks: If your tank is leaking, ensure that all seals are intact and replace any that are worn out.
- Cleaning the Device: Regular cleaning can prevent buildup that leads to gurgling sounds.
Sometimes, the damage is too extensive for repairs. Here are some factors to consider when deciding to replace your vape device:
- Age of the Device: Older devices may not perform as well as newer models and could be more prone to issues.
- Cost of Repairs: If the cost of repairs approaches the price of a new device, replacement may be the better option.
- Technological Advancements: Newer models often come with improved features that enhance the vaping experience.
Investing in a new vape device can significantly improve your vaping experience:
- Enhanced Performance: New devices often feature better technology for smoother vapor production.
- Improved Safety: Modern devices come with enhanced safety features that reduce the risk of malfunction.
- Better Flavor: A new device can provide a more consistent and flavorful vaping experience.
In conclusion, if you detect damage in your vape device, it is wise to consider repairing or replacing it. Not only does this ensure optimal functionality, but it also eliminates gurgling sounds that can detract from your enjoyment. By staying proactive about device maintenance, you can enhance your overall vaping experience and ensure that you get the most out of your investment.

Are You Using the Correct Wattage?
Understanding the correct wattage settings is crucial for achieving the best vaping experience. Using the wrong wattage can lead to inefficient vaporization, resulting in gurgling sounds and an overall unsatisfactory experience. This section delves into the significance of wattage and how it influences your vaping.
Wattage refers to the power output of your vape device. It determines how much energy is delivered to the coil, affecting how the e-liquid is vaporized. Choosing the right wattage is essential for optimal performance, as it can impact flavor, vapor production, and throat hit.
When the wattage is too low, the coil may not heat up sufficiently, leading to incomplete vaporization. This can cause a gurgling sound as unvaporized e-liquid pools in the chamber. Conversely, setting the wattage too high can lead to burnt hits and decreased flavor quality, as the coil overheats and the e-liquid burns instead of vaporizing smoothly.
- Check Coil Specifications: Most coils have a recommended wattage range printed on the packaging. Always start within this range.
- Experiment Gradually: Adjust wattage in small increments to find the sweet spot that delivers the best flavor and vapor production.
- Listen for Sounds: Pay attention to the sounds your device makes. A gurgling sound may indicate that the wattage is too low, while a burnt taste may suggest it’s too high.
Operating at low wattage can result in poor vaporization, which leads to a less satisfying vaping experience. Users may notice:
- Weak Flavor: The e-liquid may taste muted, as it isn’t being heated sufficiently to release its full flavor profile.
- Gurgling Sounds: Excess e-liquid can accumulate, causing gurgling noises due to improper vaporization.
On the other hand, using excessively high wattage settings can have negative consequences, including:
- Burnt Hits: The coil can become too hot, burning the e-liquid and resulting in a harsh, unpleasant taste.
- Shorter Coil Life: High wattage can wear out coils more quickly, leading to more frequent replacements.
To achieve the best vaping experience, consider the following tips:
- Start Low: Begin at the lower end of the recommended wattage range and gradually increase until you find a balance that suits your preferences.
- Monitor Your Device: Keep an eye on how your device performs at various wattages. Adjust based on flavor, vapor production, and any unusual sounds.
- Take Notes: Document your settings and experiences to identify what works best for you over time.
Using the correct wattage is vital for an enjoyable vaping experience. By understanding how wattage affects vaporization and experimenting with settings, you can enhance flavor, prevent gurgling sounds, and ensure your device operates smoothly. Always refer to coil specifications and listen to your device for signs of improper settings.
How to Determine the Right Wattage
The importance of using the correct wattage setting for your vape cannot be overstated. Not only does it affect the quality of vapor produced, but it also plays a crucial role in preventing issues such as gurgling sounds. In this section, we will explore how to determine the right wattage for your device and the implications of using incorrect settings.
Every vape coil comes with specific specifications that outline the recommended wattage range. These specifications are crucial for achieving optimal performance. By consulting the manufacturer’s guidelines, you can identify the ideal wattage that matches your coil. This ensures that your device operates efficiently and minimizes the risk of gurgling.
Once you have identified the recommended wattage range, it’s essential to adjust your settings accordingly. Operating within this range can significantly enhance your vaping experience. If you’re using a wattage that is too low, you may experience insufficient vapor production and a harsh throat hit. Conversely, setting the wattage too high can lead to burnt coils and gurgling sounds due to excessive e-liquid vaporization.
Using low wattage can result in a less satisfying experience, as the e-liquid may not vaporize completely. This can lead to pooling, which causes gurgling sounds. On the other hand, high wattage can overheat the coil, causing it to burn the e-liquid rather than vaporizing it smoothly. This not only affects flavor but can also lead to leaks and gurgling sounds as well.
Finding the perfect wattage setting often requires some experimentation. Start at the lower end of the recommended range and gradually increase the wattage until you find a level that provides a satisfying throat hit and vapor production without any unwanted sounds. This approach allows you to tailor your vaping experience to your personal preferences.
The composition of your e-liquid, specifically the VG/PG ratio, can also influence the ideal wattage setting. E-liquids with higher vegetable glycerin (VG) content are thicker and may require higher wattage to vaporize effectively. Conversely, e-liquids with a higher propylene glycol (PG) content are thinner and may perform better at lower wattages.
Your vaping needs may change over time due to factors such as coil wear, changes in e-liquid, or personal preference. Therefore, it is advisable to regularly check your wattage settings and make necessary adjustments. This proactive approach can help maintain optimal performance and prevent issues like gurgling.
Determining the right wattage for your vape is essential for a satisfying and smooth vaping experience. By consulting your coil’s specifications, adjusting wattage settings based on e-liquid composition, and regularly checking your device, you can enhance performance and minimize unwanted sounds like gurgling. Remember, the right wattage not only improves vapor quality but also prolongs the life of your coils.
Effects of Low vs. High Wattage
When it comes to vaping, understanding the is crucial for achieving the best experience. Different wattage settings can significantly influence vapor production, flavor intensity, and even the occurrence of unwanted sounds, such as gurgling. This section will delve into how wattage impacts your device and provide insights on troubleshooting common issues.
Using a low wattage setting can result in a cooler vape and less vapor production. While this may be preferred by some users who enjoy a milder throat hit, it can also lead to issues:
- Insufficient Vaporization: E-liquid may not vaporize fully, causing it to pool in the chamber.
- Flavor Diminishment: Lower wattage can result in a less intense flavor profile, as not enough heat is generated to release the full range of flavors.
- Increased Gurgling: The pooling of e-liquid can create gurgling sounds as the airflow becomes obstructed.
On the other hand, high wattage settings can produce a more intense vaping experience:
- Enhanced Vapor Production: Higher wattage generates more heat, resulting in larger vapor clouds.
- Rich Flavor: The increased temperature allows for a more pronounced flavor, enhancing the overall experience.
- Risk of Burnt Hits: However, exceeding the recommended wattage can lead to burnt coils and unpleasant tastes, as the e-liquid may vaporize too quickly.
To achieve the optimal vaping experience, it is essential to find a balance between low and high wattage. Here are some tips:
- Consult Coil Specifications: Always check the manufacturer’s recommendations for your coil’s ideal wattage range.
- Experiment Gradually: Adjust your wattage in small increments to find the sweet spot that provides the best flavor and vapor production without causing gurgling.
- Monitor E-Liquid Levels: Ensure your tank is adequately filled; low e-liquid levels can exacerbate issues at both low and high wattages.
Understanding wattage also helps in troubleshooting common problems. For example:
- Gurgling Sounds: If you experience gurgling, consider lowering your wattage if you are currently at a high setting, as this may help reduce excess e-liquid pooling.
- Dry Hits: If you are using a high wattage and experience dry hits, it may indicate that your wick is not saturated enough, necessitating a reduction in wattage.
In conclusion, understanding the effects of low and high wattage is essential for enhancing your vaping experience. By adjusting your wattage settings based on your device and personal preferences, you can troubleshoot issues like gurgling sounds and enjoy a satisfying vape.

Have You Checked the Airflow?
When it comes to vaping, proper airflow plays a crucial role in achieving the best experience possible. It not only affects vapor production but also helps prevent gurgling sounds that can disrupt your enjoyment. In this section, we will delve into how airflow impacts your vape’s performance and what you can do to ensure it operates smoothly.
Airflow is the pathway through which air enters and exits your vape device. Adequate airflow allows for the right amount of oxygen to mix with the vapor, enhancing flavor and vapor production. Without proper airflow, you may experience issues such as:
- Reduced Vapor Production: Insufficient airflow can lead to a lack of vapor, diminishing your overall experience.
- Gurgling Sounds: When the airflow is restricted, e-liquid may pool in the chamber, causing unpleasant sounds.
- Dry Hits: Poor airflow can result in dry hits, where you inhale vapor without sufficient e-liquid, leading to an unpleasant taste.
Recognizing the signs of poor airflow is essential for maintaining a satisfying vaping experience. Common indicators include:
- Reduced Vapor Production: If you notice a significant drop in vapor, it might be time to check your airflow settings.
- Unusual Sounds: Gurgling or bubbling noises can indicate that e-liquid is not vaporizing correctly due to airflow issues.
- Difficulty in Inhaling: If you find it hard to draw air through your device, there may be a blockage in the airflow.
Many modern vape devices come with adjustable airflow settings. Here’s how to check and modify them:
1. Locate the airflow control on your device.2. Experiment with different settings to find the right balance.3. Take a few test puffs to assess vapor production and sound.4. Adjust as necessary until you achieve optimal airflow.
Over time, residue from e-liquids can build up and restrict airflow. Regular cleaning is essential to maintain performance:
- Disassemble your vape device according to the manufacturer’s instructions.
- Use a soft cloth or cotton swab to clean the airflow holes and other components.
- Ensure everything is dry before reassembling to prevent further issues.
The type of coil and device you use can significantly impact airflow. For instance, sub-ohm tanks typically offer more airflow than standard tanks, which can enhance vapor production. Additionally, selecting a coil designed for your specific device ensures compatibility and optimal performance.
Some e-liquids are thicker than others due to their VG/PG ratio, which can affect how they flow through your device. If you’re experiencing gurgling sounds, consider trying a different e-liquid with a lower VG content to see if it improves airflow and vapor production.
In conclusion, maintaining proper airflow is essential for an enjoyable vaping experience. By regularly checking and adjusting your airflow settings, cleaning your device, and using the right equipment, you can minimize issues like gurgling sounds and enhance your overall satisfaction.
Signs of Poor Airflow
When it comes to vaping, one of the most crucial aspects that can affect your overall experience is airflow. Proper airflow is essential for achieving optimal vapor production and flavor. However, many users may encounter issues that lead to restricted airflow, resulting in undesirable sounds such as gurgling. Understanding the can help you maintain your device effectively and enjoy a better vaping experience.
Several clear indicators can signal that your vape is experiencing restricted airflow. Being aware of these signs can help you troubleshoot issues before they escalate.
- Reduced Vapor Production: If you notice that the vapor clouds are significantly smaller than usual, it may be a sign that airflow is restricted. This can occur due to various factors, including clogs or blockages in the airflow system.
- Unusual Sounds: Gurgling or bubbling noises when you inhale are common indicators of airflow issues. These sounds typically occur when e-liquid is pooling in areas it shouldn’t be, often due to a blockage.
- Difficulty in Inhaling: If you find it harder to draw vapor from your device, this could indicate that the airflow is obstructed. This resistance can be frustrating and may lead to a less enjoyable experience.
- Leaking E-Liquid: If you notice e-liquid leaking from your device, it may be a sign that the airflow is not functioning correctly. Leaks can lead to a buildup of liquid that disrupts normal airflow.
Regularly checking and maintaining your vape’s airflow is essential for several reasons:
- Prevention of Gurgling Sounds: By ensuring that your airflow is clear, you can prevent annoying gurgling sounds that can detract from your vaping experience.
- Enhanced Performance: A device that operates with optimal airflow will produce better vapor and flavor, leading to a more satisfying experience.
- Increased Longevity: Regular maintenance can extend the life of your device by preventing damage caused by excessive buildup or leaks.
Improving airflow in your vape can often be achieved through simple checks and adjustments:
- Inspect Airflow Holes: Check for any obstructions in the airflow holes. Clean them gently with a cotton swab if necessary.
- Adjust Airflow Settings: Many vapes come with adjustable airflow settings. Experimenting with these can help find the perfect balance for your preferences.
- Regular Cleaning: Make it a habit to clean your device regularly. This includes the tank, coil, and airflow components to ensure that no residue builds up.
By being aware of the signs of poor airflow and taking proactive measures, you can enhance your vaping experience significantly. Remember, a well-maintained device will not only perform better but also provide a more enjoyable and flavorful experience.
Adjusting Airflow Settings
When it comes to enhancing your vaping experience, one of the most crucial factors to consider is airflow settings. Many vapers often overlook this aspect, yet it can significantly impact not only the flavor and vapor production but also the occurrence of unwanted sounds, such as gurgling. Understanding how to adjust airflow settings can make a world of difference.
Airflow settings play a vital role in regulating the amount of air that mixes with the vapor produced by the coil. A proper balance between air and vapor can lead to a smoother draw and a more enjoyable vaping experience. If the airflow is too restricted, it can lead to a gurgling sound as e-liquid struggles to be vaporized effectively.
Finding the ideal airflow setting often requires some experimentation. Here are some tips to help you identify the right settings for your device:
- Start with Full Open Airflow: Begin by opening the airflow fully. This allows maximum air intake, which can help you gauge the flavor and vapor production.
- Gradually Restrict Airflow: Slowly close the airflow in small increments, paying attention to changes in flavor and vapor density. This can help you find the sweet spot.
- Listen for Changes: As you adjust the airflow, listen for any gurgling sounds. If they appear, it may indicate that the airflow is too restricted.
Sometimes, even after adjusting the airflow, you may still experience gurgling sounds. Here are some common issues and how to address them:
- Overly Thick E-Liquid: If you are using a high VG e-liquid, it may not vaporize efficiently with restricted airflow. Consider using a lower VG ratio for better performance.
- Clogged Airflow Holes: Check for any obstructions in the airflow holes. Cleaning these regularly can prevent gurgling and improve airflow.
- Incorrect Coil Installation: Ensure that your coil is properly installed. A misaligned coil can disrupt airflow and lead to unwanted sounds.
Many vapers find that adjusting airflow not only eliminates gurgling sounds but also enhances the overall flavor experience. For instance:
- Wide Open Airflow: This setting is often preferred for cloud chasers who enjoy large vapor production, but it may dilute flavor.
- Moderate Airflow: A balanced approach can offer both good vapor and flavor, making it suitable for everyday vaping.
- Restricted Airflow: This setting can intensify flavor but may reduce vapor production. It’s often favored by those who enjoy a tighter draw.
In conclusion, adjusting airflow settings is a fundamental aspect of optimizing your vaping experience. By experimenting with different settings and paying attention to how your device responds, you can find the perfect balance that enhances flavor, vapor production, and eliminates gurgling sounds. Remember, every device is unique, and what works for one may not work for another, so take your time to explore the possibilities.

Can E-Liquid Quality Affect Gurgling?
The quality of e-liquid used in your vape can significantly impact its overall performance, including the occurrence of annoying gurgling sounds. In this section, we will delve into how the quality of e-liquids relates to these sounds and provide insights on how to select the right e-liquid for an optimal vaping experience.
Not all e-liquids are created equal. The ingredients, manufacturing processes, and storage conditions can all affect the quality of the e-liquid. High-quality e-liquids typically contain pharmaceutical-grade ingredients, ensuring a consistent and enjoyable vaping experience. On the other hand, low-quality e-liquids may contain impurities or inconsistent ratios of VG (Vegetable Glycerin) and PG (Propylene Glycol), leading to issues like gurgling.
Gurgling sounds often indicate that e-liquid is pooling in the wrong areas of your vape device. When using low-quality e-liquids, the viscosity may not be ideal for your device, leading to improper vaporization. This can cause excess liquid to accumulate in the tank or coil, resulting in gurgling noises. Additionally, poor-quality e-liquids may not vaporize efficiently, contributing to flooding in the coil.
- Research Reputable Brands: Always opt for well-known brands that have established a reputation for quality.
- Check Ingredients: Look for e-liquids that list their ingredients clearly and use high-grade components.
- Read Reviews: Customer feedback can provide valuable insights into the performance and consistency of specific e-liquids.
Proper storage of e-liquids is crucial for maintaining their quality over time. Here are some tips:
- Keep in a Cool, Dark Place: Exposure to light and heat can degrade the quality of e-liquids, leading to changes in flavor and viscosity.
- Avoid Temperature Fluctuations: Store e-liquids at a consistent temperature to prevent separation of ingredients.
- Seal Tightly: Ensure that bottles are tightly sealed to minimize exposure to air, which can also affect quality.
The VG/PG ratio in your e-liquid can greatly influence how it performs in your vape device. A higher VG content typically results in thicker liquid, which may not wick properly in some devices, leading to gurgling. Conversely, a higher PG content can provide a smoother throat hit but may not produce as much vapor. Finding the right balance for your specific device is essential.
Being able to identify low-quality e-liquids can save you from many vaping issues:
- Unusual Tastes or Smells: If your e-liquid has an off-putting taste or odor, it may be of inferior quality.
- Inconsistent Vapor Production: High-quality e-liquids should produce consistent vapor. If you notice irregularities, it might be time to switch brands.
- Frequent Gurgling Sounds: If you experience gurgling often, it could be a sign of poor-quality e-liquid.
In summary, the quality of e-liquid plays a crucial role in the performance of your vape, particularly concerning gurgling sounds. By selecting high-quality e-liquids and ensuring proper storage, you can enhance your vaping experience and minimize unwanted issues.
Choosing High-Quality E-Liquids
When it comes to enhancing your vaping experience, is paramount. The type of e-liquid you select can significantly influence not only the flavor but also the overall performance of your vape device. This section dives into the importance of e-liquid quality and how it can help prevent issues like gurgling sounds.
Using top-tier e-liquids can lead to better consistency in flavor and vapor production. Low-quality e-liquids may contain impurities or inconsistent ingredients that can cause clogging and gurgling sounds. By opting for reputable brands, you are more likely to receive products that adhere to strict quality standards.
- Ingredient Transparency: Quality brands provide clear information about their ingredients, ensuring you know exactly what you are inhaling.
- Flavor Authenticity: High-quality e-liquids often have a more authentic flavor profile, which enhances your overall vaping experience.
- Manufacturing Standards: Look for brands that follow Good Manufacturing Practices (GMP) to ensure safety and quality.
Gurgling sounds often occur when there is an imbalance in the e-liquid’s viscosity or when the liquid does not vaporize properly. High-quality e-liquids are formulated to have the right VG/PG ratio, which helps in achieving optimal vaporization. This not only minimizes gurgling but also enhances flavor delivery.
While personal preference plays a significant role, some brands are well-regarded in the vaping community for their quality. Brands like Vapetasia, Ruthless, and Charlie’s Chalk Dust have garnered positive reviews for their consistent performance and flavor integrity.
Proper storage is essential to maintaining the quality of your e-liquids. Here are some tips:
- Keep e-liquids in a cool, dark place to prevent degradation.
- Avoid exposing them to direct sunlight, which can alter their composition.
- Seal bottles tightly to prevent air exposure, which can lead to oxidation.
Many brands offer options for customizing your e-liquid, allowing you to choose your preferred nicotine strength and VG/PG ratio. This customization can lead to a more tailored vaping experience, reducing the chances of gurgling by aligning the liquid’s properties with your device’s specifications.
Investing in high-quality e-liquids not only enhances your immediate vaping experience but also contributes to the longevity of your device. Consistent use of reputable brands can lead to fewer maintenance issues, such as gurgling sounds or device malfunctions.
In summary, the choice of e-liquid plays a critical role in your vaping experience. By selecting high-quality products from reputable brands, you can enjoy a smoother, more flavorful vape while minimizing common issues like gurgling sounds. Remember to store your e-liquids properly and consider customization options to further enhance your experience.
How to Store E-Liquids Properly
Proper storage of e-liquids is essential for maintaining their quality and ensuring an optimal vaping experience. E-liquids can degrade over time due to exposure to light, heat, and air, which can affect their flavor and vaporization properties. Understanding how to store your e-liquids effectively can help preserve their integrity and enhance your overall satisfaction.
Storing e-liquids correctly prevents degradation and maintains their flavor profile. When exposed to unfavorable conditions, e-liquids can undergo chemical changes that alter their taste and performance. Ensuring that your e-liquids are stored properly can also extend their shelf life, allowing you to enjoy them for a longer period.
The ideal storage location for e-liquids is a cool, dark place. Here are some recommended storage options:
- Closets: A closet away from sunlight is an excellent choice.
- Cabinets: Use kitchen or bathroom cabinets that are not exposed to heat sources.
- Refrigerators: For long-term storage, consider placing e-liquids in the refrigerator, but allow them to reach room temperature before use.
Maintaining a consistent temperature is crucial. E-liquids should ideally be stored between 60°F to 70°F (15°C to 21°C). Avoid areas that experience temperature fluctuations, such as near windows or heating vents, as this can lead to condensation and spoilage.
Exposure to ultraviolet (UV) light can cause e-liquids to break down more quickly. To prevent this, always store e-liquids in opaque or dark-colored bottles. If your e-liquids come in clear bottles, consider transferring them to a darker container.
Yes, air exposure can lead to oxidation, which affects flavor and aroma. Always ensure that bottles are tightly sealed when not in use. If you notice any signs of leakage or an open cap, it’s best to discard the liquid to avoid any adverse effects on your vaping experience.
Generally, e-liquids can last from 1 to 2 years if stored properly. However, it’s important to check for any changes in color, smell, or viscosity before use. If an e-liquid has darkened significantly or has an off-putting smell, it’s best to dispose of it.
For those who create their own e-liquids, the same storage principles apply. Keep your ingredients, including nicotine, VG, and PG, in a cool, dark place. Additionally, label your mixtures with the date of creation to track their freshness.
To summarize, here are some quick tips for storing e-liquids effectively:
- Store in a cool, dark place.
- Use opaque bottles to minimize light exposure.
- Ensure bottles are tightly sealed when not in use.
- Check for signs of degradation before use.
By following these guidelines, you can maintain the quality of your e-liquids, ensuring a satisfying and flavorful vaping experience every time.
Frequently Asked Questions
- What should I do if my vape is gurgling?
If your vape is gurgling, first check if the tank is overfilled. Remove any excess e-liquid and ensure proper airflow. Also, inspect the coil for flooding and adjust your VG/PG ratio if necessary.
- Can using the wrong wattage cause gurgling sounds?
Absolutely! Using wattage settings outside the recommended range can lead to poor vaporization, causing gurgling sounds. Always refer to your coil’s specifications to find the right wattage.
- How can I tell if my vape device is damaged?
Look for visible signs like cracks, dents, or any irregularities. If your vape isn’t performing as expected, it might be time for a thorough inspection or even a replacement.
- Does the quality of e-liquid affect my vaping experience?
Yes, using high-quality e-liquids can significantly enhance your vaping experience. Poor quality can lead to issues like gurgling and inconsistent vapor production.
- What are the signs of poor airflow in my vape?
Indicators of restricted airflow include reduced vapor production and unusual sounds. Regularly checking and adjusting airflow settings can help maintain optimal performance.

