Many vape users have encountered the frustrating situation of their device not turning on. This article delves into the common reasons why vapes fail to power up and offers practical troubleshooting tips to help users effectively resolve these issues.
Understanding the typical causes behind a vape’s failure to power on is essential. It can help users quickly identify the problem and avoid unnecessary frustration. Here are some common reasons:
One of the most frequent culprits for a vape not turning on is a dead battery. Always check the battery status first, as this simple step can save time and effort in troubleshooting.
Ensuring that the battery is properly connected to the device is crucial. Loose connections can prevent the vape from powering on. Here’s how to check:
- Remove the battery and reinsert it securely.
- Inspect for any visible damage.
Dirty or corroded battery contacts can hinder performance. Regular cleaning can maintain optimal connectivity and function. Use a cotton swab and rubbing alcohol to clean the contacts.
Using an incompatible charger can lead to charging issues. Always use the manufacturer’s recommended charger for the best results.
Batteries have a limited lifespan. Knowing how to assess battery health can help users decide when it’s time for a replacement. Look for signs like swelling or diminished performance.
Many vapes come equipped with safety features that may prevent them from turning on. Understanding these features can help users troubleshoot effectively.
Some devices have a lock feature to prevent accidental activation. Learning how to unlock your vape is essential for functionality. Refer to the user manual for specific instructions.
If a vape overheats, it may automatically shut off for safety. Recognizing this can help users avoid unnecessary worry. Allow the device to cool down before attempting to turn it back on.
A low e-liquid level can sometimes affect device performance. Ensuring adequate liquid can prevent operational issues.
Regularly checking e-liquid levels can help users maintain their device and avoid dry hits or other performance issues. Always keep a spare bottle of e-liquid handy.
Faulty components can lead to various issues in vapes. Identifying and replacing these components can restore functionality.
The atomizer plays a crucial role in vapor production. A burnt or faulty atomizer can prevent the device from turning on. Regularly replacing the atomizer can enhance performance.
Connection ports can gather debris over time. Regular cleaning can help maintain a proper connection for optimal performance.
Resetting a vape can resolve many operational issues. Knowing how to perform a reset can be a quick fix for persistent problems.
Different devices have varying reset procedures. Familiarizing oneself with the specific reset method for their model can save time. Typically, this involves pressing the power button multiple times.
If troubleshooting fails, professional assistance may be necessary. Knowing when to consult an expert can save users time and frustration.
Recognizing signs of serious problems can help users make informed decisions about seeking repairs or replacements. Look for unusual noises or persistent error messages.
Choosing the right repair service is essential for effective troubleshooting. Researching local options can lead to better outcomes and ensure your device is in good hands.
What Are the Common Reasons for a Vape Not Turning On?
When you find yourself in a situation where your vape won’t turn on, it can be both frustrating and confusing. Understanding the typical causes behind a vape’s failure to power on can help users identify the problem quickly and avoid unnecessary frustration. Here are some common reasons and troubleshooting tips to help you get back to enjoying your vaping experience.
One of the most frequent reasons why a vape fails to power on is a dead battery. Always start by checking the battery status. If your vape uses a removable battery, try replacing it with a fully charged one to see if that resolves the issue. For built-in batteries, plug the device into a charger and look for any signs of charging, such as a light indicator.
Another common issue is a poor connection between the battery and the device. Loose connections can prevent the vape from turning on. Ensure that the battery is securely seated in its compartment. If the connection seems loose, try removing the battery and reinserting it firmly.
Dirty or corroded battery contacts can hinder performance. Regular cleaning can maintain optimal connectivity and function. Use a cotton swab or a soft cloth to gently clean the contacts, removing any dirt or residue.
Using an incompatible charger can lead to charging issues. Always use the manufacturer’s recommended charger for best results. If you’re unsure, check the specifications on the device or the user manual.
Batteries have a limited lifespan, and understanding how to assess battery health can help users decide when it’s time for a replacement. If your battery is not holding a charge, it may be time to invest in a new one.
Many vapes come equipped with safety features that may prevent them from turning on. Understanding these features can help users troubleshoot effectively. For instance, some devices have a lock feature to prevent accidental activation.
Learning how to unlock your vape is essential for functionality. Refer to the user manual for instructions on unlocking the device, as the process can vary between models.
If a vape overheats, it may automatically shut off for safety. Recognizing this can help users avoid unnecessary worry. Allow the device to cool down before attempting to power it on again.
A low e-liquid level can sometimes affect device performance. Ensuring adequate liquid can prevent operational issues. Regularly check e-liquid levels and refill as needed to maintain optimal function.
Faulty components can lead to various issues in vapes. Identifying and replacing these components can restore functionality. The atomizer, for example, plays a crucial role in vapor production.
A burnt or faulty atomizer can prevent the device from turning on. If you suspect the atomizer is the issue, try replacing it with a new one to see if that resolves the problem.
Connection ports can gather debris over time. Regular cleaning can help maintain a proper connection for optimal performance. Use a soft brush or compressed air to clear any accumulated dust.
Resetting a vape can resolve many operational issues. Knowing how to perform a reset can be a quick fix for persistent problems. Different devices have varying reset procedures, so refer to the specific instructions for your model.
If troubleshooting fails, professional assistance may be necessary. Knowing when to consult an expert can save users time and frustration. Look for signs of major issues, such as unusual noises or persistent error messages.
Choosing the right repair service is essential for effective troubleshooting. Research local options and read reviews to ensure you receive quality service.

Is the Battery Charged?
When it comes to vaping, one of the most frustrating experiences is discovering that your device won’t turn on. The first thing you should consider is whether the battery is charged. A dead battery is often the primary culprit behind this issue, and checking the battery status can save you both time and effort in troubleshooting.
Before diving into complex troubleshooting steps, always start with the basics. If your vape isn’t turning on, the simplest and most common reason is that the battery has run out of power. Many users overlook this straightforward check, leading to unnecessary frustration.
- Check the Battery Indicator: Most vapes come equipped with an LED indicator that shows battery status. If the light is off or blinking, it’s a clear sign that your battery needs charging.
- Charging Time: Ensure you allow sufficient time for your device to charge. Depending on the model, it may take anywhere from 30 minutes to a few hours to reach a full charge.
- Use the Correct Charger: Always use the charger that comes with your device. Using an incompatible charger can lead to ineffective charging and may even damage the battery.
Sometimes, the battery may be charged, but it’s not connecting properly to the device. Loose connections can prevent your vape from powering on.
- Inspect Connection Points: Check the connection points between the battery and the device. Ensure they are clean and free from debris.
- Reinsert the Battery: If your vape uses a removable battery, take it out and reinsert it to ensure a snug fit.
Even if your battery is charged, it may not function effectively if it’s old or damaged. Batteries have a limited lifespan and can lose their ability to hold a charge over time.
- Check for Swelling: If your battery appears swollen or damaged, it’s crucial to replace it immediately to avoid potential hazards.
- Monitor Performance: If you notice that your device drains quickly or doesn’t last as long as it used to, it may be time for a new battery.
Many modern vapes come with built-in safety features designed to protect the device and the user. These features can sometimes prevent the device from turning on.
- Lock Feature: Some devices have a lock feature to prevent accidental activation. Make sure to unlock it before trying to turn it on.
- Overheating Protection: If your vape has overheated, it may shut down automatically. Allow it to cool down before attempting to turn it back on.
While it may seem unrelated, a low level of e-liquid can sometimes affect the device’s performance. Make sure your tank is adequately filled to avoid operational issues.
If you’ve checked the battery, connections, and other basic troubleshooting steps without success, it may be time to consult a professional. Recognizing when to seek help can save you time and prevent further damage to your device.
- Signs of Major Issues: If you notice persistent problems despite troubleshooting, it’s best to consult an expert.
- Finding a Reliable Repair Service: Research local repair services that specialize in vaping devices for the best outcomes.
By understanding these common issues and troubleshooting steps, you can effectively address the problem of your vape not turning on. Always remember that a charged battery is your first line of defense!
How to Check Battery Connection
When it comes to vaping, ensuring that your device functions properly is essential for an enjoyable experience. One of the most critical aspects of this is the battery connection. A well-connected battery is the lifeblood of your vape, and any issues here can lead to frustrating failures to power on. Below, we explore the steps to effectively check and maintain your battery connection.
A secure battery connection is vital for several reasons:
- Power Supply: A loose or improperly connected battery can disrupt the power supply to the device, preventing it from turning on.
- Safety: Ensuring a proper connection helps avoid potential hazards like overheating or battery damage.
- Performance: A solid connection guarantees optimal performance, enhancing your overall vaping experience.
Here’s how to ensure your battery is securely connected:
- Remove the Battery: Start by carefully removing the battery from the device. This will allow you to inspect both the battery and the device contacts.
- Inspect the Contacts: Look for any signs of dirt, corrosion, or damage on both the battery terminals and the device contacts. If you notice any buildup, gently clean it using a cotton swab or a soft cloth.
- Reinsert the Battery: Place the battery back into the device, ensuring it fits snugly. Pay attention to the positive (+) and negative (−) terminals to ensure correct orientation.
- Check for Movement: After reinserting, gently wiggle the battery to see if it moves. If it feels loose, it may not be making the necessary connection.
Understanding potential issues can help you troubleshoot effectively:
- Corroded Contacts: Over time, battery contacts can corrode, leading to poor connections. Regular cleaning is essential to maintain optimal performance.
- Incompatible Batteries: Always use batteries that are compatible with your device. Using the wrong type can lead to connection problems.
- Worn Out Batteries: If your battery is old or has been through many charge cycles, it may not connect properly. Consider replacing it if issues persist.
To prevent future issues, consider these maintenance tips:
- Regular Cleaning: Make it a habit to clean the battery contacts regularly to avoid buildup that can impede connectivity.
- Store Properly: When not in use, store your vape in a cool, dry place to prevent moisture damage to the battery and contacts.
- Monitor Battery Health: Keep an eye on your battery’s performance. If you notice a decrease in functionality, it may be time for a replacement.
By following these guidelines, you can ensure that your battery connection remains secure, allowing your vape to operate smoothly. A well-maintained battery not only enhances your vaping experience but also contributes to the longevity of your device.
Inspecting Battery Contacts
When it comes to ensuring your vape functions optimally, is a crucial step that should not be overlooked. Dirty or corroded battery contacts can significantly hinder the performance of your device, leading to frustrating situations where your vape simply won’t turn on. Regular maintenance, including cleaning these contacts, can help maintain optimal connectivity and function.
Battery contacts are the points where the battery connects with the vape device, and they play a vital role in the overall performance. Over time, these contacts can accumulate dirt, grime, or even corrosion due to exposure to moisture and air. This buildup can create a barrier that prevents the battery from transferring power effectively to the device.
Why Are Clean Battery Contacts Important?
- Enhanced Connectivity: Clean contacts ensure a solid connection between the battery and the device, allowing for efficient power transfer.
- Improved Performance: Regular cleaning can help maintain the device’s performance, preventing issues like misfires or failure to turn on.
- Prolonged Battery Life: Keeping contacts clean can help reduce wear and tear on the battery, potentially extending its lifespan.
How to Inspect and Clean Battery Contacts
To maintain your vape’s performance, it’s essential to regularly inspect and clean the battery contacts. Here’s a simple step-by-step guide:
- Turn Off Your Device: Always ensure your vape is turned off before performing any maintenance.
- Remove the Battery: Carefully take out the battery from the device.
- Inspect the Contacts: Look for any signs of dirt, corrosion, or damage on both the battery and the device contacts.
- Clean the Contacts: Use a cotton swab or a soft cloth lightly moistened with isopropyl alcohol to gently clean the contacts. Avoid using excessive liquid.
- Dry Thoroughly: Ensure that all parts are completely dry before reassembling the device.
By following these steps, you can help ensure that your vape operates smoothly and reliably. Regular maintenance checks are not only beneficial for performance but also for the longevity of your device.
When to Seek Professional Help
If you notice persistent issues with your vape even after cleaning the battery contacts, it may be time to consult a professional. Signs of deeper issues might include:
- Frequent Battery Drain: If your battery drains quickly despite regular charging.
- Physical Damage: Any visible damage to the battery or device that could affect performance.
- Inconsistent Power: If the device powers on and off unpredictably.
In conclusion, maintaining clean battery contacts is essential for ensuring your vape functions properly. Regular inspections and cleaning can prevent many common issues, allowing you to enjoy a seamless vaping experience. Always remember to keep an eye on the condition of your device and take action when necessary.
Using the Correct Charger
When it comes to maintaining your vape device, one of the most critical aspects to consider is the charger you use. is essential for ensuring optimal performance and longevity of your device. Here’s why choosing the right charger matters and how it can impact your vaping experience.
Every vape device is designed with specific charging requirements. The manufacturer’s recommended charger is engineered to provide the correct voltage and current, which is crucial for:
- Preventing Overcharging: Using an incompatible charger can lead to overcharging, which may damage the battery and reduce its lifespan.
- Avoiding Short Circuits: Mismatched chargers can cause short circuits, leading to potential safety hazards.
- Maintaining Battery Health: Consistent use of the correct charger helps preserve the overall health of the battery, ensuring it holds a charge longer.
Using a charger that is not designed for your specific vape model can result in various issues:
- Charging Issues: Incompatible chargers may not connect properly, leading to poor charging or no charging at all.
- Device Malfunction: A charger that delivers incorrect voltage can cause your device to malfunction, affecting its performance and reliability.
- Warranty Void: Using a non-recommended charger may void your warranty, leaving you without support if your device fails.
To ensure you are using the right charger, consider the following:
- Check the Specifications: Look at the voltage and amperage ratings on your device and match them with the charger’s specifications.
- Consult the User Manual: Your vape’s user manual will provide specific information about the recommended charger.
- Look for OEM Products: Original Equipment Manufacturer (OEM) chargers are designed specifically for your device and are the safest option.
To further protect your vape device and ensure efficient charging, follow these best practices:
- Charge in a Safe Environment: Avoid charging your vape in extreme temperatures or humid conditions.
- Monitor Charging Time: Do not leave your device charging overnight unless it has built-in overcharge protection.
- Inspect Your Charger Regularly: Check for any signs of wear and tear on your charger, and replace it if necessary.
In conclusion, using the correct charger is not just a recommendation; it is essential for the performance and safety of your vape device. Always prioritize the manufacturer’s guidelines to enjoy a hassle-free vaping experience.
Identifying Battery Health Issues
Batteries are integral to the functionality of your vape device, and understanding their health is crucial for a seamless vaping experience. As with any electronic device, batteries have a limited lifespan, which means they will eventually degrade over time. Recognizing the signs of battery wear can help you determine when it’s time for a replacement, ensuring your device performs optimally.
Identifying battery health issues is essential for maintaining your vape’s performance. Here are some common signs that indicate your battery may need attention:
- Decreased Battery Life: If you notice that your vape doesn’t last as long on a full charge, it may be time to assess the battery health.
- Slow Charging: A battery that takes longer than usual to charge can be a sign of wear.
- Overheating: If your device becomes excessively hot during use or charging, this could indicate a failing battery.
- Unusual Sounds: Popping or hissing noises from the battery can signal serious issues.
To ensure your battery is functioning correctly, you can perform a few simple checks:
- Visual Inspection: Examine the battery for any signs of damage, such as swelling, leaking, or corrosion on the contacts.
- Battery Voltage Test: Use a multimeter to check the voltage. A significant drop from the rated voltage can indicate a health issue.
- Device Performance: Pay attention to how your device performs. If it struggles to produce vapor or frequently shuts off, it might be time for a battery replacement.
Knowing when to replace your battery is crucial for maintaining your vaping experience. Here are some guidelines:
- If your battery shows signs of physical damage.
- When performance issues persist even after troubleshooting.
- If the battery fails to hold a charge or drops significantly in voltage.
To prolong the life of your vape battery, consider the following best practices:
- Regular Cleaning: Keep battery contacts clean to ensure optimal connectivity.
- Avoid Overcharging: Unplug your device once it reaches a full charge to prevent damage.
- Store Properly: When not in use, store your battery in a cool, dry place away from direct sunlight.
Understanding and identifying battery health issues is fundamental for any vape user. By recognizing the signs of degradation, performing regular assessments, and adhering to best practices, you can ensure a longer lifespan for your battery and a better overall vaping experience. If you find that your battery is consistently underperforming, it may be time to consider a replacement to maintain the quality of your device.
Are There Any Safety Features Engaged?
When using a vape device, it is essential to understand that many models come with built-in safety features designed to enhance user safety and device longevity. These features can sometimes prevent the device from turning on, causing confusion for users. In this section, we will delve into the various safety mechanisms that may be engaged and how they impact the operation of your vape.
Vape devices are equipped with a variety of safety features that protect both the user and the device. Familiarizing yourself with these features can help you troubleshoot effectively.
Many vapes come with a lock feature that is designed to prevent accidental firing. This is particularly useful for portable devices that may be carried in pockets or bags. If your vape is not turning on, it could be because the lock feature is engaged.
- How to Unlock: Typically, unlocking the device involves pressing the power button multiple times in quick succession. Refer to your user manual for specific instructions.
Another common safety feature is overheating protection. If your vape has been used continuously or left in a hot environment, it may automatically shut off to prevent damage. This feature can be a lifesaver, but it may lead to temporary frustration if you are unaware of it.
- What to Do: If you suspect overheating, allow the device to cool down for a few minutes before attempting to turn it back on.
Short circuit protection is another critical safety feature that can prevent your vape from powering on. If there is a short circuit detected within the device, it will automatically disable itself to avoid potential hazards.
- Identifying Short Circuits: If you notice any unusual behavior, such as a burning smell or visible damage, cease using the device immediately and consult a professional.
Many modern vapes include battery protection features that monitor the health and charge of the battery. If the battery is deemed unsafe—due to over-discharge or damage—the device may refuse to turn on.
- Checking Battery Health: Regularly inspect your battery for signs of wear and ensure you are using the correct charger.
Some advanced vape devices require firmware updates to function correctly. If your device is not turning on, it might be due to outdated software.
- Updating Firmware: Check the manufacturer’s website for any available updates and follow the instructions to install them.
Understanding the safety features of your vape device is crucial for effective troubleshooting. By familiarizing yourself with these mechanisms, you can quickly identify issues that may prevent your device from turning on. If all else fails and your vape still does not operate, consider seeking professional assistance to ensure your device is functioning safely and correctly.
Understanding the Lock Feature
When it comes to using your vape, understanding the various features and functionalities is essential for an optimal experience. One crucial feature that many users overlook is the lock feature. This function is designed to prevent accidental activation, ensuring that your device remains safe and secure when not in use. In this section, we will delve deeper into the significance of the lock feature, how it operates, and the steps to unlock your vape effectively.
The lock feature serves as a protective measure, especially for portable vapes that users may carry in their pockets or bags. It helps to avoid unintentional firing of the device, which can lead to wasted e-liquid and potential overheating. By engaging this feature, users can ensure that their vape remains inactive until they are ready to use it.
Typically, the lock feature is activated through a specific button combination on the device. For instance, most vapes require you to press the power button multiple times in quick succession—usually five times—to toggle the lock on or off. This simple mechanism is designed to be user-friendly while providing an essential layer of safety.
Understanding how to unlock your vape is vital for functionality. If your device is locked, it will not turn on, leading to confusion and frustration. Knowing the unlock procedure allows you to quickly regain access to your vape, ensuring that you can enjoy your experience without unnecessary delays.
- Locate the Power Button: Familiarize yourself with the location of the power button on your device.
- Press the Button: Quickly press the power button five times (or as specified in the user manual) to unlock.
- Check for Indicator Lights: Many devices will have LED indicators that confirm whether the device is locked or unlocked.
If you find that your vape remains locked despite following the unlocking procedure, there may be an underlying issue. Here are a few steps you can take:
- Inspect the Manual: Refer to the user manual for specific instructions related to your model.
- Reset the Device: Sometimes, performing a reset can resolve glitches. Check how to reset your specific device.
- Contact Customer Support: If issues persist, reach out to the manufacturer’s customer support for assistance.
Understanding the lock feature on your vape is an essential aspect of responsible vaping. By knowing how to engage and disengage this feature, you can ensure that your device remains functional and safe. Always refer to your user manual for specific instructions and troubleshooting tips tailored to your model. With this knowledge, you can enjoy a seamless vaping experience without the worry of accidental activation.
Overheating Protection
When using a vape device, understanding its safety features is crucial for ensuring a smooth and enjoyable experience. One such feature is , which plays a significant role in preventing potential hazards associated with high temperatures. If a vape overheats, it may automatically shut off for safety. Recognizing this can help users avoid unnecessary worry and ensure the longevity of their devices.
Overheating protection is a built-in mechanism designed to monitor the temperature of your vape device. When the internal temperature exceeds a certain threshold, the device will automatically shut down. This feature is particularly important for preventing battery damage and ensuring user safety. By understanding how this feature works, users can better manage their vaping experience.
Overheating can occur for several reasons, including:
- Continuous Use: Prolonged sessions without breaks can cause the device to heat up.
- Low Battery: A weak battery may struggle to power the device efficiently, leading to overheating.
- Blocked Airflow: Obstructions in the airflow can cause the device to work harder, generating excess heat.
To avoid overheating and ensure optimal performance, consider the following tips:
- Take Breaks: Allow your device to cool down between uses.
- Maintain Battery Health: Regularly check and replace batteries as needed.
- Keep Airflow Clear: Regularly clean your device to prevent blockages.
If your vape shuts off due to overheating, follow these steps:
- Turn Off the Device: Allow it to cool down completely before attempting to use it again.
- Check for Blockages: Inspect the airflow and clean any debris that may hinder performance.
- Inspect the Battery: Ensure that the battery is charged and functioning properly.
The overheating protection feature is not just a precaution; it is a vital component of modern vaping technology. By shutting down the device when temperatures rise, it helps prevent:
- Battery Damage: Overheating can lead to battery failure or even explosions in extreme cases.
- Device Malfunction: High temperatures can cause internal components to warp or fail.
- Health Risks: Excessive heat can produce harmful toxins in vapor.
In summary, recognizing the signs of overheating and understanding the protection mechanisms in place can greatly enhance your vaping experience. By taking proactive measures to prevent overheating, you can enjoy a safer and more satisfying experience while extending the lifespan of your vape device.

Is the E-Liquid Level Sufficient?
When using a vape device, one of the critical factors that can impact its performance is the level of e-liquid present in the tank. A low e-liquid level can sometimes affect device performance. Ensuring adequate liquid can prevent operational issues and enhance the overall vaping experience.
The e-liquid serves as the fuel for your vape device. Without sufficient liquid, the atomizer cannot function correctly, leading to potential problems such as dry hits or burnt coils. It’s essential to maintain the right level of e-liquid to ensure that the device operates smoothly and efficiently.
- Look at the tank: Most vape tanks have a transparent window that allows users to see the liquid level easily.
- Use a dipstick: For tanks without a clear view, a dipstick can help gauge the liquid level.
- Monitor usage: Keeping track of how much e-liquid you use can help you refill before it gets too low.
When the e-liquid level drops too low, several issues can arise. First, the atomizer may begin to produce a dry hit, which is an unpleasant experience characterized by a harsh, burnt taste. This occurs because the wick inside the atomizer is not saturated with liquid, leading to overheating and damage.
To avoid problems related to low e-liquid levels, consider the following tips:
- Regularly check your tank: Make it a habit to inspect your e-liquid levels frequently, especially if you are a heavy user.
- Keep a spare bottle handy: Having an extra bottle of e-liquid on hand ensures that you can refill your tank whenever necessary.
- Use a larger tank: If you find yourself frequently running low, consider upgrading to a tank with a larger capacity.
If you experience dry hits due to low e-liquid, the first step is to refill your tank immediately. After refilling, allow the device to sit for a few minutes to let the wick absorb the e-liquid properly. This will help restore optimal performance and prevent further damage to the atomizer.
Different e-liquids can have varying viscosities, which may affect how quickly they are consumed. Thicker e-liquids may take longer to deplete, while thinner liquids may require more frequent refills. Understanding the type of e-liquid you are using can help you manage your tank levels effectively.
Maintaining a sufficient level of e-liquid is vital for the optimal performance of your vape device. By regularly checking your tank, understanding the implications of low e-liquid, and taking preventive measures, you can ensure a smooth and enjoyable vaping experience.
How to Check E-Liquid Levels
Maintaining your vape device is essential for a satisfying experience, and one of the key aspects of this maintenance is regularly checking e-liquid levels. Many users overlook this important step, which can lead to a range of performance issues, including dry hits and burnt coils. Understanding how to effectively monitor and manage your e-liquid levels is crucial for ensuring your device operates smoothly and efficiently.
When your e-liquid level is low, the wick in your atomizer may not receive enough liquid to saturate properly. This can result in dry hits, which are not only unpleasant but can also damage your coil. Additionally, maintaining a sufficient e-liquid level ensures that the device functions correctly, providing consistent vapor production and flavor.
Checking e-liquid levels is a straightforward process, but it varies depending on the type of device you are using. Here are some general steps:
- Look Through the Window: Many vape tanks come with a transparent window that allows users to easily see the liquid level. Simply hold your device up to the light to assess how much e-liquid remains.
- Remove the Tank: If your device doesn’t have a window, you may need to remove the tank to check the liquid level. This method is more cumbersome but ensures you can see the actual amount of liquid inside.
- Feel the Weight: For devices with a sealed tank, you can often gauge the e-liquid level by the weight of the device. A lighter device usually indicates a lower e-liquid level.
It’s best to refill your e-liquid before it gets too low. A good rule of thumb is to refill when your tank is about one-quarter full. This practice not only prevents dry hits but also ensures that your wick remains adequately saturated, enhancing flavor and vapor production.
To keep your vape performing optimally, consider the following tips:
- Use Quality E-Liquids: High-quality e-liquids often have better viscosity, which helps maintain consistent wicking and reduces the chances of dry hits.
- Monitor Usage: Keep track of how quickly you go through e-liquid. This can help you anticipate when to refill and avoid running low unexpectedly.
- Store Properly: Always store your e-liquids in a cool, dark place to prevent degradation, which can affect both flavor and performance.
If you find yourself experiencing dry hits despite checking your e-liquid levels regularly, it may be time to consider other factors:
- Check the Coil: A burnt or old coil can also cause dry hits. If your coil is discolored or has been in use for an extended period, it may need replacement.
- Adjust Wattage: Sometimes, adjusting the wattage settings on your device can help improve wicking and vapor production.
By understanding and implementing these practices, you can significantly enhance your vaping experience. Regularly checking e-liquid levels not only helps maintain your device but also ensures that you enjoy every puff with optimal flavor and satisfaction.

Are There Any Faulty Components?
When it comes to vaping, users often encounter a myriad of issues that can disrupt their experience. One of the most significant problems arises from faulty components. These components can lead to various operational failures, and understanding how to identify and replace them is crucial for restoring functionality to your device.
Faulty components can be the root cause of many issues in vaping devices. Here are some critical parts to consider:
- Atomizer: The atomizer is responsible for heating the e-liquid to produce vapor. A malfunctioning atomizer can lead to poor vapor production or no vapor at all.
- Battery: A dead or damaged battery can prevent your vape from turning on. Regularly checking the battery’s health is essential.
- Connection Ports: These ports can accumulate debris, which may hinder connectivity and performance. Keeping them clean is vital.
- Coils: Worn-out or burnt coils can result in a burnt taste and reduced vapor quality. Replacing coils regularly can enhance your vaping experience.
Identifying faulty components requires a systematic approach. Here are some steps to diagnose the issue:
- Visual Inspection: Start by visually inspecting your vape. Look for any signs of wear, damage, or corrosion on the components.
- Functional Tests: Test each component individually. For instance, check if the battery is charging properly or if the atomizer heats up when activated.
- Cleaning: Regular cleaning can prevent many issues. Ensure that all parts, especially the connection ports, are free from debris.
If you identify a faulty component, replacing it is often the best course of action. Here are some tips:
- Purchase Quality Parts: Always opt for high-quality replacement parts from reputable manufacturers. This ensures compatibility and longevity.
- Follow Manufacturer Guidelines: Refer to the device’s manual for specific instructions on replacing components. This can prevent further damage.
- Seek Professional Help: If you’re unsure about replacing a component yourself, consider seeking help from a professional technician.
Preventative maintenance is key to ensuring the longevity of your vape. Here are some effective strategies:
- Regular Cleaning: Clean your device regularly to remove any residue that could affect performance.
- Proper Storage: Store your vape in a cool, dry place to avoid damage from extreme temperatures or moisture.
- Routine Checks: Make it a habit to check the battery, atomizer, and other components frequently to catch any issues early.
In summary, faulty components can significantly impact the performance of your vape. By understanding how to identify and replace these parts, as well as implementing regular maintenance practices, users can ensure a smoother and more enjoyable vaping experience.
Inspecting the Atomizer
The atomizer is a fundamental component of any vaping device, directly influencing the vapor production and overall experience. When users encounter issues with their vape not turning on, one of the first areas to inspect is the atomizer. A burnt or faulty atomizer can severely impact performance, leading to frustration and wasted time.
Understanding the role of the atomizer is essential. It is responsible for heating the e-liquid and converting it into vapor. If the atomizer is not functioning correctly, it may prevent the device from powering on altogether. This can occur due to several factors, including:
- Burnt Coils: Coils can burn out over time, especially with heavy usage or if the e-liquid is too thick. A burnt coil not only affects taste but can also lead to the device failing to activate.
- Clogged Wicks: If the wicks within the atomizer become clogged with residue, it can prevent proper e-liquid flow, leading to dry hits and potential device failure.
- Improper Assembly: If the atomizer is not correctly screwed onto the device, it can cause connectivity issues, leading to the vape not turning on.
To effectively inspect the atomizer, follow these steps:
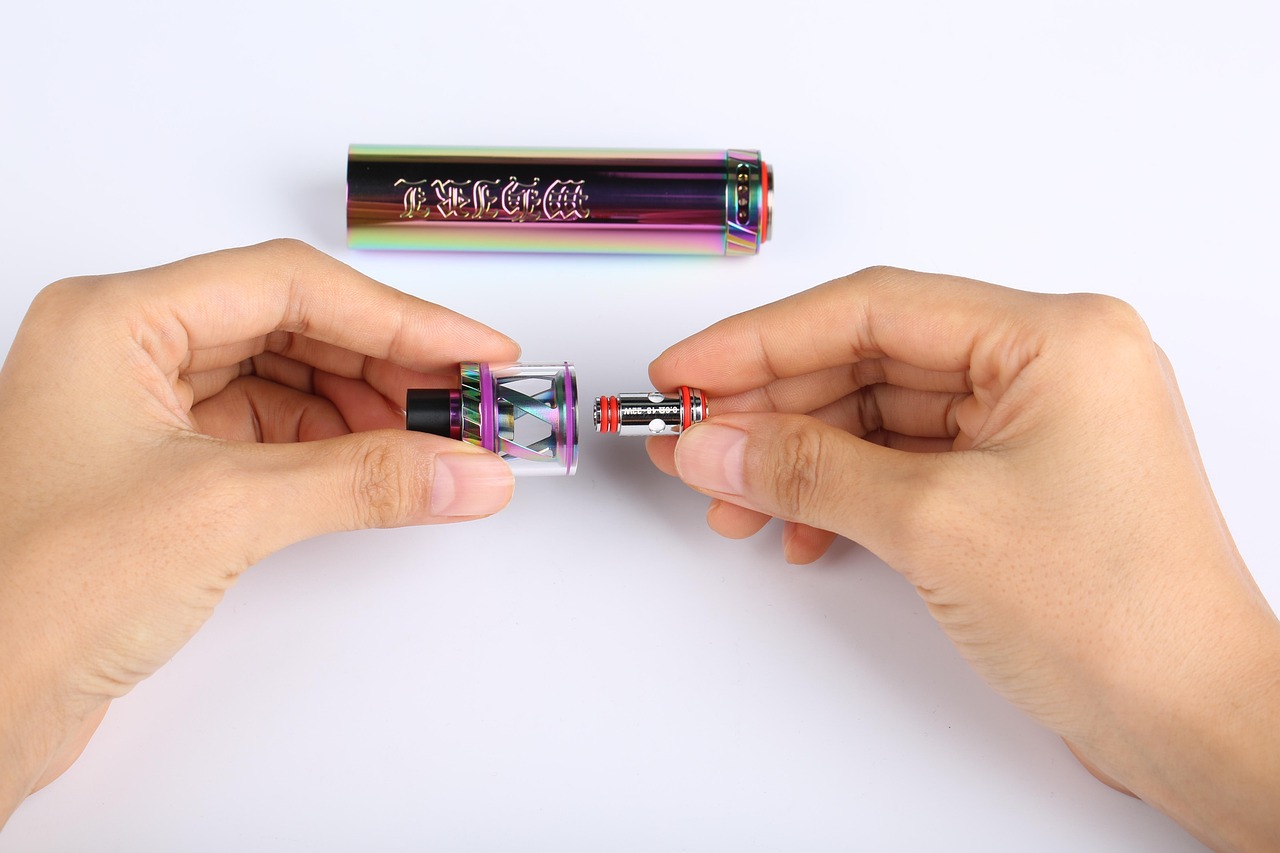
- Disassemble the Device: Carefully take apart your vape, ensuring you keep track of all components.
- Examine the Coils: Look for any signs of damage or discoloration. If the coils appear burnt or broken, it’s time for a replacement.
- Check the Wicks: Ensure that the wicks are saturated with e-liquid. If they appear dry or clogged, consider cleaning or replacing them.
- Reassemble and Test: After inspecting and making any necessary changes, reassemble the device and attempt to power it on.
Additionally, regular maintenance of the atomizer is crucial for optimal performance. Users should consider cleaning the atomizer regularly to prevent buildup and ensure proper airflow. This can be done by:
- Using Warm Water: Rinse the atomizer components with warm water to remove residue.
- Drying Thoroughly: Ensure all parts are completely dry before reassembling to avoid short circuits.
- Replacing Coils Periodically: Regularly changing coils based on usage can prevent issues related to burnt or faulty components.
In summary, the atomizer is a critical element of your vaping experience. Regular inspections and maintenance can prevent many issues, ensuring your device operates smoothly. If you find that replacing or cleaning the atomizer does not resolve the problem, it may be time to consider other components or consult a professional for further assistance.
Examining the Connection Ports
When it comes to maintaining the optimal performance of your vape device, is crucial. These ports are essential for ensuring a reliable connection between the battery and the atomizer, facilitating the vaporization process necessary for a satisfying vaping experience. Over time, however, these ports can accumulate debris and residue, which may hinder functionality.
The connection ports serve as the bridge between your vape’s battery and the atomizer. A clean and unobstructed port ensures that electrical signals flow smoothly, allowing the device to function as intended. If the ports are dirty or clogged, you may experience issues such as:
- Inconsistent Power Supply: A poor connection can lead to intermittent power, making your device unreliable.
- Reduced Vapor Production: Debris can obstruct the atomizer, resulting in less vapor and a less satisfying experience.
- Potential Damage: Accumulated dirt and grime can cause long-term damage to the device if not addressed promptly.
Regular maintenance is key to ensuring your vape operates smoothly. Here are some effective steps to clean your connection ports:
- Gather Your Supplies: You will need a soft cloth, cotton swabs, and isopropyl alcohol.
- Power Off Your Device: Always turn off your vape before cleaning to avoid any accidental activation.
- Wipe Down the Ports: Use a soft cloth to gently wipe around the connection ports, removing any visible debris.
- Use Cotton Swabs: Dampen a cotton swab with isopropyl alcohol and carefully clean inside the ports to remove stubborn residue.
- Let It Dry: Allow the ports to dry completely before reassembling and powering on your device.
To maintain optimal performance, it is recommended to clean your connection ports at least once a month. However, if you notice any issues with vapor production or inconsistent power, you should clean them immediately. Regular cleaning not only enhances performance but also prolongs the lifespan of your device.
Being aware of the signs that indicate your connection ports may need cleaning can save you from potential frustrations. Look out for:
- Frequent Misfires: If your device often fails to activate, it may be due to a poor connection.
- Strange Tastes: A burnt or unusual taste can signal that the atomizer is not functioning correctly due to debris.
- Physical Build-Up: Visible grime or residue around the ports is a clear indicator that it’s time for a cleaning session.
By regularly examining and cleaning your connection ports, you can ensure that your vape continues to deliver a satisfying experience. Keeping these components in good condition is a simple yet effective way to enhance the overall performance of your device.

Have You Tried Resetting Your Device?
When it comes to vaping, users often encounter various operational issues that can be frustrating. One effective solution that many overlook is resetting the device. Understanding how to reset a vape can be a quick and efficient way to resolve persistent problems, allowing users to enjoy their vaping experience without unnecessary interruptions.
Resetting a vape can address a variety of issues, such as:
- Software Glitches: Like any electronic device, vapes can experience software malfunctions. A reset can clear these issues.
- Battery Recognition Problems: Sometimes, the device may not recognize the battery properly, leading to a failure to turn on. A reset can help re-establish this connection.
- Temperature Control Issues: If the temperature settings are not functioning correctly, resetting the device can restore default settings.
Different vape models have varying methods for performing a reset. Here are some common techniques:
- Pressing the Power Button: For many devices, holding down the power button for a specific duration (usually 5-10 seconds) can initiate a reset.
- Using Menu Settings: Some advanced devices allow users to navigate through the menu to find a reset option. Refer to the user manual for guidance.
- Removing the Battery: If your vape uses a removable battery, taking it out and reinserting it after a brief pause can also act as a reset.
It’s important to know when a reset is necessary. Consider resetting your device if:
- You experience frequent misfires or inconsistent performance.
- The device fails to recognize the battery or atomizer.
- You encounter issues with the device’s settings, such as temperature control not responding.
While resetting can solve many issues, it’s also essential to perform regular maintenance:
- Keep Connections Clean: Ensure all connections, including battery contacts and atomizer connections, are clean and free from debris.
- Check for Updates: Some devices require firmware updates to function correctly. Check the manufacturer’s website for any updates.
- Monitor Battery Health: Regularly assess the battery’s health to determine if it needs replacement.
If you have attempted to reset your vape and the issues persist, it may be time to consider other factors:
- Inspect the Atomizer: A faulty or burnt atomizer may be the root cause of the problem. Replacing it can often restore functionality.
- Seek Professional Help: If troubleshooting fails, consulting with a professional can provide insights into more complex issues.
In conclusion, resetting your vape can be a simple yet effective solution to many operational problems. By understanding the reset process and recognizing when to apply it, users can enhance their vaping experience and minimize frustration. Regular maintenance and awareness of the device’s health are also crucial for optimal performance.
How to Perform a Reset
When it comes to troubleshooting your vape device, knowing how to perform a reset is crucial. Different devices have varying reset procedures, and familiarizing oneself with the specific reset method for their model can save time and prevent unnecessary frustration. Below, we explore the steps involved in resetting your device effectively.
Resetting your vape can help resolve a multitude of issues, from software glitches to unresponsive buttons. By performing a reset, you can restore the device’s original settings, often resolving problems that prevent it from functioning correctly.
- Button Combination Reset: Many devices require a specific combination of button presses to initiate a reset. For example, pressing the fire button and the plus button simultaneously for a few seconds might do the trick.
- Menu Settings Reset: Some advanced devices allow users to navigate through the menu to find a reset option. This is typically found under settings and may be labeled as “Factory Reset” or “Restore Default Settings.”
- Removing and Replacing the Battery: For devices with removable batteries, taking out the battery for a few minutes can sometimes reset the device. This method is particularly useful for mechanical vapes.
Here’s a step-by-step guide to help you reset your vape:
- Consult the User Manual: Always refer to the user manual specific to your model. This will provide you with the most accurate reset procedure.
- Power Off the Device: Ensure your vape is turned off before attempting a reset. This can help prevent accidental activation during the process.
- Perform the Reset: Depending on your device, follow the appropriate reset method as outlined above.
- Power On the Device: After resetting, turn your vape back on and check if the issues have been resolved.
If performing a reset does not resolve the issue, it may indicate a more serious problem with your device. In such cases, consider the following:
- Check for Firmware Updates: Some devices may require firmware updates that can enhance performance and fix bugs.
- Inspect Hardware Components: Look for any visible damage or wear on components like the atomizer, battery, or connection ports.
- Seek Professional Help: If you are unable to resolve the issue on your own, consider consulting a professional technician who specializes in vape repairs.
In conclusion, understanding how to reset your vape device can be a valuable skill. By following the correct procedures and knowing when to seek help, you can ensure that your vaping experience remains enjoyable and hassle-free.

When Should You Seek Professional Help?
When dealing with vape issues, many users find themselves in a frustrating situation when their device simply won’t turn on. While troubleshooting can often resolve minor problems, there are instances when seeking professional help becomes essential. Understanding when to consult an expert can save users both time and unnecessary stress.
Many vape users attempt to fix their devices through basic troubleshooting steps such as checking the battery, ensuring proper connections, and inspecting the atomizer. However, if these measures fail to yield results, it may indicate a deeper issue. Ignoring persistent problems can lead to further damage, making it crucial to know when to escalate the situation.
- Frequent Malfunctions: If your device frequently fails to power on or shuts off unexpectedly, it may be a sign of a serious issue.
- Unusual Noises: Any strange sounds coming from the device can indicate internal problems that require professional attention.
- Physical Damage: Visible signs of wear, such as cracks or dents, could affect the vape’s functionality and safety.
- Battery Swelling: A swollen battery is a major red flag and should be addressed immediately by a professional.
Continuing to use a malfunctioning vape can pose risks, including potential safety hazards. Issues such as overheating or battery failure can lead to dangerous situations. Therefore, it’s essential to prioritize safety and consult an expert if you notice any troubling signs.
Once you’ve determined that professional help is necessary, the next step is finding a reliable repair service. Here are some tips:
- Research Local Options: Look for vape shops or repair services in your area with positive reviews and recommendations.
- Check Certifications: Ensure that the technicians are certified and have experience with the specific type of vape you own.
- Ask About Warranty: Inquire if the repair service offers warranties on their work, providing peace of mind for your investment.
If you are unsure about where to go for repairs, consider reaching out to the manufacturer’s customer support. They can provide guidance on authorized service centers or troubleshooting steps tailored to your specific model.
After resolving your current issue, consider implementing preventive measures to avoid future problems:
- Regular Maintenance: Clean your vape regularly, including the battery contacts and atomizer, to ensure optimal performance.
- Proper Storage: Store your device in a cool, dry place to prevent damage from extreme temperatures and moisture.
- Battery Care: Follow best practices for battery care, including avoiding overcharging and using the correct charger.
In conclusion, understanding when to seek professional help is crucial for maintaining a safe and functional vaping experience. By recognizing the signs of major issues, finding reliable repair services, and taking preventive measures, users can enhance their vaping journey and avoid unnecessary frustration.
Identifying Signs of Major Issues
When it comes to vapes, understanding the is crucial for ensuring a smooth and enjoyable experience. Many users may overlook subtle indicators that suggest their device is not functioning correctly. Recognizing these signs early can help prevent further damage and save time and money in repairs or replacements.
There are several warning signs that may indicate your vape is experiencing serious problems:
- Inconsistent Vapor Production: If you notice a sudden drop in vapor output, it might be a sign of a failing atomizer or other internal components.
- Unusual Noises: Strange sounds, such as popping or crackling, can indicate issues with the coil or battery.
- Overheating: If your device becomes excessively hot during use or charging, it may be time to investigate potential problems.
- Frequent Battery Issues: If you find yourself constantly recharging or replacing batteries, it could indicate a deeper issue with the device.
Being aware of these signs is essential for several reasons:
- Preventing Further Damage: Addressing issues early can prevent more significant damage to your device, saving you from costly repairs.
- Ensuring Safety: Malfunctioning devices can pose safety risks, including battery leaks or overheating. Recognizing the signs can help ensure your safety.
- Making Informed Decisions: By understanding the symptoms of serious problems, users can make educated choices about whether to repair or replace their device.
Once you recognize the warning signs, diagnosing the problem becomes the next step. Here are some practical tips:
- Visual Inspection: Check for any visible damage to the device, such as cracks or corrosion.
- Battery Testing: Use a multimeter to check the voltage of your battery. If it’s below the recommended level, it may need replacement.
- Component Checks: Inspect the atomizer and other components for wear and tear. A burnt coil can significantly affect performance.
If you’ve tried troubleshooting and the device still shows signs of major issues, it may be time to seek professional assistance. Here are some indicators that you should consider:
- Persistent Problems: If issues persist despite your efforts, consulting an expert can provide solutions you may not have considered.
- Complex Repairs: Some repairs require specialized knowledge or tools, making it best to leave them to professionals.
- Warranty Considerations: If your device is still under warranty, seeking professional help can prevent voiding it.
In summary, recognizing the signs of major issues in your vape can significantly impact your user experience. By being vigilant and proactive, you can ensure your device operates smoothly and safely. Should you encounter persistent problems, don’t hesitate to reach out to a qualified technician for assistance.
Finding a Reliable Repair Service
When faced with issues regarding your vape, finding a reliable repair service can be a daunting task. With numerous options available, it is crucial to make an informed decision to ensure effective troubleshooting and repairs. Below are key considerations to help you choose the right service.
Selecting the right repair service can significantly impact the longevity and performance of your device. A qualified technician can accurately diagnose the problem, ensuring that the issue is resolved efficiently. This not only saves time but also minimizes the risk of further damage to your vape.
- Experience and Expertise: Look for services that have a proven track record in repairing vapes. Experienced technicians will be familiar with various brands and models, ensuring they can handle your specific device.
- Customer Reviews: Check online reviews and testimonials from previous customers. Positive feedback can indicate a reliable service, while negative reviews may be a red flag.
- Warranty on Repairs: A reputable repair service often provides a warranty on their work. This demonstrates confidence in their skills and offers you peace of mind.
- Transparency in Pricing: Ensure that the service provides clear and upfront pricing. Hidden fees can lead to unexpected costs, so it’s essential to understand the pricing structure before proceeding.
Conducting thorough research is vital in finding the right repair service. Start by searching online for local vape repair shops. Websites and social media platforms often provide insights into the services offered and customer interactions.
You can also ask for recommendations from friends or fellow vape enthusiasts. Personal experiences can lead you to trustworthy services that you might not find through a simple online search.
Choosing a local repair service comes with several advantages:
- Convenience: Local services are typically easier to access, allowing for quick drop-offs and pick-ups.
- Personalized Service: Smaller shops often provide more personalized attention, ensuring that your specific needs are addressed.
- Community Support: Supporting local businesses helps strengthen your community, fostering a healthier local economy.
If basic troubleshooting steps do not resolve your vape issues, it may be time to consult a professional. Signs that indicate the need for expert assistance include persistent malfunction, unusual noises, or physical damage to the device.
In conclusion, taking the time to research and choose the right repair service can lead to better outcomes for your vape. By focusing on the factors mentioned above, you can ensure that your device receives the care it needs, ultimately enhancing your vaping experience. Remember, a well-maintained vape not only performs better but also provides a safer and more enjoyable experience.
Frequently Asked Questions
- Why won’t my vape turn on?
If your vape won’t turn on, it could be due to a dead battery, loose connections, or safety features like a lock mode. Start by checking the battery charge and connections.
- How can I check if my battery is charged?
Most vapes have an indicator light that shows the battery status. If there’s no light, try charging it with the recommended charger for a few hours.
- What should I do if my vape is locked?
To unlock your vape, refer to the user manual for specific instructions. Typically, you may need to click the power button multiple times in quick succession.
- Can low e-liquid levels affect my vape?
Absolutely! Low e-liquid levels can lead to dry hits and may cause your vape to malfunction. Always keep an eye on your e-liquid levels.
- When should I consider getting my vape repaired?
If you’ve tried troubleshooting and your vape still won’t work, it might be time to seek professional help. Look for signs like unusual sounds or persistent error messages.


