
This article provides an in-depth guide on building your own vape coils, covering the necessary materials, techniques, and safety precautions to enhance your vaping experience.
Before starting, it’s essential to gather the right materials. Here’s a list of the necessary tools and components:
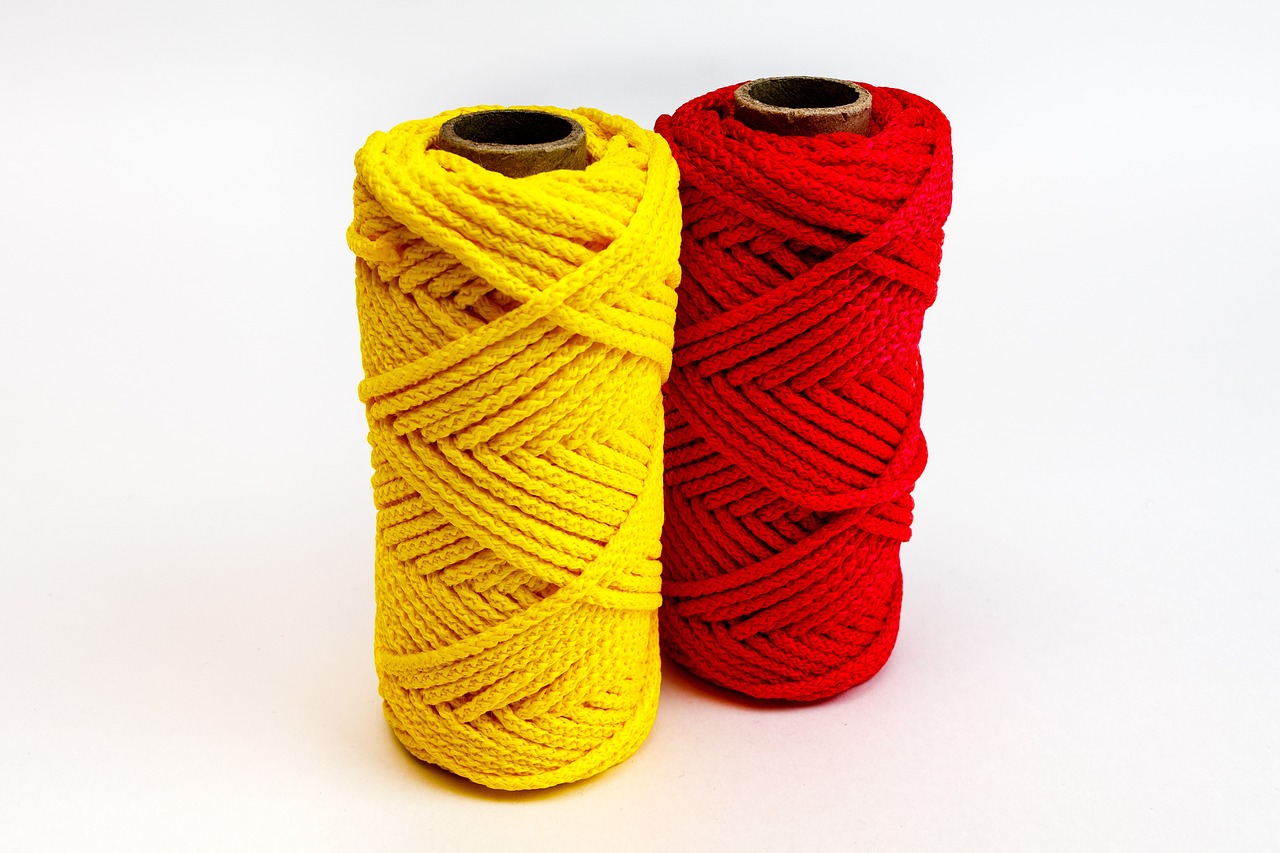
- Wire: Choose between Kanthal, stainless steel, or nichrome.
- Coil Jig: For creating uniform coils.
- Wire Cutters: To trim the wire to the desired length.
- Needle-Nose Pliers: For bending and shaping the wire.
- Multimeter: To measure resistance and ensure safety.
Selecting the appropriate wire is crucial for coil performance. Different wire types have unique properties:
- Kanthal: Known for its resistance and durability, making it a popular choice.
- Stainless Steel: Offers versatility and can enhance flavor.
- Nichrome: Heats up quickly and is often preferred for its low resistance.
Coil configuration significantly impacts vapor production and flavor. Here are some common designs:
- Single Coil: Easier to build and maintain, ideal for beginners.
- Dual Coil: Provides more vapor and flavor but requires more power.
- Clapton Coil: A complex design that enhances flavor due to its larger surface area.
Having the right tools makes coil building easier and safer. Essential tools include:
- Coil Jig: Helps in creating consistent and evenly spaced coils.
- Multimeter: Crucial for checking the resistance of your coils to prevent short circuits.
Building your first coil can be intimidating, but following these steps can simplify the process:
- Cut the Wire: Measure and cut a length of wire suitable for your coil type.
- Wrap the Coil: Use a coil jig to wrap the wire around the jig, maintaining consistent tension.
- Trim the Ends: Use wire cutters to trim the excess wire.
- Install the Coil: Securely place the coil into your atomizer.
- Test Resistance: Use a multimeter to check the resistance before vaping.
Safety is paramount when building coils. Here are essential safety measures:
- Test Resistance: Always test the resistance of your coils to avoid overheating and potential hazards.
- Use Quality Materials: Ensure you are using high-quality wire and tools to minimize risks.
- Follow Guidelines: Adhere to recommended guidelines for coil building to ensure a safe vaping experience.
By following this guide, you can enhance your vaping experience through the art of coil building. Remember, practice makes perfect, and always prioritize safety!
 1")
What Materials Do You Need to Build Vape Coils?
Building your own vape coils can be a rewarding and cost-effective venture for any vaping enthusiast. However, before diving into the intricate process of coil building, it is crucial to gather the right materials. This section will outline the essential tools and components necessary for constructing high-quality vape coils.
To successfully build vape coils, you will need a variety of materials and tools. Below is a comprehensive list of what you should have before starting your coil-building journey:
- Wire: The most fundamental component for coil building. Common choices include Kanthal, stainless steel, and nichrome. Each type offers different resistances and heating characteristics.
- Coil Jig: A coil jig is a handy tool that helps you create consistent and precise coils. It allows for various diameters and helps maintain uniform tension while wrapping the wire.
- Wire Cutters: Sharp wire cutters are essential for trimming your wire to the desired length, ensuring clean cuts and preventing frayed ends.
- Needle-Nose Pliers: These are useful for bending and adjusting the coils, allowing you to achieve the perfect shape and alignment.
- Multimeter: A multimeter is a crucial tool for checking the resistance of your coils. This ensures that you are within safe limits before using your coils in a vape device.
- Cotton or Wicking Material: This is necessary for wicking the e-liquid to the coil. Organic cotton is a popular choice due to its excellent absorption properties and clean flavor.
- Safety Gear: Always prioritize safety by wearing goggles and gloves when building coils. This protects you from potential injuries and ensures a safe working environment.
Having the right materials not only simplifies the coil-building process but also enhances the overall vaping experience. By investing in quality tools and components, you can ensure that your coils perform optimally, providing a satisfying and flavorful vape.
In conclusion, gathering the right materials is the first step toward successfully building your own vape coils. Each component plays a vital role in the process, from the wire you choose to the tools you use. With the right setup, you can create coils that deliver exceptional flavor and vapor production.
 2")
How to Choose the Right Wire for Your Coils?
Choosing the right wire for your vape coils is a fundamental aspect of coil building that directly impacts performance, flavor, and overall vaping experience. With a variety of wire types available, it can be challenging to determine which one best suits your needs. In this section, we will explore different wire types, their properties, and essential considerations for selecting the most appropriate wire for your coils.
- Kanthal Wire: A popular choice among vapers, Kanthal is known for its excellent resistance and durability. It heats evenly and retains heat well, making it ideal for a variety of vaping styles.
- Stainless Steel Wire: This wire type is versatile and offers unique benefits, such as improved flavor and the ability to be used in both wattage and temperature control modes.
- Nickel Wire: Nickel is primarily used for temperature control vaping due to its low resistance. However, it should be used with caution, as it can pose health risks if not handled properly.
- Titanium Wire: Titanium is another option for temperature control. It provides a clean flavor but requires careful handling to avoid overheating.
When choosing wire, consider the following properties:
- Resistance: The resistance of the wire affects how it heats up and how much power it requires. Lower gauge wires have lower resistance, while higher gauge wires have higher resistance.
- Durability: Some wires are more durable than others. For instance, Kanthal is known for its longevity, while nickel may degrade faster under certain conditions.
- Flavor Production: The type of wire can influence the flavor of your vape. Stainless steel is often preferred for its clean taste, while Kanthal is favored for its stability.
- Heat Resistance: Different wires have varying heat tolerances. Ensure that the wire you choose can handle the wattage you plan to use.
The gauge of the wire is critical in determining the coil’s resistance and heating time. A lower gauge wire (thicker) will have lower resistance and heat up faster, while a higher gauge wire (thinner) will have higher resistance and take longer to heat. Here are some tips for selecting the right gauge:
- For beginners, starting with a 26-28 gauge Kanthal wire is recommended for its balance of ease of use and performance.
- If you prefer a warmer vape, opt for a 22-24 gauge wire, as it will heat up faster and produce more vapor.
- For those who enjoy flavor over vapor production, a 30 gauge wire may be suitable, as it allows for finer control and better flavor.
Before installing your coils, it is crucial to test the wire for any inconsistencies in resistance. A multimeter can help ensure that the wire is functioning correctly and safely. This step is vital for preventing potential hazards, such as short circuits or overheating.
In summary, selecting the right wire for your vape coils involves understanding the properties of different wire types, considering their gauge, and testing for safety. By making informed choices, you can enhance your vaping experience and enjoy flavorful, satisfying clouds.
Kanthal vs. Stainless Steel: Which Is Better?
When it comes to building vape coils, one critical decision revolves around the choice of wire. Understanding the differences between Kanthal and stainless steel wire can significantly impact your vaping experience. Each type of wire offers unique benefits and drawbacks, making it essential to evaluate them based on your personal preferences and vaping style.
Kanthal wire is a popular choice among vapers due to its excellent resistance properties and durability. Made from an iron-chromium-aluminum alloy, Kanthal is known for its ability to withstand high temperatures without degrading. This wire type is primarily used in wattage mode vaping, where it provides a consistent and stable performance. Additionally, Kanthal coils are easy to work with, making them ideal for beginners.
- High Resistance: Kanthal has a high resistance, allowing for efficient heating and vapor production.
- Durability: Its robust nature ensures a longer lifespan, reducing the need for frequent replacements.
- Ease of Use: Kanthal is readily available and easy to manipulate, making it suitable for various coil builds.
Stainless steel wire is another popular choice that offers versatility and unique advantages. Unlike Kanthal, stainless steel can be used in both wattage and temperature control modes, providing vapers with more options for customization. It is made from a combination of iron and chromium, giving it excellent resistance to oxidation and corrosion.
- Versatility: Stainless steel can be used in different vaping modes, allowing for a more tailored experience.
- Flavor Enhancement: Many vapers report that stainless steel wire provides a cleaner flavor profile, enhancing the overall vaping experience.
- Quick Heating: Stainless steel wire heats up quickly, allowing for faster ramp-up times and improved performance.
While both Kanthal and stainless steel have their advantages, they also come with certain drawbacks. Kanthal wire does not work in temperature control mode, which may limit its appeal for those who prefer precise temperature settings. Additionally, it may not provide the same flavor clarity as stainless steel.
On the other hand, stainless steel wire can be more challenging to work with, especially for beginners. Its higher cost compared to Kanthal may also deter some vapers. Moreover, if not used correctly, it can lead to dry hits due to its rapid heating properties.
Ultimately, the choice between Kanthal and stainless steel wire depends on your vaping style and preferences. If you are looking for a straightforward, durable option that is easy to use, Kanthal may be the better choice. However, if you value versatility and flavor enhancement, stainless steel could be the way to go. It’s essential to consider your personal preferences and the type of vaping experience you desire.
In conclusion, both Kanthal and stainless steel have their unique benefits and drawbacks. Evaluating these factors can help you make an informed decision that enhances your overall vaping experience.
What is Kanthal Wire?
Kanthal wire has emerged as a favored choice among vapers due to its exceptional resistance properties and remarkable durability. This wire, made from a unique iron-chromium-aluminum alloy, is renowned for its ability to withstand high temperatures without losing structural integrity. This section will delve into the characteristics of Kanthal wire and why it has become a staple in the vaping community.
One of the primary reasons many vapers prefer Kanthal is its high resistance. This quality allows for the creation of coils that can produce significant vapor while maintaining a stable temperature. Additionally, Kanthal wire is available in various gauges, enabling users to customize their coils according to their specific vaping preferences. Whether you are looking for a low-resistance coil for intense flavor or a higher resistance for a cooler vape, Kanthal wire offers flexibility.
Furthermore, Kanthal wire is celebrated for its long lifespan. Unlike other materials that may degrade or corrode over time, Kanthal maintains its performance even after prolonged use. This durability means less frequent replacements, making it a cost-effective option for vapers. Users often report that Kanthal coils can last for weeks or even months, depending on their usage and maintenance habits.
Kanthal wire also has a unique heating profile. When heated, it provides a consistent and even heat distribution, which is essential for achieving the desired flavor and vapor production. This property is particularly beneficial for those who enjoy sub-ohm vaping, as it allows for rapid heating and cooling, enhancing the overall vaping experience.
Another significant advantage of Kanthal is its non-reactive nature. Unlike some other metals, Kanthal does not react with e-liquids, which means it won’t alter the flavor of your vape. This characteristic is crucial for flavor chasers who want to experience the true essence of their chosen e-liquids without any metallic aftertaste.
In summary, Kanthal wire is a top choice for coil building due to its resistance, durability, and non-reactive properties. Its ability to maintain performance over time, coupled with its versatility in various gauges, makes it an ideal material for both novice and experienced vapers. Whether you are building a simple coil or a complex configuration, Kanthal wire can deliver the performance you seek.
As you explore your options in coil building, consider the benefits of Kanthal wire. Its unique characteristics not only enhance your vaping experience but also contribute to a safer and more enjoyable session. With the right knowledge and materials, you can create coils that suit your vaping style perfectly.
What is Stainless Steel Wire?
Stainless steel wire is increasingly becoming a favored choice among vaping enthusiasts due to its unique properties that enhance the overall vaping experience. This wire is not just versatile but also plays a significant role in flavor enhancement, making it a compelling option for both beginners and seasoned vapers.
One of the standout features of stainless steel wire is its versatility. Unlike other wire types, such as Kanthal, stainless steel can be used in both temperature control and power mode vaping. This dual functionality allows vapers to customize their experience according to their preferences. Moreover, stainless steel wire has a higher resistance to oxidation, which means it can withstand higher temperatures without degrading, ensuring a longer lifespan for your coils.
Another significant advantage of using stainless steel wire is its ability to enhance flavor. Many vapers report that stainless steel provides a cleaner taste compared to Kanthal, which can sometimes impart a metallic flavor. This is largely due to the wire’s lower thermal mass, allowing it to heat up quickly and evenly, resulting in a more consistent flavor profile. Additionally, the smooth surface of stainless steel wire minimizes the risk of burnt or off-flavors, making it an ideal choice for flavor chasers.
When comparing stainless steel to Kanthal, there are several key differences to consider. Kanthal is a popular choice among vapers for its ease of use and affordability, but it lacks the versatility that stainless steel offers. While Kanthal is primarily used in power mode, stainless steel can adapt to temperature control settings, providing a more tailored vaping experience.
- Durability: Stainless steel wire is more durable than Kanthal, making it less likely to break or wear down over time.
- Temperature Control: Stainless steel allows for precise temperature control, reducing the risk of dry hits.
- Flavor Quality: Many vapers prefer the flavor produced by stainless steel due to its cleaner and more vibrant taste.
To maximize the benefits of stainless steel wire, it’s essential to understand how to use it properly. Here are some tips:
1. Always dry burn your coils before use to remove any impurities.2. Experiment with different gauges to find the right balance between flavor and vapor production.3. Use a regulated mod that supports temperature control to take full advantage of stainless steel's capabilities.
In summary, stainless steel wire offers unique benefits that make it a popular choice among vapers. Its versatility, flavor enhancement, and durability set it apart from other wire types like Kanthal. By understanding its properties and how to use it effectively, you can significantly improve your vaping experience.
How to Determine the Right Gauge for Your Coils?
When it comes to building vape coils, understanding the wire gauge is critical for achieving the desired vaping experience. The gauge of the wire directly influences the coil’s resistance and heating time, which in turn affects flavor and vapor production. In this section, we will explore how to select the right gauge based on your personal vaping preferences.
The wire gauge is a numerical representation of the wire’s diameter. A lower gauge number indicates a thicker wire, while a higher gauge number denotes a thinner wire. The thickness of the wire has a significant impact on the coil’s resistance, which is measured in ohms. Understanding this relationship is essential for achieving optimal performance from your vape setup.
Resistance plays a crucial role in how quickly a coil heats up. Thicker wires (lower gauge) typically have lower resistance, allowing for quicker heating times. Conversely, thinner wires (higher gauge) have higher resistance, which can lead to slower heating. This difference can affect your vaping experience in terms of flavor delivery and vapor production. For instance:
- Thicker Wires: Ideal for sub-ohm vaping, providing larger clouds and intense flavor.
- Thinner Wires: Better suited for mouth-to-lung (MTL) vaping, offering a tighter draw and a more controlled vaping experience.
Choosing the right gauge depends on several factors, including your vaping style, the type of device you are using, and your personal preferences. Here are some guidelines to help you make an informed decision:
- For Cloud Chasers: If you enjoy producing large clouds, consider using a 24-26 gauge wire. This gauge allows for lower resistance and faster ramp-up times, enhancing vapor production.
- For Flavor Seekers: If flavor is your primary concern, a 28-30 gauge wire may be more suitable. These thinner wires provide a slower heat-up time, allowing for more nuanced flavor profiles.
- For Versatility: A 26-28 gauge wire strikes a balance between flavor and vapor production, making it a good choice for those who enjoy both.
Once you’ve selected your wire gauge, it’s important to test your setup. Use a multimeter to check the resistance of your coil before using it in your device. This step is crucial for ensuring safety and optimal performance. Remember, using a coil with too low of a resistance in a device not designed for it can lead to dangerous situations.
In summary, the wire gauge you select for your coils significantly impacts your vaping experience. By understanding the relationship between gauge, resistance, and heating time, you can tailor your setup to match your specific preferences. Whether you’re seeking massive clouds or rich flavors, choosing the right wire gauge is a fundamental step in building the perfect coil.
 3")
What Are the Different Coil Configurations?
Understanding the various coil configurations is essential for any vaping enthusiast looking to enhance their experience. The design of your coil directly affects both vapor production and flavor delivery, making it a critical aspect of vaping. In this section, we will explore different coil designs and their unique advantages, helping you make informed choices for your vaping setup.
- Single Coils: These coils consist of one wire wrapped around a core. They are simple to build and offer a straightforward vaping experience. Single coils tend to produce less vapor compared to dual coils but can provide a more concentrated flavor.
- Dual Coils: Featuring two coils working in tandem, dual coils can significantly increase vapor production. They heat up faster and can create denser clouds, making them popular among cloud chasers. However, they may require more power and can drain battery life quicker.
- Clapton Coils: Named after the guitar string they resemble, Clapton coils are made by wrapping a thinner wire around a thicker core wire. This configuration increases the surface area, enhancing flavor and vapor production. Clapton coils are ideal for those seeking a rich flavor profile.
- Fused Clapton Coils: A variation of the Clapton coil, fused Claptons are made by twisting two core wires together before wrapping them with a thinner wire. This design offers even more surface area and improved flavor, making it a favorite among advanced vapers.
- Alien Coils: These intricate coils are crafted by wrapping multiple wires in a specific pattern, resembling the shape of an alien. They provide exceptional flavor and vapor due to their complex structure, but they can be challenging to build.
The configuration of your coil plays a pivotal role in determining how much vapor is produced. Single coils are generally more efficient for flavor but may not produce as much vapor as dual coils. Dual coils can handle higher wattages, resulting in larger vapor clouds. However, the choice of coil configuration should also align with your personal vaping style and preferences.
Flavor is another critical factor influenced by coil design. Clapton coils and their variations, such as fused Claptons and alien coils, are renowned for their ability to enhance flavor due to their larger surface area. The increased contact with the wick allows for better saturation and vaporization of e-liquid, resulting in a more pronounced flavor profile. In contrast, single coils might deliver a cleaner taste, especially with simpler e-liquids.
Your choice of coil configuration ultimately depends on your vaping goals. If you prioritize flavor, you might lean towards Clapton or alien coils. For those who enjoy producing large vapor clouds, dual coils may be the way to go. Additionally, consider your device’s capabilities and your own experience level when selecting a coil configuration.
In summary, understanding the various coil configurations can significantly enhance your vaping experience. By knowing the advantages and disadvantages of each type, you can tailor your setup to achieve the perfect balance of vapor production and flavor. Experimenting with different coils can lead to discovering your ideal vaping style.
Single vs. Dual Coils: What’s the Difference?
When it comes to vaping, coil configuration plays a pivotal role in determining your overall experience. Among the various configurations available, single coils and dual coils are the most commonly used. Each has its own set of advantages and disadvantages that can significantly impact flavor, vapor production, and battery life. This section will delve into the differences between these two popular coil setups, helping you make an informed decision based on your vaping preferences.
A single coil configuration consists of one coil wrapped around a wick. This setup is often favored by those who prefer a simpler vaping experience. The benefits of single coils include:
- Less Wattage Required: Single coils generally require less power to operate, making them ideal for vapers who want to conserve battery life.
- Enhanced Flavor: Many users report that single coils provide a purer flavor, as the vapor travels through a shorter path.
- Easier to Build: For beginners, single coils are less complex to build and install, reducing the risk of mistakes.
However, there are some drawbacks to consider:
- Lower Vapor Production: Single coils typically produce less vapor compared to dual coils, which may not satisfy cloud chasers.
- Limited Heat Retention: The single coil can cool down faster, potentially affecting the overall vaping experience.
Dual coils consist of two coils working in tandem, effectively doubling the surface area for heating the e-liquid. This configuration offers distinct advantages:
- Increased Vapor Production: With two coils, dual configurations can produce significantly more vapor, appealing to those who enjoy large clouds.
- Enhanced Heat Distribution: Dual coils can maintain a consistent temperature, providing a smoother vaping experience.
- Versatile Wattage Range: Users can adjust wattage to find their preferred balance between flavor and vapor production.
However, dual coils also come with their own set of challenges:
- Higher Power Consumption: Dual coils require more wattage, which can drain batteries faster and may lead to shorter vaping sessions.
- Complexity in Building: Building dual coils can be more intricate, requiring a higher skill level and more tools.
Ultimately, the choice between single and dual coils depends on your personal preferences and vaping style. If you prioritize flavor and simplicity, a single coil might be the best option. On the other hand, if you are looking for cloud production and versatility, dual coils could be the way to go. Consider your vaping habits, the type of device you use, and how much power you are willing to consume when making your decision.
In summary, understanding the differences between single and dual coils can greatly enhance your vaping experience. By weighing the pros and cons of each configuration, you can select the setup that best aligns with your preferences and lifestyle.
What is a Clapton Coil?
Clapton coils have gained popularity among vaping enthusiasts due to their unique structure and the enhanced flavor they provide. Unlike traditional coils, Clapton coils consist of a core wire wrapped in a thinner wire, which creates a coil that closely resembles a guitar string. This design not only increases the surface area of the coil but also improves the overall vaping experience.
Building a Clapton coil requires a few essential materials and tools. You’ll need:
- Core Wire: This is the primary wire around which the thinner wire will be wrapped. Common choices include Kanthal or stainless steel.
- Wrap Wire: A thinner wire that will be wrapped around the core wire. Often, a lower gauge wire is used for the wrap.
- Coil Jig: This tool helps maintain consistent coil diameter.
- Drill or Power Tool: A drill can facilitate the wrapping process, making it quicker and more efficient.
Clapton coils offer several advantages that make them a preferred choice for many vapers:
- Improved Flavor: The larger surface area allows for better vaporization of e-liquid, resulting in richer flavor profiles.
- Increased Vapor Production: The unique structure of Clapton coils contributes to denser vapor clouds, enhancing the overall vaping experience.
- Versatility: Clapton coils can be used in various setups, including single and dual coil configurations, making them adaptable to different vaping styles.
- Customizability: Vapers can experiment with different wire gauges and materials to create coils tailored to their preferences.
Creating your own Clapton coil may seem daunting, but with practice, it becomes easier. Here’s a step-by-step guide:
1. Cut your core wire to the desired length.2. Secure one end of the core wire in a drill.3. Attach the wrap wire to the core wire and start the drill.4. Carefully wrap the wrap wire around the core wire, ensuring consistent tension.5. Once finished, cut the wires and remove the coil from the drill.6. Trim the ends and shape the coil as needed.
While there are various coil types available, Clapton coils stand out due to their unique design and performance characteristics. Here are some reasons to consider them:
- Enhanced Flavor Delivery: The way Clapton coils heat the e-liquid results in a more flavorful and enjoyable vaping experience.
- Better Heat Distribution: The structure allows for even heating, reducing the risk of hot spots.
- Longer Lifespan: With proper care and maintenance, Clapton coils can last longer than traditional coils, providing more value.
In summary, Clapton coils are an excellent choice for vapers looking to enhance their experience through improved flavor and vapor production. With the right materials and techniques, anyone can build their own Clapton coils and enjoy the benefits they offer.
 4")
What Tools Are Essential for Coil Building?
Building your own vape coils can be a rewarding experience, but it requires the right tools to ensure the process is both efficient and safe. In this section, we will explore the essential tools needed for coil building, detailing their functions and significance in achieving high-quality results.
- Coil Jig: A coil jig is an indispensable tool for creating consistent and evenly spaced coils. It allows users to easily wrap the wire around a rod, ensuring that each coil is uniform in size and shape. This consistency is crucial for achieving optimal performance in your vaping device.
- Wire Cutters: Sharp wire cutters are essential for trimming your wire to the desired length. Using a quality pair ensures clean cuts, preventing frayed ends that can complicate the coil installation process.
- Needle Nose Pliers: These pliers are perfect for gripping and bending wire. They are particularly useful for making adjustments to your coils and for securing the wire tightly around the coil jig.
- Multimeter: A multimeter is crucial for checking the resistance of your coils before use. This tool helps ensure that your coils are safe to use and function within the desired parameters. Understanding how to use a multimeter can prevent potential hazards related to improper resistance levels.
- Scissors: While wire cutters are great for trimming wire, a good pair of scissors is necessary for cutting wicking material. Properly cut wicks enhance the coil’s performance and flavor delivery.
- Wicking Material: Although not a tool per se, having the right wicking material is essential. Cotton is the most popular choice due to its excellent absorption properties and ability to deliver flavor effectively.
- Safety Gear: Safety goggles and gloves should not be overlooked. These items protect you from potential injuries while working with tools and materials that can pose a risk.
Each of these tools plays a vital role in the coil-building process. By equipping yourself with the right tools, you can enhance your coil-building experience, ensuring it is both efficient and safe. Proper preparation and the use of quality tools will ultimately lead to a more satisfying vaping experience.
In conclusion, investing in the right tools is essential for anyone looking to build their own vape coils. Not only do they make the process easier, but they also help ensure that your coils are built to last and perform optimally. Whether you are a novice or an experienced builder, having these tools at your disposal will significantly improve your coil-building endeavors.
What is a Coil Jig?
A coil jig is an essential tool for anyone serious about building their own vape coils. This tool simplifies the process of creating consistent and precise coils, which are crucial for achieving optimal performance in vaping. In this section, we will delve into the importance of a coil jig and provide a comprehensive guide on how to use it effectively.
The significance of a coil jig cannot be overstated. When building coils, consistency is key. A coil jig helps in maintaining uniformity in the winding process, which directly affects the resistance and heating characteristics of the coil. Without the use of a coil jig, achieving the same number of wraps and maintaining even tension can be challenging, leading to variations in coil performance.
Using a coil jig is straightforward, but following the right steps ensures the best results. Here’s a step-by-step guide:
- Gather Your Materials: Before you start, ensure you have your coil jig, wire, and wire cutters ready.
- Choose the Right Size: Most coil jigs come with multiple posts to accommodate different coil sizes. Select the post size that matches your desired coil diameter.
- Wrap the Wire: Secure one end of the wire into the designated slot on the jig. Begin wrapping the wire around the post, maintaining even tension as you go. The jig will help you keep the wraps neat and uniform.
- Count the Wraps: As you wrap, keep track of the number of wraps you make. This is crucial for calculating the resistance of your coil.
- Remove the Coil: Once you have reached the desired number of wraps, carefully remove the coil from the jig. You can then shape it as needed.
Utilizing a coil jig offers several benefits:
- Consistency: Achieve uniform coils every time, enhancing performance.
- Efficiency: Save time by simplifying the wrapping process.
- Precision: Easily create coils with the exact number of wraps needed for your vaping preferences.
While using a coil jig can make the process easier, there are some common pitfalls to watch out for:
- Inconsistent Tension: Ensure you maintain even tension while wrapping to avoid uneven coils.
- Incorrect Post Selection: Using the wrong post size can lead to coils that do not fit your atomizer.
- Neglecting Safety: Always follow safety precautions when working with wire and tools to prevent accidents.
In conclusion, a coil jig is an invaluable tool for both beginners and experienced vapers looking to build their own coils. By understanding its importance and learning how to use it effectively, you can enhance your vaping experience significantly. Embrace the precision and consistency that a coil jig provides, and take your coil-building skills to the next level.
Why Do You Need a Multimeter?
When it comes to building your own vape coils, having the right tools is essential for both performance and safety. One of the most important tools in your arsenal is a multimeter. This device allows you to measure electrical properties such as resistance, voltage, and current, making it an invaluable asset during the coil-building process.
A multimeter is crucial for checking resistance and ensuring safety. When you build coils, the resistance of the wire directly affects the vaping experience. If the resistance is too low, it can lead to overheating and potentially hazardous situations. Therefore, knowing how to use a multimeter effectively is vital.
Using a multimeter may seem daunting at first, but it is straightforward. Here’s a step-by-step guide:
- Set the Multimeter: Turn on the multimeter and set it to the resistance (Ω) measurement mode.
- Connect the Probes: Insert the black probe into the COM port and the red probe into the VΩmA port.
- Measure Resistance: Touch the probes to the ends of the coil wire. The display will show the resistance reading.
It’s important to note that the resistance value you get will depend on the wire gauge and the number of wraps you have made. A lower resistance value can indicate a short circuit, which is a serious safety concern.
Testing the resistance of your coils is not just a recommendation; it is a necessity. Here are a few reasons why:
- Safety: High resistance can help prevent overheating, which is essential to avoid battery failures.
- Performance: The right resistance ensures that your coil heats evenly, producing better flavor and vapor.
- Compatibility: Different devices have specific resistance requirements. Using a multimeter helps ensure your coils are compatible with your device.
When using a multimeter, there are common mistakes that beginners often make:
- Not Zeroing the Multimeter: Always check that the multimeter is calibrated before taking measurements.
- Ignoring the Readings: Pay attention to the resistance readings; if they seem off, double-check your connections and coil configuration.
- Neglecting Battery Safety: Always ensure your multimeter is rated for the voltages you are working with, especially in high-wattage builds.
In conclusion, a multimeter is an indispensable tool for anyone serious about building vape coils. It not only ensures that your coils are safe and functional but also enhances the overall vaping experience. By understanding how to effectively use a multimeter, you can build coils with confidence, knowing that you are prioritizing both performance and safety.
 5")
How to Build Your First Coil: A Step-by-Step Guide?
Building your first coil can indeed feel intimidating, especially for beginners. However, with the right guidance and a clear understanding of the process, you can successfully create your own coils. This section provides a detailed, step-by-step guide to help you navigate through the coil-building journey with confidence.
Before diving into coil building, it’s essential to gather all necessary materials. Here’s a quick list of what you will need:
- Wire: Kanthal or stainless steel, depending on your preference.
- Coil jig: For consistent coil wraps.
- Wire cutters: To trim your wire accurately.
- Tweezers: For adjusting coils during installation.
- Multimeter: To check resistance and ensure safety.
Start by measuring the length of wire you need. A good starting point is around 6-8 inches. Use your wire cutters to cut the wire neatly. Make sure the ends are clean to avoid any issues during wrapping.
Next, take your coil jig and insert the wire. Begin wrapping the wire around the jig tightly and evenly. Aim for 5-10 wraps depending on your desired resistance. Ensure that the wraps are close together for optimal performance.
Once you have wrapped the coil, carefully remove it from the jig. Use your tweezers to shape the coil, ensuring that it is uniform. This step is crucial for achieving even heating when you vape.
Now it’s time to install your coil. Place the coil into the deck of your atomizer, ensuring it fits snugly. Use your screwdriver to tighten the screws and secure the coil in place. Double-check that the coil is positioned correctly to avoid any short circuits.
Before you start vaping, it’s essential to test the resistance of your coil using a multimeter. This step ensures that your coil is safe to use and operates within the desired range. A resistance of 0.2 to 1.0 ohms is typically ideal for most vapers.
After confirming the resistance, it’s time to wick your coil. Cut a piece of cotton to fit snugly into the coil. Insert the cotton and trim any excess. Make sure the wick is not too tight, allowing for proper juice flow.
Finally, before you start vaping, it’s crucial to prime your coil. Apply a few drops of e-liquid directly onto the cotton wick to saturate it. This step prevents dry hits and ensures a smooth vaping experience.
By following these steps, you will have successfully built your first vape coil. Remember, practice makes perfect, so don’t be discouraged if your first attempt isn’t flawless. With time and experience, you will become more proficient and confident in your coil-building skills.
How to Wrap Your Coil?
Wrapping your coil correctly is essential for achieving optimal vape performance. A well-wrapped coil ensures that the wire is evenly tensioned and properly aligned, which significantly impacts the flavor and vapor production. This section will guide you through the coil wrapping process step by step, highlighting key techniques to enhance your vaping experience.
When you wrap your coil, you are essentially creating a heating element that will vaporize your e-liquid. If the coil is wrapped improperly, it can lead to uneven heating, hot spots, and even dry hits. Therefore, paying attention to tension and alignment is crucial.
- Gather Your Materials: Before you start, ensure you have your wire, coil jig, and scissors ready. Having everything at hand will streamline the process.
- Choose the Right Gauge: The wire gauge affects the resistance and heating time of your coil. Select a gauge that suits your vaping preferences.
- Secure the Wire: Insert one end of the wire into the coil jig and secure it tightly. This will act as your anchor point.
- Begin Wrapping: Start wrapping the wire around the jig. Aim for even spacing between each wrap to ensure consistent heating. Use your fingers to apply light tension while wrapping.
- Check for Alignment: After wrapping, inspect the coil closely. Each loop should be parallel and evenly spaced. Misalignment can lead to poor performance.
- Trim Excess Wire: Once you have achieved the desired number of wraps, trim the excess wire, leaving enough length to attach to your atomizer.
- Final Inspection: Double-check the coil for any irregularities. A well-wrapped coil should be tight, evenly spaced, and free of any kinks.
Even experienced vapers can make mistakes when wrapping coils. Here are some common pitfalls to avoid:
- Uneven Tension: Applying too much or too little tension can lead to uneven heating. Aim for a balance.
- Incorrect Spacing: Gaps between wraps can cause hot spots, which can ruin the vaping experience.
- Overheating: If you notice your coil glowing unevenly, it may be time to re-wrap.
After wrapping your coil, it’s essential to test its resistance using a multimeter. This step ensures that your coil is safe to use and helps you avoid potential hazards.
In summary, wrapping your coil correctly is a vital skill for any vaper. By following these steps and avoiding common mistakes, you can ensure that your coils perform at their best, providing you with an enjoyable vaping experience. Remember, practice makes perfect, so don’t hesitate to experiment with different wrapping techniques to find what works best for you.
How to Install Your Coil in the Atomizer?
Installing your coil in the atomizer is a crucial step in achieving optimal performance and flavor from your vape setup. A well-installed coil not only enhances vapor production but also ensures safety during use. Below, we will cover the essential steps for securely installing your coil in the atomizer, along with important tips to keep in mind.
- Gather Your Tools: Before you begin, ensure you have the necessary tools at hand, including a screwdriver, tweezers, and your coil.
- Prepare the Atomizer: Start by disassembling your atomizer. Remove the tank and any existing coils. This will give you a clear workspace.
- Insert the Coil: Take your coil and carefully insert it into the designated slots in the atomizer base. Make sure it is aligned properly to avoid any misfires.
- Secure the Coil: Using your screwdriver, tighten the screws on the coil terminals. Ensure the coil is firmly in place, but be cautious not to overtighten, as this can damage the coil or the atomizer.
- Trim Excess Wire: If your coil has excess wire, use wire cutters to trim it down to avoid any short circuits. The ends should be flush with the atomizer base.
- Check the Alignment: After securing the coil, use tweezers to gently adjust it, ensuring it sits evenly and does not touch the atomizer’s walls. A misaligned coil can lead to uneven heating.
- Wicking the Coil: Once the coil is installed, it’s time to add your wick. Cut your cotton to the appropriate length and insert it into the coil, ensuring it is snug but not overly tight.
- Prime the Coil: Before using your new coil, it’s essential to saturate the wick with e-liquid. This prevents dry hits and extends the life of your coil.
- Always Test Resistance: Before firing up your coil, use a multimeter to check the resistance. This is crucial for safety and performance.
- Be Mindful of Temperature: When installing your coil, remember that different materials have varying temperature tolerances. Make sure your setup matches the coil’s specifications.
- Regular Maintenance: Keep your atomizer clean and regularly check your coils for wear and tear to maintain optimal performance.
Following these steps will help ensure that your coil is installed correctly, maximizing your vaping experience. Proper coil installation is not just about performance; it’s also about safety. By taking the time to do it right, you can enjoy flavorful vapor and peace of mind.
 6")
What Safety Precautions Should You Take?
When it comes to building coils for vaping, safety is of utmost importance. This section will provide you with essential safety precautions that every vaper should adhere to in order to prevent accidents and ensure a secure vaping experience.
Building your own coils can be rewarding, but it also comes with risks. By following these guidelines, you can significantly reduce the chances of mishaps:
- Always Use a Multimeter: Before using any coil, it’s crucial to test its resistance with a multimeter. This device helps you verify that the coil’s resistance is within safe limits. Failure to do so can result in overheating and potential damage to your device.
- Understand Ohm’s Law: Familiarize yourself with Ohm’s Law to calculate the safe wattage for your coils. Knowing how to calculate the voltage, resistance, and current is essential for safe vaping.
- Use Quality Materials: Always use high-quality wire and wicking materials. Low-quality products can lead to dangerous situations, such as short circuits or the release of harmful substances when heated.
- Check for Shorts: After building your coil, ensure there are no shorts. A short circuit can occur when the coil wire touches itself or the atomizer body, leading to potential failure of your device.
- Monitor Battery Safety: Use batteries that are rated for the resistance of your coils. Always check the battery’s specifications and avoid using damaged or old batteries, as they can pose serious risks.
- Keep Your Workspace Clean: A cluttered workspace can lead to accidents. Ensure your work area is tidy, and keep tools organized to avoid misplacing essential items.
- Be Aware of Temperature: Overheating can be a significant issue. Regularly check the temperature of your device during use to prevent overheating and potential burns.
- Educate Yourself: Stay informed about the latest safety guidelines and best practices in coil building. Join vaping communities, read articles, and watch tutorials to enhance your knowledge.
By adhering to these safety precautions, you can build coils with confidence and enjoy a safer vaping experience. Remember, the goal is to create a satisfying and enjoyable vaping experience while minimizing risks. Always prioritize safety, and happy vaping!
Why Is It Important to Test Resistance?
When it comes to building your own vape coils, testing the resistance of your coils is not just a recommended practice; it is a critical safety measure that can prevent potentially dangerous situations. This section will guide you through the process of testing resistance and highlight the risks associated with neglecting this essential step.
Coil resistance is measured in ohms, and it plays a vital role in the performance of your vaping device. The resistance of a coil affects the amount of current that flows through it, which in turn influences vapor production and flavor intensity. A coil with too low of a resistance can lead to excessive current flow, resulting in overheating and possible damage to your device.
- Gather Your Tools: You will need a multimeter, which is essential for accurately measuring the resistance of your coils.
- Set the Multimeter: Ensure your multimeter is set to the appropriate resistance measurement mode (ohms).
- Connect the Probes: Attach the multimeter probes to the ends of the coil. Make sure that there is no power going to the coil during this process.
- Read the Measurement: Observe the reading on the multimeter. A typical resistance for most vape coils ranges from 0.1 to 3.0 ohms, depending on your setup.
Failing to test the resistance of your coils can lead to several significant risks:
- Overheating: If the resistance is too low, the coil may draw too much power, causing it to overheat. This can lead to burnt wicks and even potential battery failure.
- Battery Damage: Using a coil with incorrect resistance can strain your battery, leading to malfunction or, in extreme cases, an explosion.
- Inconsistent Vaping Experience: Incorrect resistance can result in a poor vaping experience, with uneven heating and flavor production.
To mitigate risks, always follow these best practices:
- Double-Check Your Readings: Always verify the resistance readings multiple times before using the coil.
- Use Quality Materials: Ensure you are using high-quality wire and components to minimize the risk of failure.
- Stay Informed: Keep up with the latest safety guidelines and best practices in the vaping community to enhance your knowledge and skills.
In summary, testing the resistance of your coils is a vital step in ensuring a safe and enjoyable vaping experience. By understanding how to measure resistance and recognizing the risks of neglecting this step, you can build coils with confidence and enhance your overall vaping journey.
What Are the Risks of Building Coils Incorrectly?
Building vape coils can be an exciting and rewarding hobby, but it comes with its share of responsibilities. Understanding the risks associated with improper coil building is crucial for ensuring a safe vaping experience. This section delves into the potential hazards and emphasizes the importance of adhering to safety guidelines.
Improper coil building can lead to a variety of dangerous situations that pose risks not only to the user but also to those around them. Here are some of the major risks:
- Short Circuits: One of the most common issues arises from short circuits, which occur when the coil wire touches the atomizer’s metal parts. This can cause excessive heat, potentially leading to battery failure or even explosions.
- Overheating: If the coil’s resistance is too low, it can draw too much current from the battery. This can cause the battery to overheat, resulting in damage or, in severe cases, a thermal runaway situation.
- Incorrect Resistance: Failing to test the resistance of your coils can lead to using a coil that draws more power than your device can handle. This can compromise the device’s safety features and lead to malfunctions.
- Poor Quality Builds: Using low-quality materials or improper techniques can lead to uneven heating and poor vapor production. This not only diminishes the vaping experience but can also result in burnt coils that release harmful substances.
- Inhalation of Toxic Fumes: When coils are built incorrectly or used with inappropriate materials, they can emit toxic fumes. This can happen when the wire is not suitable for vaping or when the coil is overheated.
Following established safety guidelines is essential for minimizing the aforementioned risks. Here are some key reasons:
- Ensuring Device Compatibility: Understanding your device’s specifications helps in selecting the right wire and coil configuration, reducing the likelihood of accidents.
- Enhancing Performance: Proper coil building techniques lead to better vapor production and flavor, enhancing your overall vaping experience.
- Preventing Accidents: Adhering to safety measures, such as using a multimeter to check resistance and ensuring proper installation, can prevent hazardous situations.
- Protecting Your Health: Safe coil building practices reduce the risk of inhaling harmful substances, ensuring a healthier vaping experience.
In conclusion, the importance of proper coil building cannot be overstated. By understanding the risks associated with improper techniques and committing to safety guidelines, vapers can enjoy a safer and more satisfying experience. Always remember, safety first!
Frequently Asked Questions
- What materials do I need to build vape coils?
To build your own vape coils, you’ll need essential materials such as wire (Kanthal or stainless steel), a coil jig, cotton wicking material, and tools like pliers and scissors. Having a multimeter handy is also crucial for checking resistance.
- How do I choose the right wire for my coils?
Selecting the right wire depends on your vaping style. Kanthal is great for beginners due to its durability, while stainless steel offers better flavor. Consider your preferences in terms of resistance and heating time when making your choice.
- What is the difference between single and dual coils?
Single coils are simpler and easier to build, providing a more straightforward vaping experience. Dual coils, on the other hand, can enhance vapor production and flavor but require more skill to build correctly. It’s all about what you prefer!
- Why is it important to test the resistance of my coils?
Testing resistance is vital for safety. It ensures your coils are functioning correctly and helps prevent potential hazards like overheating or battery failure. Always use a multimeter to check before you vape!
- What are the risks of building coils incorrectly?
Improper coil building can lead to dangerous situations, including short circuits and battery explosions. Always follow safety guidelines, and don’t skip the resistance testing!


