
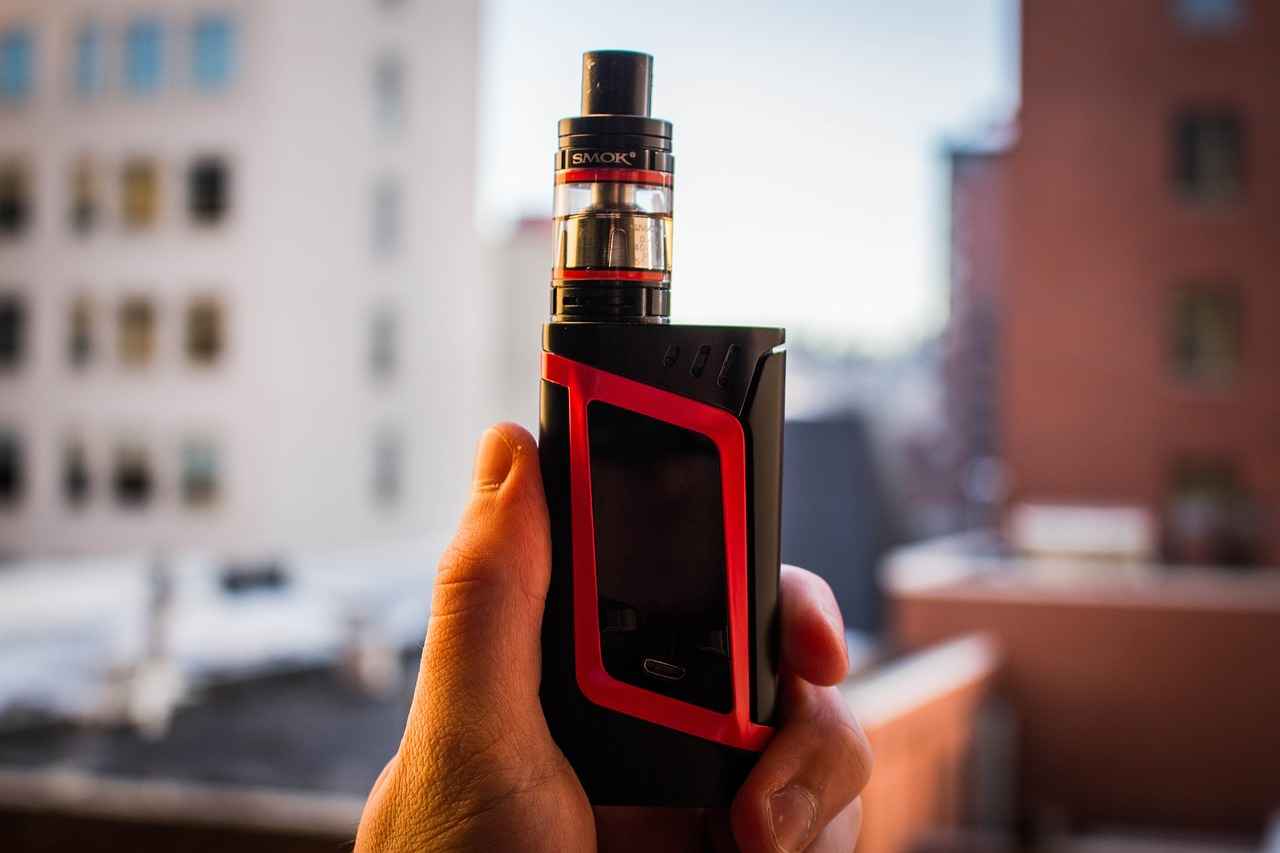
Priming a vape coil is a fundamental step for anyone looking to enhance their vaping experience. This process involves saturating the coil with e-liquid before use, ensuring optimal performance and preventing the dreaded dry hit. In this article, we will delve into the significance of priming, methods to do it effectively, and tips to improve your overall vaping experience.
Priming a vape coil refers to the process of preparing the coil by soaking it with e-liquid. This is essential for ensuring that the coil heats evenly and produces flavorful vapor. Without proper priming, the coil may not perform at its best, leading to a less satisfying vaping experience.
Understanding the importance of priming is crucial. Neglecting this step can lead to dry hits, which occur when the coil is not adequately saturated. These dry hits not only ruin the flavor but can also damage the coil over time. By priming your coil, you maintain the integrity of the flavor and extend the life of your vaping equipment.
Recognizing a dry hit is essential for improving your vaping experience. Common signs include:
- A harsh or burnt taste
- Reduced vapor production
- Unpleasant throat irritation
If you experience any of these symptoms, it may be time to check your coil and consider re-priming.
Before starting the priming process, gather the following materials:
- E-liquid of your choice
- Vape device
- Coil (new or cleaned)
- Paper towel or cloth for cleanup
Having these items ready will streamline the priming process.
Here’s a straightforward guide to properly prime your vape coil:
1. Remove the coil from your device.2. Inspect the coil for any damage or wear.3. Apply a few drops of e-liquid directly onto the cotton wicking material.4. Fill the tank with e-liquid.5. Allow the coil to sit for 5-10 minutes before use.
Following these steps will ensure that your coil is adequately primed and ready for a flavorful vaping experience.
Avoiding common pitfalls can significantly enhance your vaping experience. Some frequent mistakes include:
- Over-saturating the coil, leading to flooding
- Not allowing enough time for the e-liquid to soak in
- Using e-liquid that is too thick, which can hinder absorption
Being aware of these mistakes can help you achieve better results.
Timing is crucial after priming your coil. It is generally recommended to wait at least 5 to 10 minutes after saturating the coil before using your device. This waiting period allows the e-liquid to fully penetrate the cotton and ensures a smooth vaping experience.
To extend the life of your vape coil and maintain flavor integrity, consider the following tips:
- Regularly clean your tank and coil to prevent residue buildup.
- Use e-liquids with appropriate viscosity for your coil type.
- Replace coils regularly to avoid degradation of flavor.
By following these maintenance tips, you can enjoy a consistent and flavorful vaping experience.

What is Priming a Vape Coil?
Understanding the concept of priming is essential for every vaper. It involves saturating the coil with e-liquid to ensure optimal performance and prevent dry hits. When you first install a new coil in your vape, it is crucial to properly prime it before use. This process not only enhances the flavor of your vape but also significantly extends the lifespan of the coil itself.
Priming a vape coil is straightforward, yet many new vapers overlook this critical step. When a coil is dry, it can lead to burnt hits, which are unpleasant and can ruin your vaping experience. By ensuring that the coil is adequately saturated with e-liquid, you allow the wick to absorb the liquid, preventing any damage that could occur from overheating.
So, how do you effectively prime your vape coil? The process generally involves a few simple steps:
- Remove the Coil: Take out the coil from your tank.
- Inspect the Coil: Look for any visible damage or defects.
- Apply E-Liquid: Place a few drops of e-liquid directly onto the wicking holes of the coil. This allows the wick to absorb the liquid efficiently.
- Reassemble: Put the coil back into the tank, ensuring it’s securely in place.
- Fill the Tank: Fill the tank with your preferred e-liquid, making sure not to overfill.
- Let it Sit: Allow the tank to sit for about 5-10 minutes. This waiting period ensures that the wick is fully saturated.
It is also important to note that different coils may require varying amounts of e-liquid for priming. For instance, sub-ohm coils often need more liquid compared to standard coils. Additionally, using a thicker e-liquid can slow down the saturation process, so be mindful of the viscosity of the liquid you choose.
Neglecting to prime your coil can lead to several issues, including:
- Dry Hits: This occurs when the coil overheats due to insufficient e-liquid, resulting in a harsh and burnt taste.
- Shortened Coil Lifespan: Regularly experiencing dry hits can damage the coil, requiring more frequent replacements.
- Flavor Loss: A poorly primed coil may not deliver the intended flavor of your e-liquid, diminishing your overall vaping experience.
In conclusion, understanding the importance of properly priming your vape coil cannot be overstated. By following the outlined steps and being attentive to the signs of a dry hit, you can ensure a more enjoyable and satisfying vaping experience. Remember, a well-primed coil not only enhances flavor but also prolongs the life of your device, making it a vital practice for every vaper.

Why is Priming Important?
When it comes to enjoying a satisfying vaping experience, priming your vape coil is an essential step that should never be overlooked. Neglecting this crucial process can lead to a series of negative consequences that affect both the flavor and longevity of your device. In this section, we will delve into the reasons why priming is important and the detrimental effects of skipping this vital step.
Priming your vape coil is not just a recommendation; it is a necessity for maintaining flavor integrity and ensuring the overall performance of your vaping device. When a coil is dry, it can lead to a phenomenon known as a dry hit, which is not only unpleasant but can also damage the coil itself.
- Flavor Preservation: One of the most significant reasons to prime your coil is to preserve the flavor of your e-liquids. A well-primed coil absorbs the e-liquid, allowing for a smooth and rich vaping experience. Without proper priming, the coil may burn the wick, leading to a burnt taste that ruins the flavor profile.
- Coil Longevity: Neglecting to prime your coil can shorten its lifespan. A dry coil is prone to overheating, which can cause the materials to degrade faster. This not only results in frequent replacements but also increases the cost of your vaping habit.
- Consistent Vapor Production: Properly primed coils produce consistent vapor. When the coil is saturated, it can generate adequate vapor without any interruptions. Failing to prime can lead to uneven vapor production, making your vaping experience less enjoyable.
Furthermore, the act of priming helps to avoid the buildup of residue that can occur when a coil is used without proper saturation. This residue can affect the performance of the coil and lead to a decrease in flavor quality over time.
In addition to the negative impacts on flavor and coil longevity, neglecting to prime can also lead to a frustrating vaping experience. Users may find themselves dealing with frequent dry hits, which can be painful and off-putting. Recognizing the signs of a dry hit is crucial, and it often manifests as a harsh throat hit, a burnt taste, or even a complete lack of vapor.
In conclusion, priming your vape coil is a simple yet effective way to enhance your vaping experience. By taking the time to properly saturate your coil, you not only ensure a better flavor and vapor production but also protect your device from unnecessary damage. Remember, a little preparation goes a long way in the world of vaping.

How to Identify a Dry Hit?
Identifying a dry hit is essential for enhancing your overall vaping experience. A dry hit occurs when the coil does not receive enough e-liquid, leading to a burnt taste and an unpleasant throat hit. Understanding the signs of a dry hit can help you take immediate action to prevent damage to your coil and ensure a smoother vaping experience.
Several indicators can help you recognize when you are experiencing a dry hit:
- Burnt Taste: The most noticeable sign is a harsh, burnt flavor. This occurs when the cotton wick is scorched due to insufficient e-liquid saturation.
- Throat Irritation: A dry hit can cause a scratchy throat or a sensation of irritation, making it uncomfortable to inhale.
- Reduced Vapor Production: If you notice a significant drop in vapor clouds, it may indicate that the coil is not properly saturated.
- Gurgling Sounds: Unusual noises, such as gurgling or bubbling, can signal that the coil is struggling to vaporize the e-liquid effectively.
- Frequent Dry Hits: If you find yourself experiencing dry hits repeatedly, it may be a sign that your coil needs to be primed or replaced.
Being able to identify a dry hit is crucial for several reasons:
- Preserving Coil Life: Frequent dry hits can lead to premature coil burnout, increasing your replacement costs.
- Enhancing Flavor: A well-primed coil ensures that you enjoy the full flavor profile of your e-liquid. Dry hits can ruin the taste and diminish your vaping experience.
- Improving Safety: In extreme cases, a dry hit can lead to overheating and potential safety hazards. Recognizing the signs can help you avoid these situations.
If you find yourself facing a dry hit, here are some immediate steps you can take:
- Stop Vaping: Cease using your device to prevent further damage to the coil.
- Check E-Liquid Levels: Ensure that your tank has sufficient e-liquid. If it’s low, refill it.
- Prime Your Coil: If you suspect that your coil is dry, consider re-priming it by adding a few drops of e-liquid directly onto the cotton.
- Allow Time to Soak: After priming, let the coil sit for a few minutes to ensure the cotton is fully saturated.
- Adjust Wattage: If you are using a variable wattage device, consider lowering the wattage to prevent burning the cotton until it is adequately primed.
By being vigilant and recognizing the signs of a dry hit, you can significantly improve your vaping experience. Proper care and attention to your device will lead to better flavor, increased satisfaction, and longer-lasting coils.

What Materials Do You Need to Prime a Coil?
Before diving into the process of priming your vape coil, it is essential to be fully equipped with the right materials. Understanding what you need can significantly enhance your vaping experience and prevent issues like dry hits. Below is a comprehensive list of the items required for effective coil priming, ensuring you’re well-prepared.
- E-Liquid: The most crucial component, e-liquid, is what you’ll be saturating your coil with. Choose a quality e-liquid that suits your taste preferences, whether it’s high VG for cloud chasing or a balanced mix for flavor.
- Vape Coil: Ensure you have a new or clean coil ready for priming. A good coil is vital for optimal performance and flavor delivery.
- Dropper or Syringe: Using a dropper or syringe allows for precise application of e-liquid directly onto the coil, minimizing waste and ensuring adequate saturation.
- Paper Towels: Keep some paper towels handy for any spills or excess e-liquid. This helps maintain a clean workspace and prevents sticky situations.
- Vape Device: Your vape device, whether it’s a mod or a pod system, should be ready for use. Make sure it’s clean and functioning properly.
- Scissors (if needed): In some cases, you may need scissors to trim cotton wicks or adjust your coil for better fitment.
- Patience: While not a physical item, patience is essential during the priming process. Rushing can lead to improper saturation and dry hits.
Having these materials on hand ensures that you can prime your coil effectively, setting you up for a satisfying vaping experience. Each item plays a role in the priming process, from the e-liquid that saturates the coil to the tools that help you apply it accurately. Being prepared with the right materials not only enhances your experience but also extends the life of your vape coil.
As you gather these materials, take a moment to familiarize yourself with each component’s role in the priming process. Understanding how they work together will empower you to achieve the best possible results, ensuring that your coil is primed correctly and ready for use. This preparation is the first step toward enjoying rich flavors and preventing the unpleasantness of dry hits.
In conclusion, having the right materials is not just a suggestion; it is a necessity for effective coil priming. By ensuring you have everything you need before starting, you can streamline the process and enhance your overall vaping experience.

Step-by-Step Guide to Priming Your Vape Coil
Priming your vape coil is a crucial step that every vaper should master, especially beginners. This step-by-step guide will walk you through the process, ensuring that you achieve optimal performance from your vape device while avoiding unpleasant dry hits.
Before diving into the priming process, it’s essential to gather the necessary materials:
- E-liquid – Choose your preferred flavor.
- Vape coil – Ensure it’s compatible with your device.
- Paper towels – For any spills and clean-up.
- Scissors – If you need to trim wicking material.
Now that you have everything ready, follow these detailed steps:
- Prepare the Coil: Start by removing the tank from your vape device. Unscrew the base to access the coil. Inspect the coil for any damage or wear. If it’s a new coil, ensure it’s properly seated in the base.
- Apply E-Liquid to the Coil: Take your e-liquid and carefully apply a few drops directly onto the exposed cotton wicks of the coil. Be generous but avoid over-saturating. This initial step helps the cotton absorb the liquid effectively.
- Saturate the Wicking Holes: If your coil has wicking holes, add a drop of e-liquid into each hole. This ensures that the cotton inside the coil is thoroughly soaked, which is vital for optimal performance.
- Let It Soak: After applying e-liquid, let the coil sit for about 5 to 10 minutes. This waiting period allows the cotton to fully absorb the e-liquid, preventing dry hits.
- Reassemble Your Device: Once the coil has soaked, reattach the base to your tank and fill the tank with e-liquid. Make sure to leave some space at the top to prevent overflow when you screw the base back on.
- Prime the Coil Again: After reassembling, take a few gentle puffs without firing the device. This action helps draw additional e-liquid into the coil, ensuring it’s fully saturated.
- Set Your Wattage: Start at a lower wattage than the coil’s recommended range. Gradually increase the wattage to your desired level. This gradual increase helps prevent burning the cotton.
By following these steps, you can ensure that your vape coil is primed correctly, leading to a more enjoyable vaping experience. Remember, proper priming not only enhances flavor but also prolongs the life of your coil.
In summary, the process of priming your vape coil is straightforward but essential. By taking the time to properly prepare and saturate your coil, you can avoid dry hits and enjoy the full flavor of your e-liquid. Happy vaping!
Preparing the Coil
is a critical phase in the process of priming your vape coil. This step ensures that your coil is ready to deliver the best flavor and vapor production while minimizing the risk of dry hits. In this section, we will delve into the essential procedures for removing and inspecting your coil before you proceed with the priming process.
To start, you must gather the necessary tools for coil preparation. Typically, you will need:
- A vape device
- A replacement coil
- A clean cloth or paper towel
- Your favorite e-liquid
Once you have everything ready, follow these steps:
- Remove the Tank: Begin by carefully unscrewing the tank from your vape device. Ensure that the device is turned off to avoid any accidental firing.
- Take Out the Coil: Locate the coil within the tank. Depending on your tank design, you may need to unscrew it or simply pull it out. Be gentle to avoid damaging any components.
- Inspect the Coil: Once removed, closely examine the coil for any signs of damage or wear. Look for burnt spots, discoloration, or any debris that may have accumulated. A well-maintained coil should appear clean and intact.
- Clean the Tank: While you have the tank disassembled, take the opportunity to clean it. Use a cloth or paper towel to wipe away any residual e-liquid. This step helps maintain the flavor integrity of your vape.
After inspecting the coil and cleaning the tank, it’s time to prepare the coil for priming. This involves saturating the wick with e-liquid to ensure that it is fully soaked before you start vaping. Here’s how to do it:
- Apply E-Liquid: Using a dropper, apply a few drops of e-liquid directly onto the exposed cotton of the coil. Make sure to cover all sides to ensure even saturation.
- Let It Soak: Allow the e-liquid to sit for a few minutes. This soaking time is essential for the cotton to absorb the liquid thoroughly.
By following these steps to prepare your coil, you set the stage for a more enjoyable vaping experience. Remember, proper preparation not only enhances flavor but also prolongs the lifespan of your coil.
In conclusion, preparing your coil is an essential part of the priming process that can significantly impact your vaping experience. By taking the time to inspect and properly saturate your coil, you can avoid dry hits and ensure that you enjoy the full flavor of your e-liquid.
Applying E-Liquid
correctly is crucial for effective priming, as it directly influences the performance and longevity of your vape coil. When saturating the coil, it’s essential to find the right balance to prevent both under-saturation and over-saturation. This section details the best practices for saturating the coil without overdoing it, ensuring an optimal vaping experience.
To begin with, choosing the right e-liquid is fundamental. The viscosity of the e-liquid plays a significant role in how well it saturates the coil. Thicker liquids may take longer to absorb, while thinner liquids can flood the coil if applied too generously. It’s advisable to use e-liquids that are specifically designed for your type of coil to achieve the best results.
Next, when you’re ready to apply e-liquid, consider using a dropper or needle tip bottle. These tools allow for precise application, minimizing the risk of over-saturating the coil. Start by placing a few drops of e-liquid directly onto the exposed cotton of the coil. This method ensures the cotton absorbs the liquid effectively, creating a solid foundation for your vaping experience.
- Apply a few drops: Begin with 3-5 drops on the cotton.
- Let it soak: Allow the e-liquid to sit for a minute or two, giving the cotton time to absorb the liquid.
- Check for saturation: If the cotton appears darkened and saturated, you’re on the right track.
After the initial application, it’s important to avoid flooding the coil. Over-saturation can lead to leaking and gurgling sounds when you inhale. To prevent this, ensure that you’re not over-applying e-liquid. A good rule of thumb is to apply just enough to see the cotton change color without excess liquid pooling around the coil.
Another effective technique is to prime the coil before fully assembling your vape. This involves applying e-liquid to the cotton and then gently puffing on the mouthpiece without activating the battery. This action helps draw the e-liquid into the coil, ensuring even saturation throughout.
Once you’ve applied the e-liquid and allowed it to soak, it’s crucial to wait a few minutes before using your device. This waiting period allows the e-liquid to fully saturate the coil and prevents dry hits. If you’re eager to start vaping, consider taking a few gentle puffs without firing the device to help further saturate the coil.
In summary, applying e-liquid correctly is an art that requires attention to detail and a bit of patience. By following these best practices, you can ensure that your coil is properly primed, enhancing your overall vaping experience while minimizing the risk of dry hits.

Common Mistakes When Priming a Coil
When it comes to vaping, ensuring a satisfying experience goes beyond just selecting the right device or e-liquid. One of the most critical aspects is priming your vape coil correctly. Unfortunately, many vapers, especially beginners, fall victim to common mistakes that can lead to unpleasant experiences. This section will delve into these frequent errors and provide guidance on how to avoid them.
Understanding the common pitfalls is essential for a successful vaping experience. Here are some of the typical mistakes:
- Skipping the Priming Process: One of the most significant errors is not priming the coil at all. This can lead to dry hits, which are not only unpleasant but can also damage your coil.
- Over-Saturating the Coil: While it’s crucial to saturate the coil, applying too much e-liquid can flood the coil and lead to leaking. It’s essential to find the right balance.
- Using the Wrong E-Liquid: Not all e-liquids are suitable for every coil. High VG liquids can be thicker and may not saturate the coil properly, leading to dry hits.
- Inadequate Waiting Time: After priming, some vapers rush to start using their device. It’s vital to allow sufficient time for the e-liquid to soak into the coil fully.
- Neglecting to Inspect the Coil: Before priming, failing to check the coil for damage or wear can result in poor performance. Always inspect your coil before use.
Now that we’ve identified the common mistakes, here are some practical tips to help you avoid them:
- Always Prime Your Coil: Never skip this step. Take the time to saturate your coil properly before using it.
- Apply E-Liquid Sparingly: Use just enough e-liquid to saturate the cotton without overdoing it. A few drops directly onto the cotton and around the coil will suffice.
- Choose Compatible E-Liquids: Ensure that the e-liquid you are using is appropriate for your coil type. If you are using a high-VG liquid, consider using a coil designed for it.
- Be Patient: After priming, allow at least 5-10 minutes for the coil to soak before taking your first puff. This will help prevent dry hits.
- Inspect Regularly: Make it a habit to check your coil for any signs of wear or damage. Replace it if necessary to maintain a good vaping experience.
By adhering to these guidelines, you can significantly enhance your vaping experience and avoid the common pitfalls that many encounter. Remember, a well-primed coil not only improves flavor but also extends the life of your device, ensuring that you enjoy every puff.

How Long Should You Wait After Priming?
When it comes to vaping, understanding the intricacies of coil priming is essential for an enjoyable experience. One of the most critical aspects of this process is knowing how long to wait after priming your coil. This waiting period is crucial for ensuring that your coil is adequately saturated with e-liquid, which can significantly enhance your vaping experience.
After you have primed your coil, it is essential to allow sufficient time for the e-liquid to fully penetrate the wick. This waiting period helps to prevent dry hits, which can ruin your vaping experience and damage your coil. A dry hit occurs when the coil is not adequately saturated, causing it to burn the wick and produce an unpleasant taste. By allowing the right amount of time after priming, you can ensure that the coil is ready for optimal performance.
The optimal waiting time after priming can vary depending on several factors, including the type of coil, the e-liquid viscosity, and personal preferences. However, a general rule of thumb is to wait at least 5 to 10 minutes after priming your coil. This timeframe allows the e-liquid to fully saturate the wick, ensuring that you will not experience dry hits.
- Coil Material: Different materials, such as kanthal, stainless steel, or nichrome, may absorb e-liquid at different rates.
- E-Liquid Viscosity: Thicker e-liquids may take longer to saturate the wick compared to thinner e-liquids.
- Wick Type: Natural cotton wicks typically absorb e-liquid faster than synthetic materials.
To ensure that your coil is ready for use after the waiting period, you can perform a simple test. Take a few gentle puffs without activating the device. If you notice a smooth flow of vapor and a pleasant taste, your coil is ready. However, if you experience any harshness or a burnt flavor, it may require more time to saturate.
- Fill the Tank: Always fill your tank with e-liquid before priming the coil to ensure a consistent supply.
- Use the Right Technique: When applying e-liquid to the coil, make sure to drip it directly onto the wick and avoid over-saturating.
- Be Patient: Rushing the process can lead to dry hits and damage to your coil.
In summary, the waiting period after priming your vape coil is a vital step that should not be overlooked. By allowing at least 5 to 10 minutes for the coil to saturate fully, you can enhance your vaping experience and avoid unpleasant dry hits. Remember to consider factors like coil material and e-liquid viscosity, as these can influence the optimal waiting time. With these tips in mind, you can enjoy a flavorful and satisfying vaping experience.

Tips for Maintaining Your Vape Coil
Maintaining your vape coil is essential for ensuring a satisfying vaping experience. With proper care, you can extend the lifespan of your coil, enhance flavor, and avoid unpleasant dry hits. Below are some practical tips to help you maintain your vape coil effectively.
Regular maintenance of your vape coil not only prolongs its life but also improves the overall performance of your device. A well-maintained coil provides a smoother draw, richer flavor, and consistent vapor production. Neglecting maintenance can lead to issues such as burnt taste, reduced vapor output, and even damage to your device.
Cleaning your coil is an essential part of maintenance. Over time, residue from e-liquids can build up, affecting performance. To clean your coil:
- Remove the coil from your device.
- Rinse it under warm water to remove any build-up.
- Let it dry completely before reusing.
The quality of e-liquids you use can significantly affect the longevity of your coil. Opt for reputable brands that use high-quality ingredients. Avoid overly sweet or sugary e-liquids, as they can lead to faster coil degradation.
Chain vaping can lead to dry hits and burnt coils. Allow your device to rest between puffs to give the coil time to re-saturate with e-liquid. This practice not only enhances flavor but also prolongs the life of your coil.
Using the correct wattage is vital for maintaining your coil. If you vape at a wattage that is too high for your coil, you risk burning it out quickly. Always refer to the manufacturer’s recommendations for optimal wattage settings.
When not in use, store your vape in a cool, dry place. Avoid exposing it to extreme temperatures or direct sunlight, as these conditions can damage the coil and e-liquid. Additionally, always keep the tank filled to prevent the coil from drying out.
Even with proper maintenance, coils will eventually need to be replaced. Regularly check for signs of wear, such as a burnt taste or reduced vapor production. It’s advisable to replace your coil every 1-3 weeks, depending on usage.
Always prime your coil before using it for the first time. This process involves saturating the coil with e-liquid to prevent dry hits. Follow the steps outlined in the previous sections to ensure your coil is adequately primed.
Maintaining appropriate e-liquid levels in your tank is crucial. Ensure that your tank is never allowed to run dry, as this can lead to burnt coils. Regularly check your e-liquid levels and refill as necessary.
By implementing these maintenance tips, you can significantly enhance your vaping experience while extending the life of your vape coil. Proper care ensures that you enjoy rich flavors and consistent vapor production, making your vaping sessions more enjoyable.
Frequently Asked Questions
- What happens if I don’t prime my vape coil?
If you skip the priming step, you risk getting dry hits, which can ruin your vaping experience. It’s like trying to drink a smoothie with a blocked straw—frustrating and unsatisfying!
- How can I tell if my coil is properly primed?
A well-primed coil will absorb the e-liquid and produce smooth vapor without any burnt taste. If you notice a dry hit or a harsh flavor, it’s a sign that your coil may need more saturation.
- Can I use any e-liquid to prime my coil?
While most e-liquids work, it’s best to use a liquid that matches the coil’s resistance and is suited for your device. Think of it like using the right fuel for your car—using the wrong type can lead to issues!
- How long should I wait after priming before vaping?
Generally, it’s advisable to wait about 5-10 minutes after priming your coil. This allows the e-liquid to fully saturate the wick, ensuring a smooth vaping experience.
- What are some common mistakes when priming a coil?
Some common errors include over-saturating the coil, not letting it sit long enough, or using the wrong e-liquid. Avoiding these pitfalls can make a world of difference in your vaping enjoyment!


 Vapers")


